PhotoVideoBackup — User Guide
Version 2.5.1 · iOS
A simple, reliable way to back up your photos and videos to an external SSD — or to a NAS over Wi-Fi.
Table of Contents
- What is PhotoVideoBackup?
- Free vs Pro
- What You Need
- First Launch — Giving Permissions
- Setting Up Your SSD
- Backing Up Your iPhone Photos & Videos
- Backing Up a Camera SD Card (Pro)
- The Backup in Progress
- When the Backup Is Done
- Viewing Your Backup History
- Browsing and Sharing Your Backed-Up Files
- Using Two SSDs — Mirror Backup (Pro)
- Backing Up to a NAS over Wi-Fi (Pro)
- Frequently Asked Questions
1. What is PhotoVideoBackup?
PhotoVideoBackup copies your photos and videos from your iPhone — or from a camera memory card — to a portable SSD (a fast external hard drive) plugged into your iPhone.
Why use it?
- Your iPhone storage is getting full and you want to free up space safely.
- You just came back from a trip with an SD card full of footage and want to secure it immediately.
- You want a personal copy of your media that does not depend on iCloud or any online service.
- You shoot with a Blackmagic camera, an Insta360, a DJI drone, or any other camera and need to back up the card on the go.
What makes it safe?
Every file copied is verified with a mathematical fingerprint (SHA-256). If even a single byte is wrong, the app flags it. You will never end up with a silent, corrupted backup.
2. Free vs Pro
PhotoVideoBackup is free to download. A one-time Pro upgrade ($1.99 — no subscription) unlocks two additional features:
| Feature | Free | Pro |
|---|---|---|
| Back up your iPhone photo library to an SSD | ✓ | ✓ |
| Browse and preview backed-up media (with real-time LUT preview) | ✓ | ✓ |
| Add external sources (SD cards, Blackmagic, Insta360, DJI…) | — | ✓ |
| Grade LOG footage to H.265/HEVC with a LUT baked in | — | ✓ |
| Mirror backup to a second SSD simultaneously | — | ✓ |
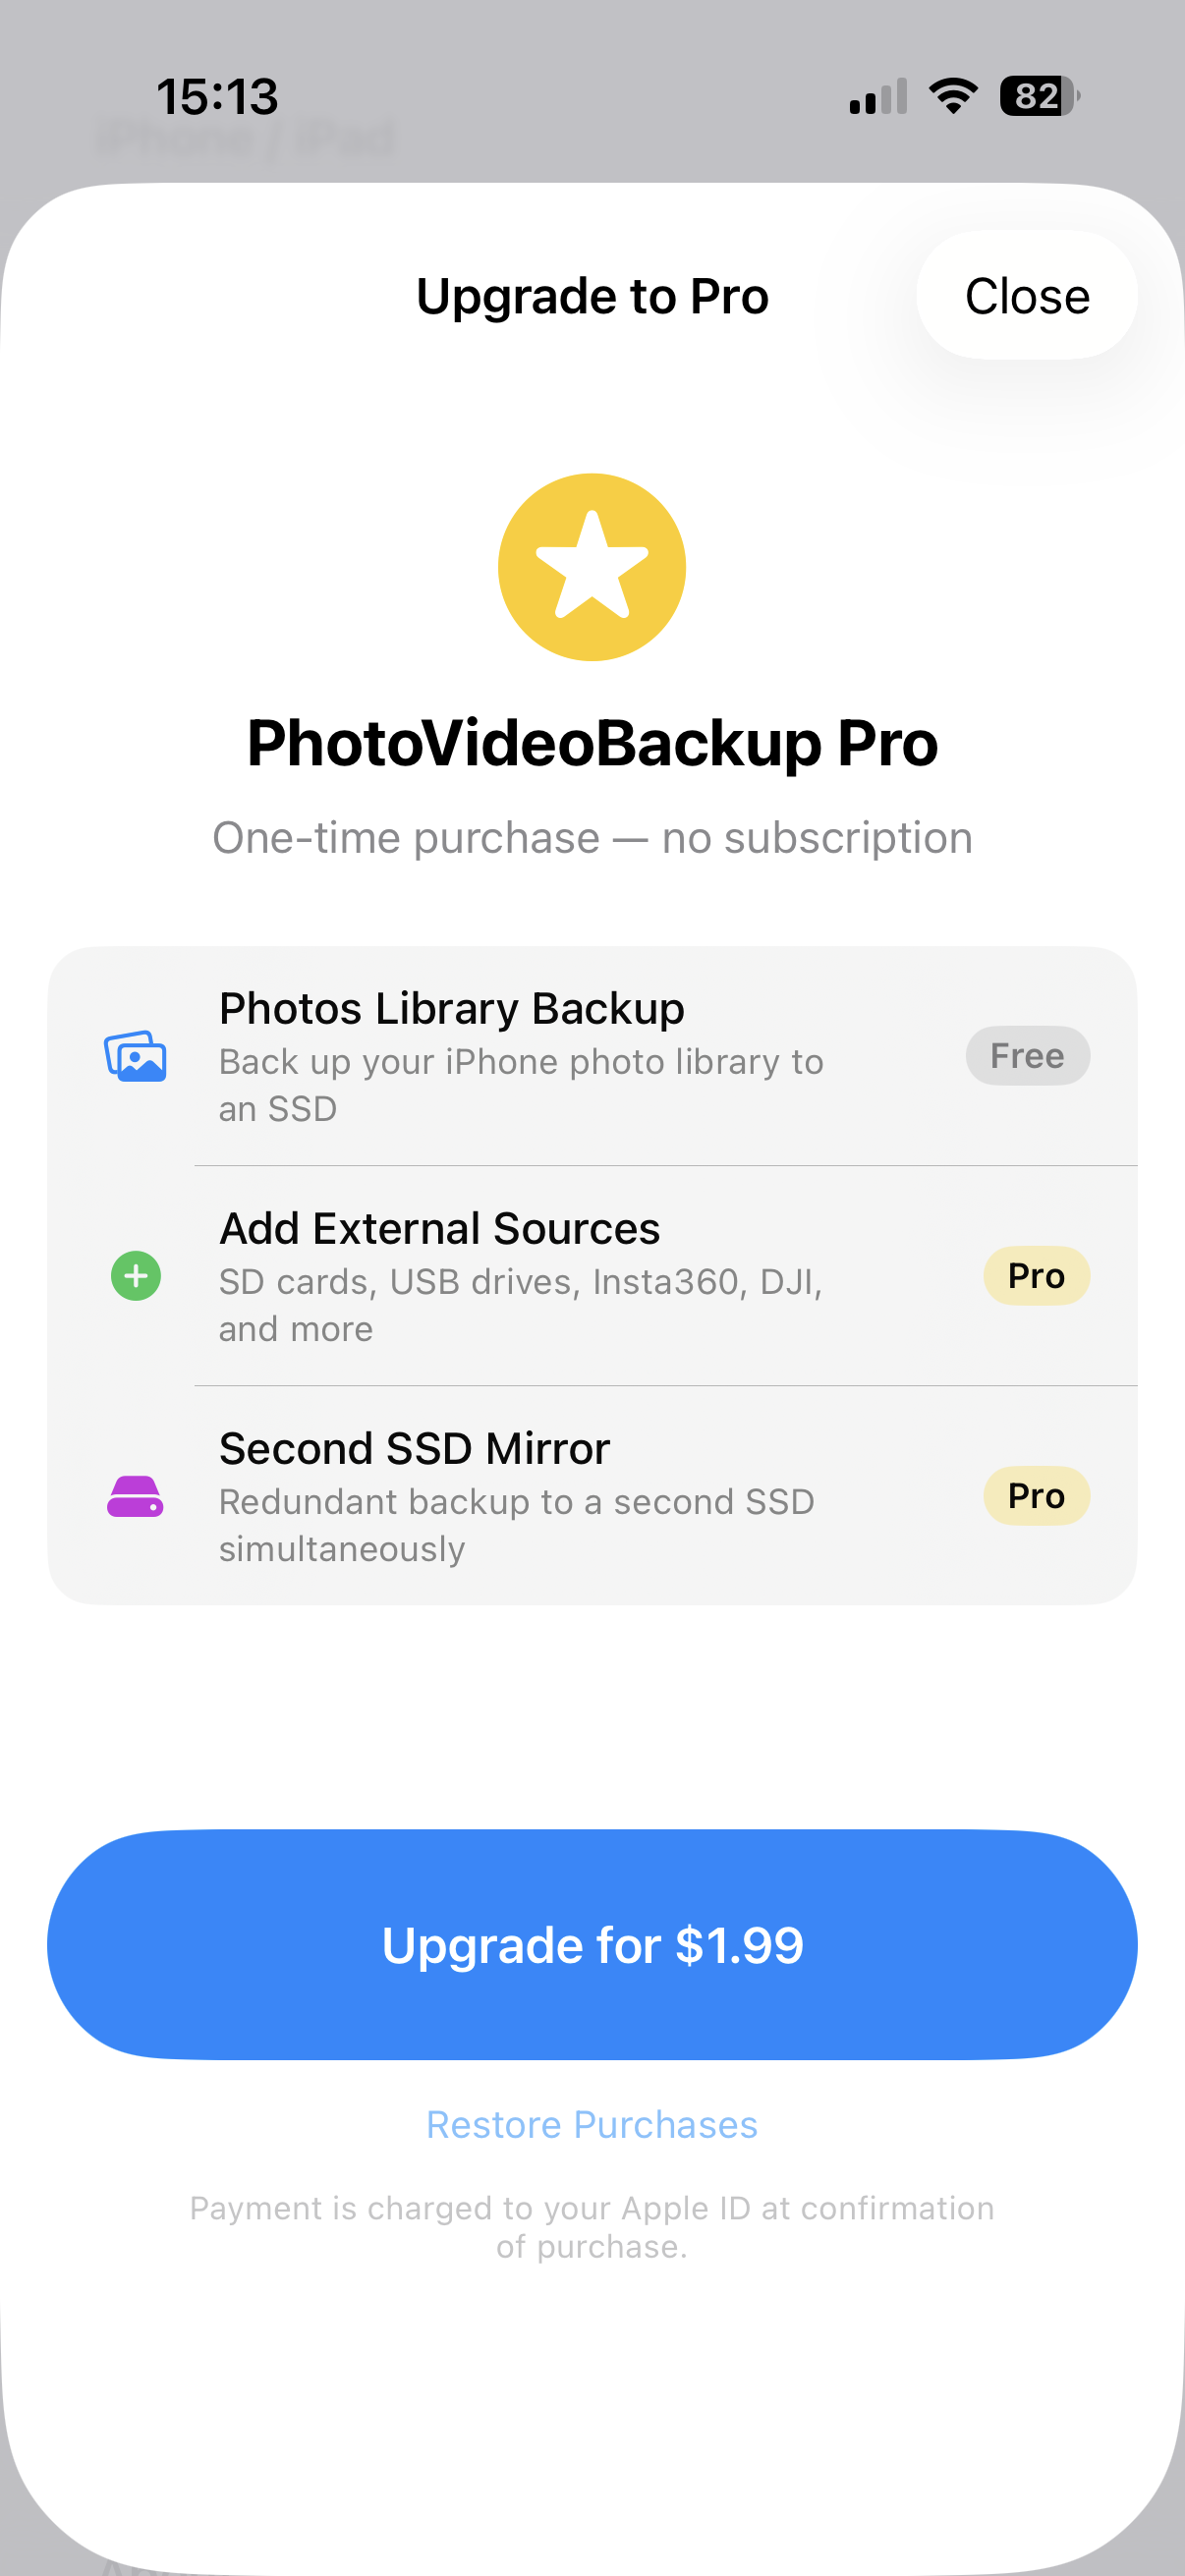
To unlock Pro, tap Upgrade to Pro when prompted, or open the upgrade screen from the Settings tab. It is a single payment — you own it forever.
3. What You Need
| Item | Notes |
|---|---|
| An iPhone with a USB-C port | iPhone 15 or later |
| A USB-C SSD | Any portable SSD with a USB-C cable works. Recommended: Samsung T7, SanDisk Extreme, WD My Passport. |
| A USB-C cable or hub | The cable that came with your SSD is fine. If you also want to plug in an SD card reader at the same time, you need a small USB-C hub. |
| An SD card reader (optional — Pro) | Only needed if you want to back up a camera card. Any USB-C SD card reader works. |
Tip: Copying large amounts of video uses battery. Plug your iPhone in or make sure it is well charged before starting.
4. First Launch — Giving Permissions
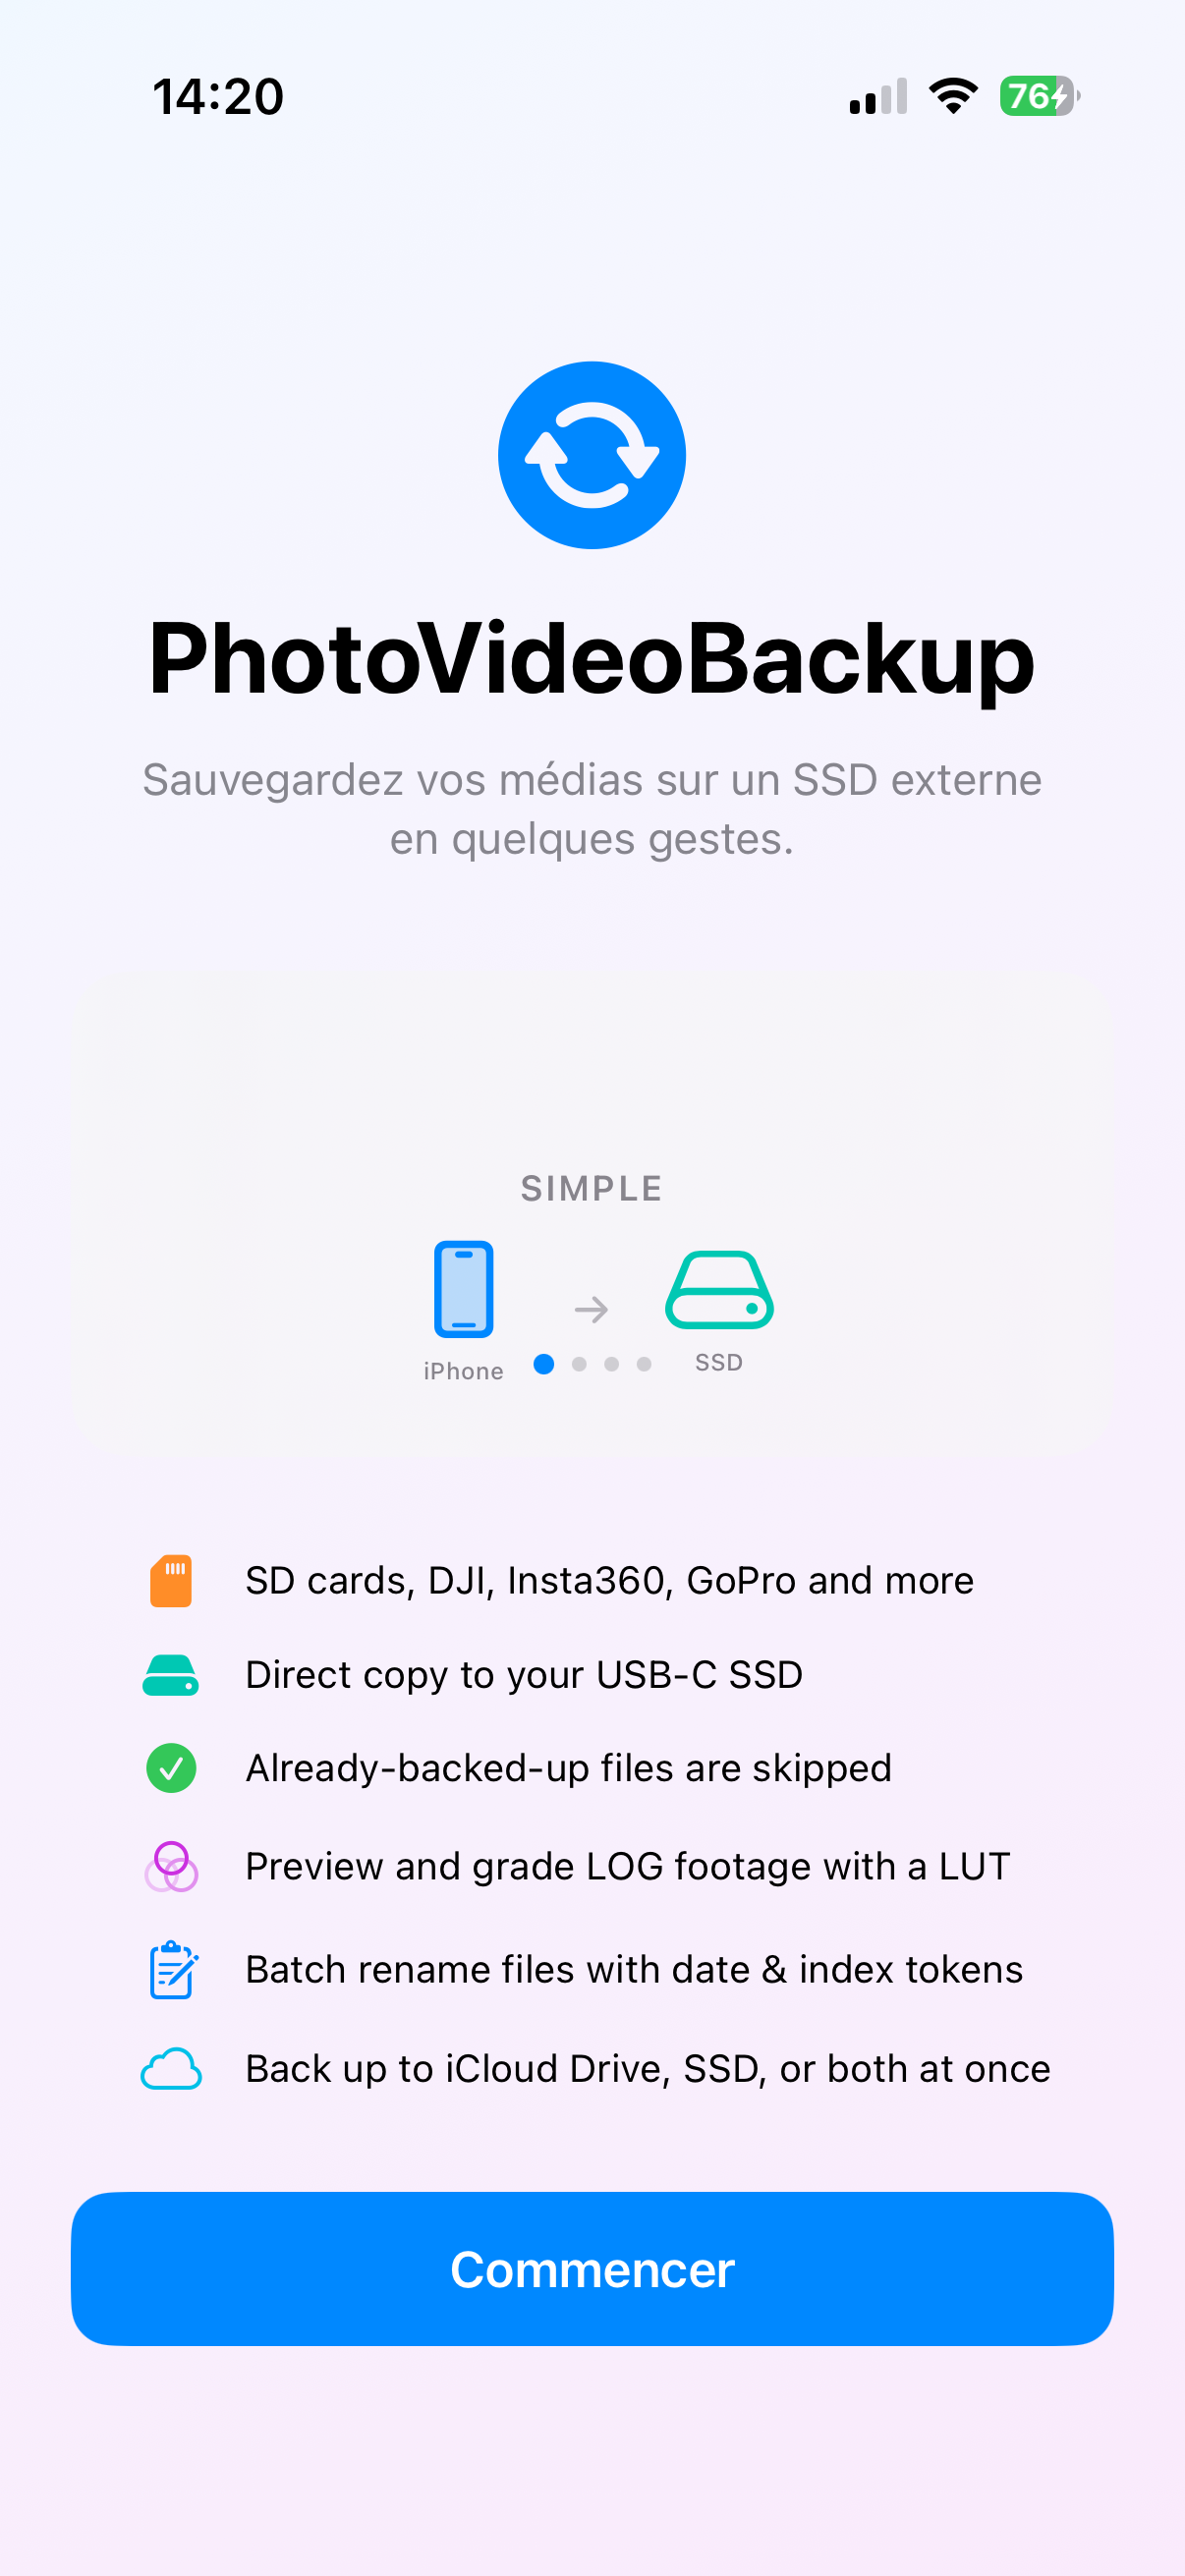
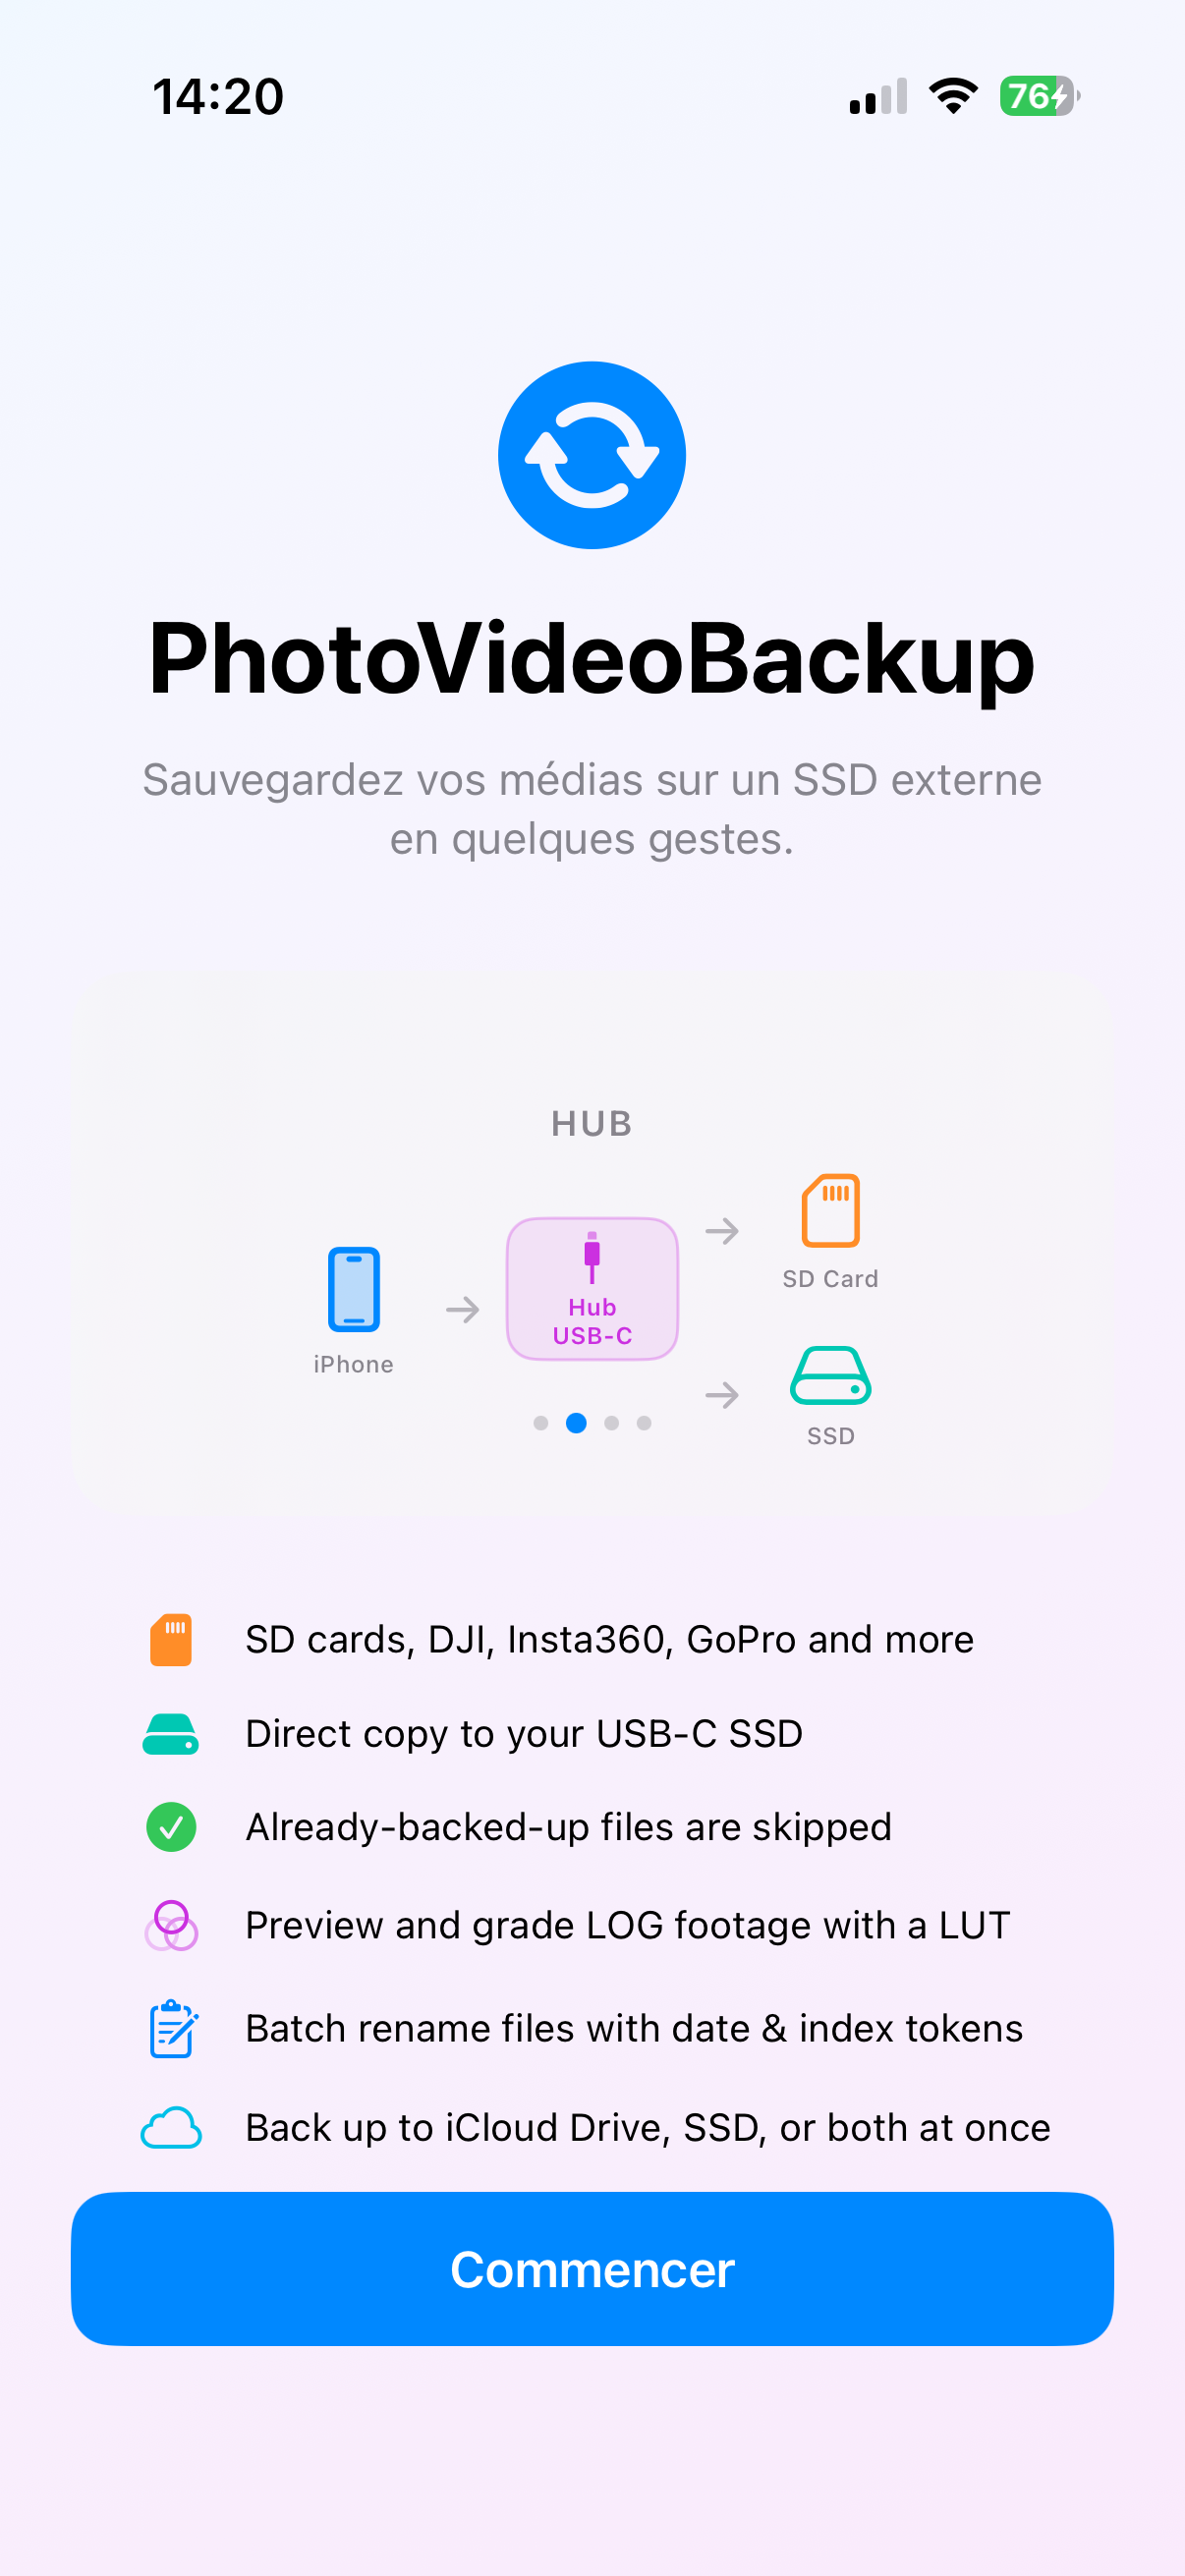
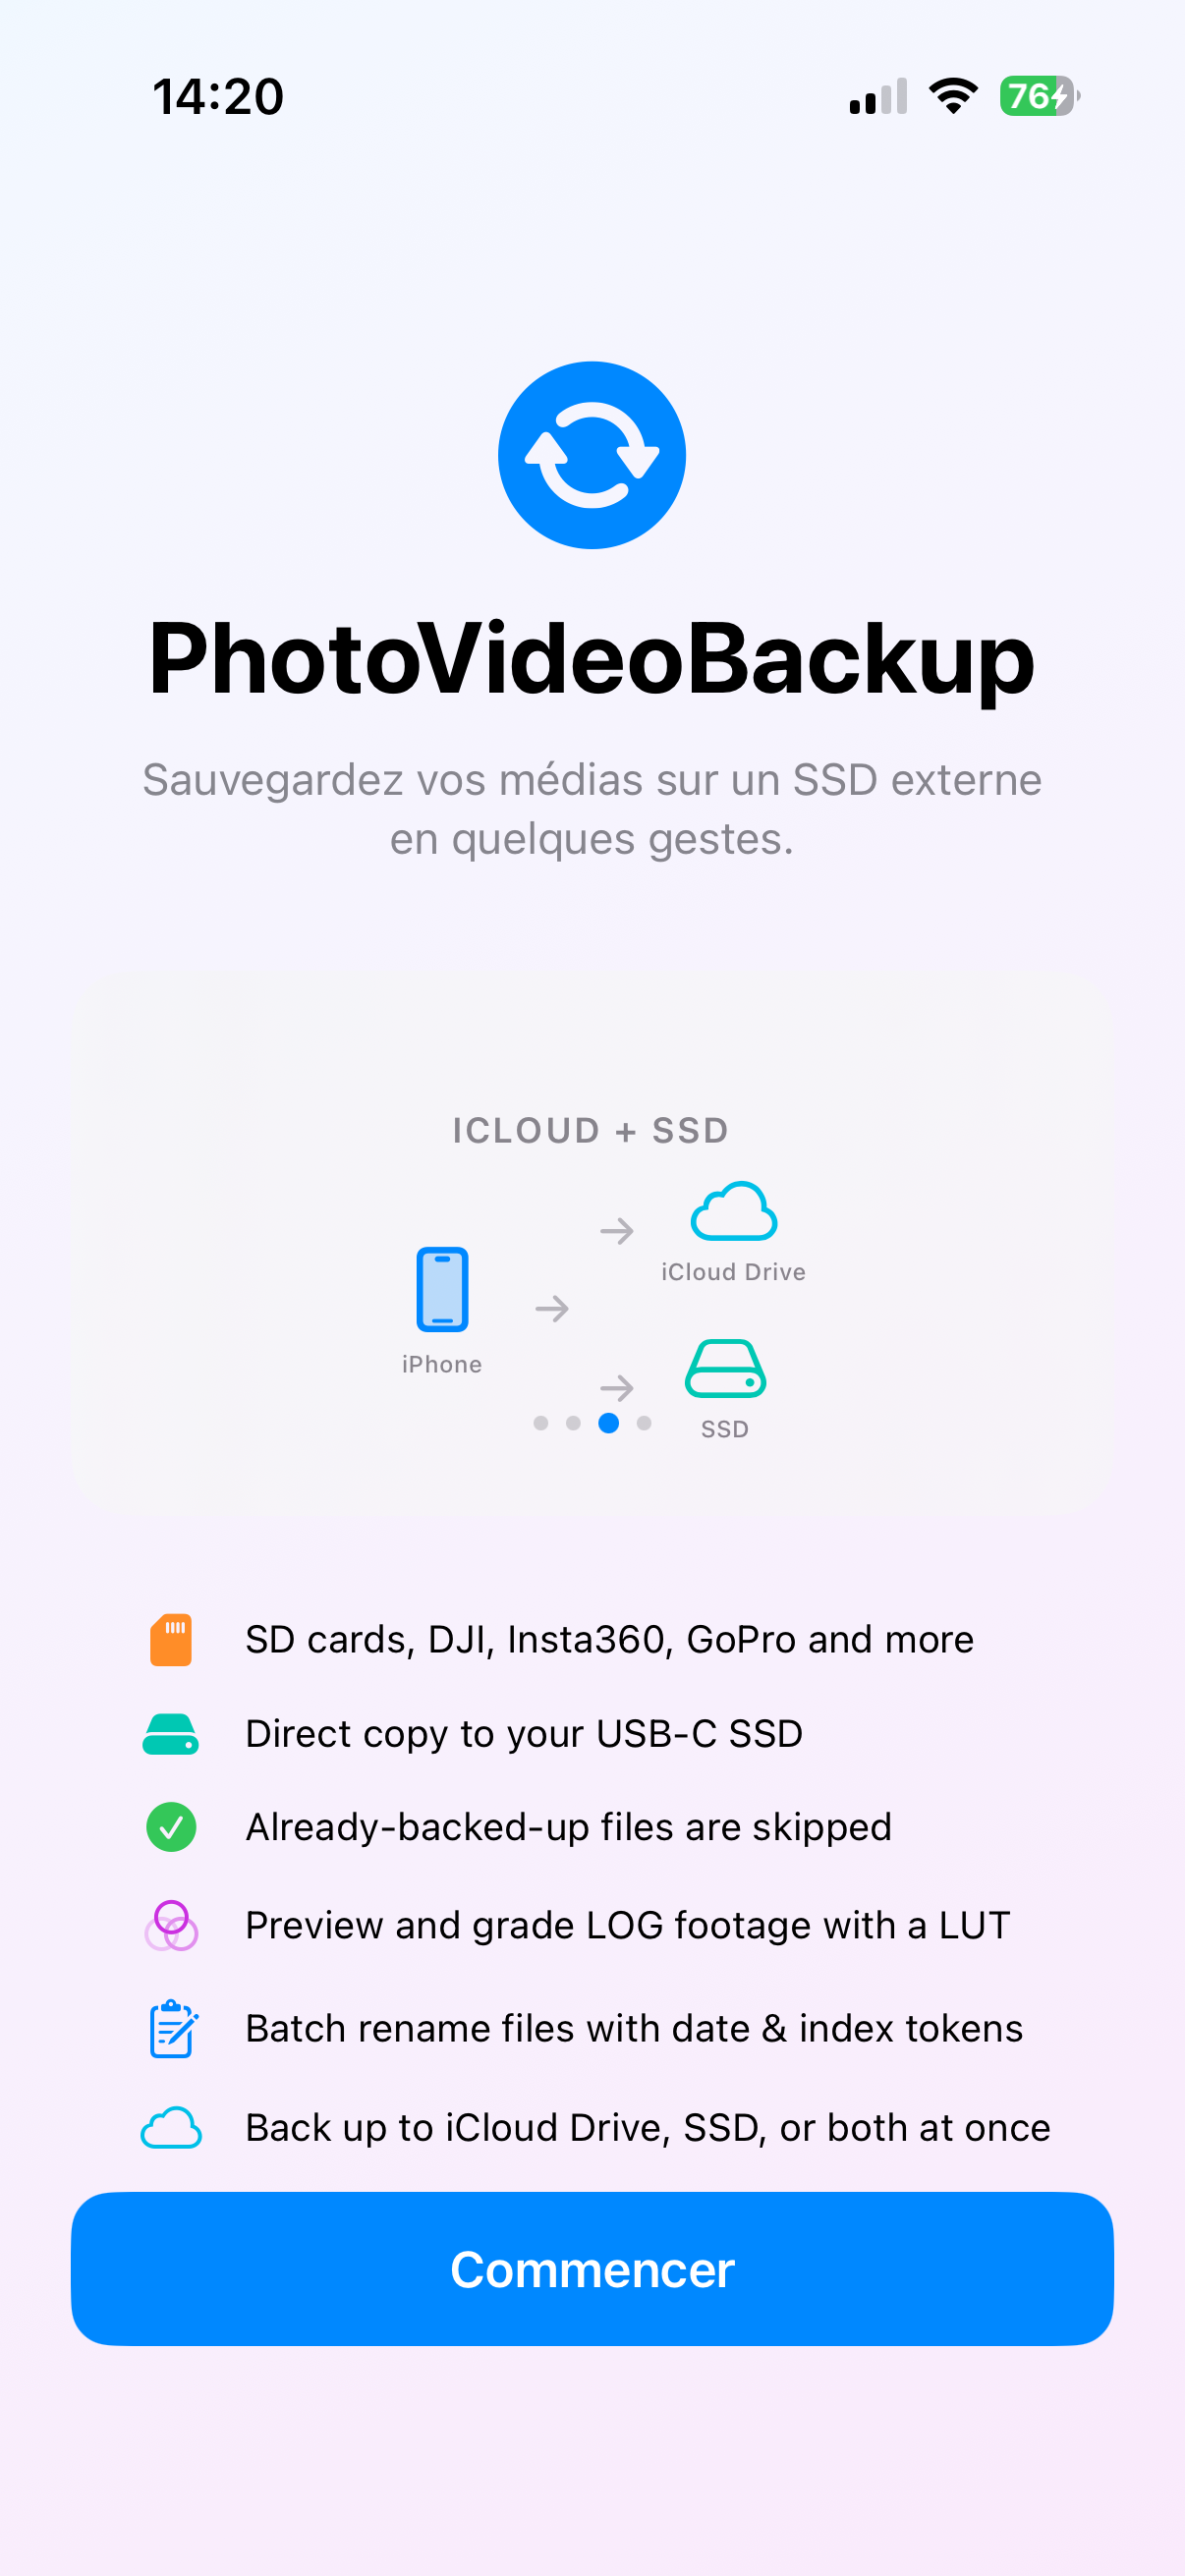
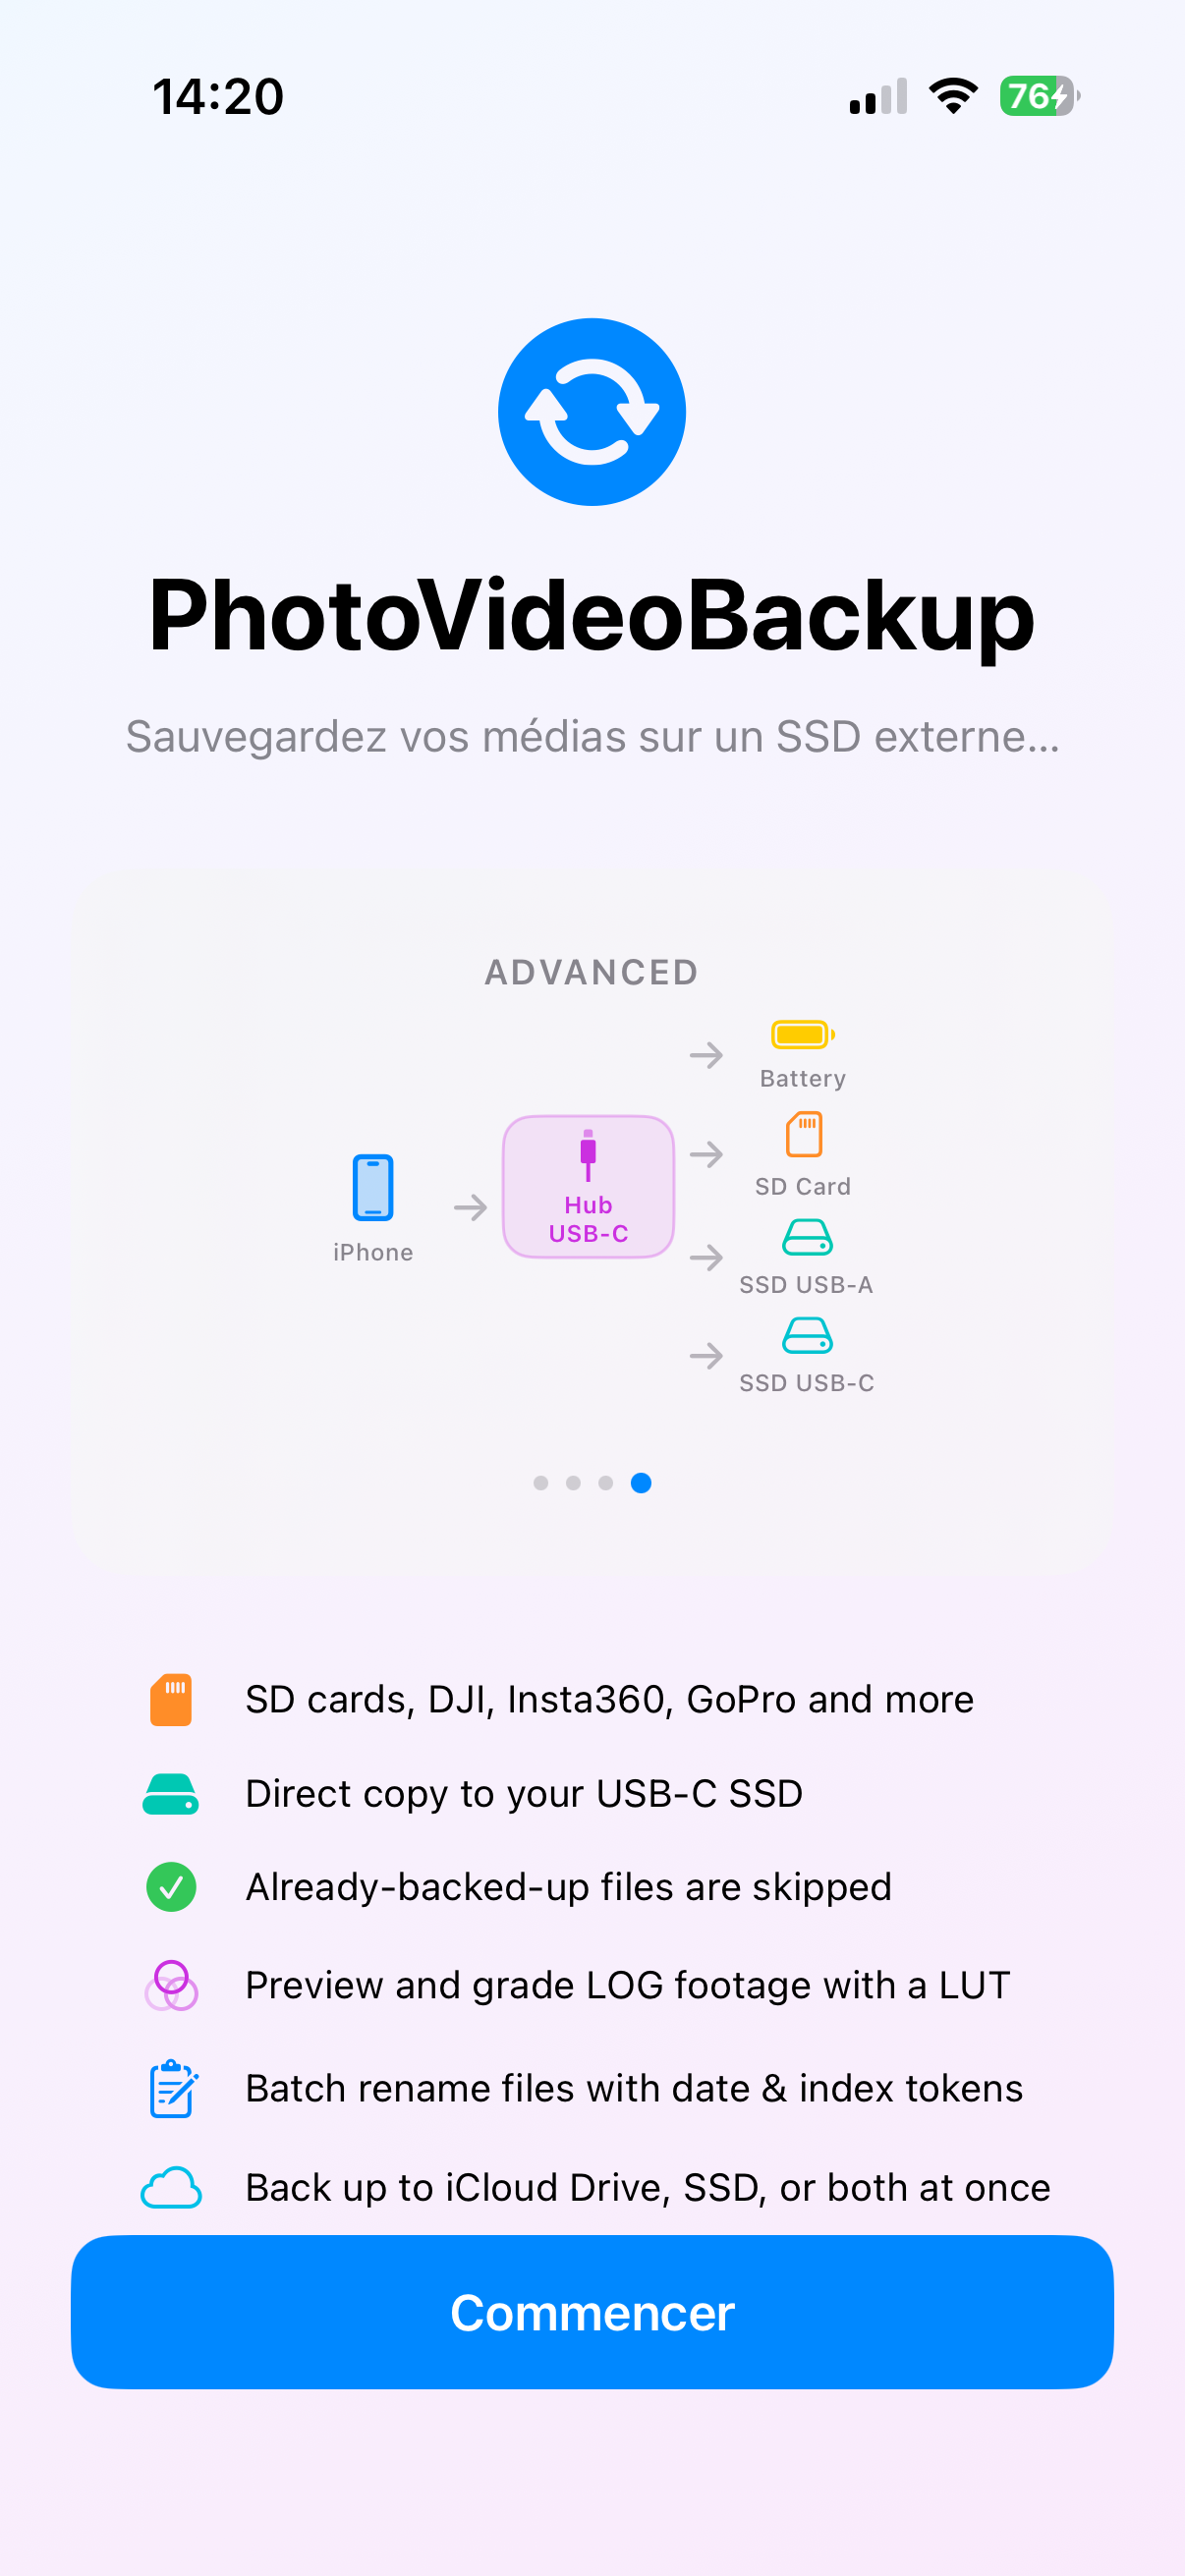
When you open PhotoVideoBackup for the first time, a welcome screen gives you an overview of the app’s features. Tap Get Started to continue.
iOS will then ask for permission to access your photo library.
Tap Allow Full Access. Without this permission, the app cannot read your photos and videos.
The app only reads your photos to copy them. It never modifies, deletes, or shares them.
5. Setting Up Your SSD
Before you can back anything up, you need to tell the app where to save the files and give your device a name.
Step 1 — Name your device
Tap the Settings tab at the bottom of the screen (the gear icon).
At the top of the page you will see an iPhone / iPad section with a Folder name field. Tap it and type a name that identifies your device — for example iPhone de Gérard or iPad Pro Camille.
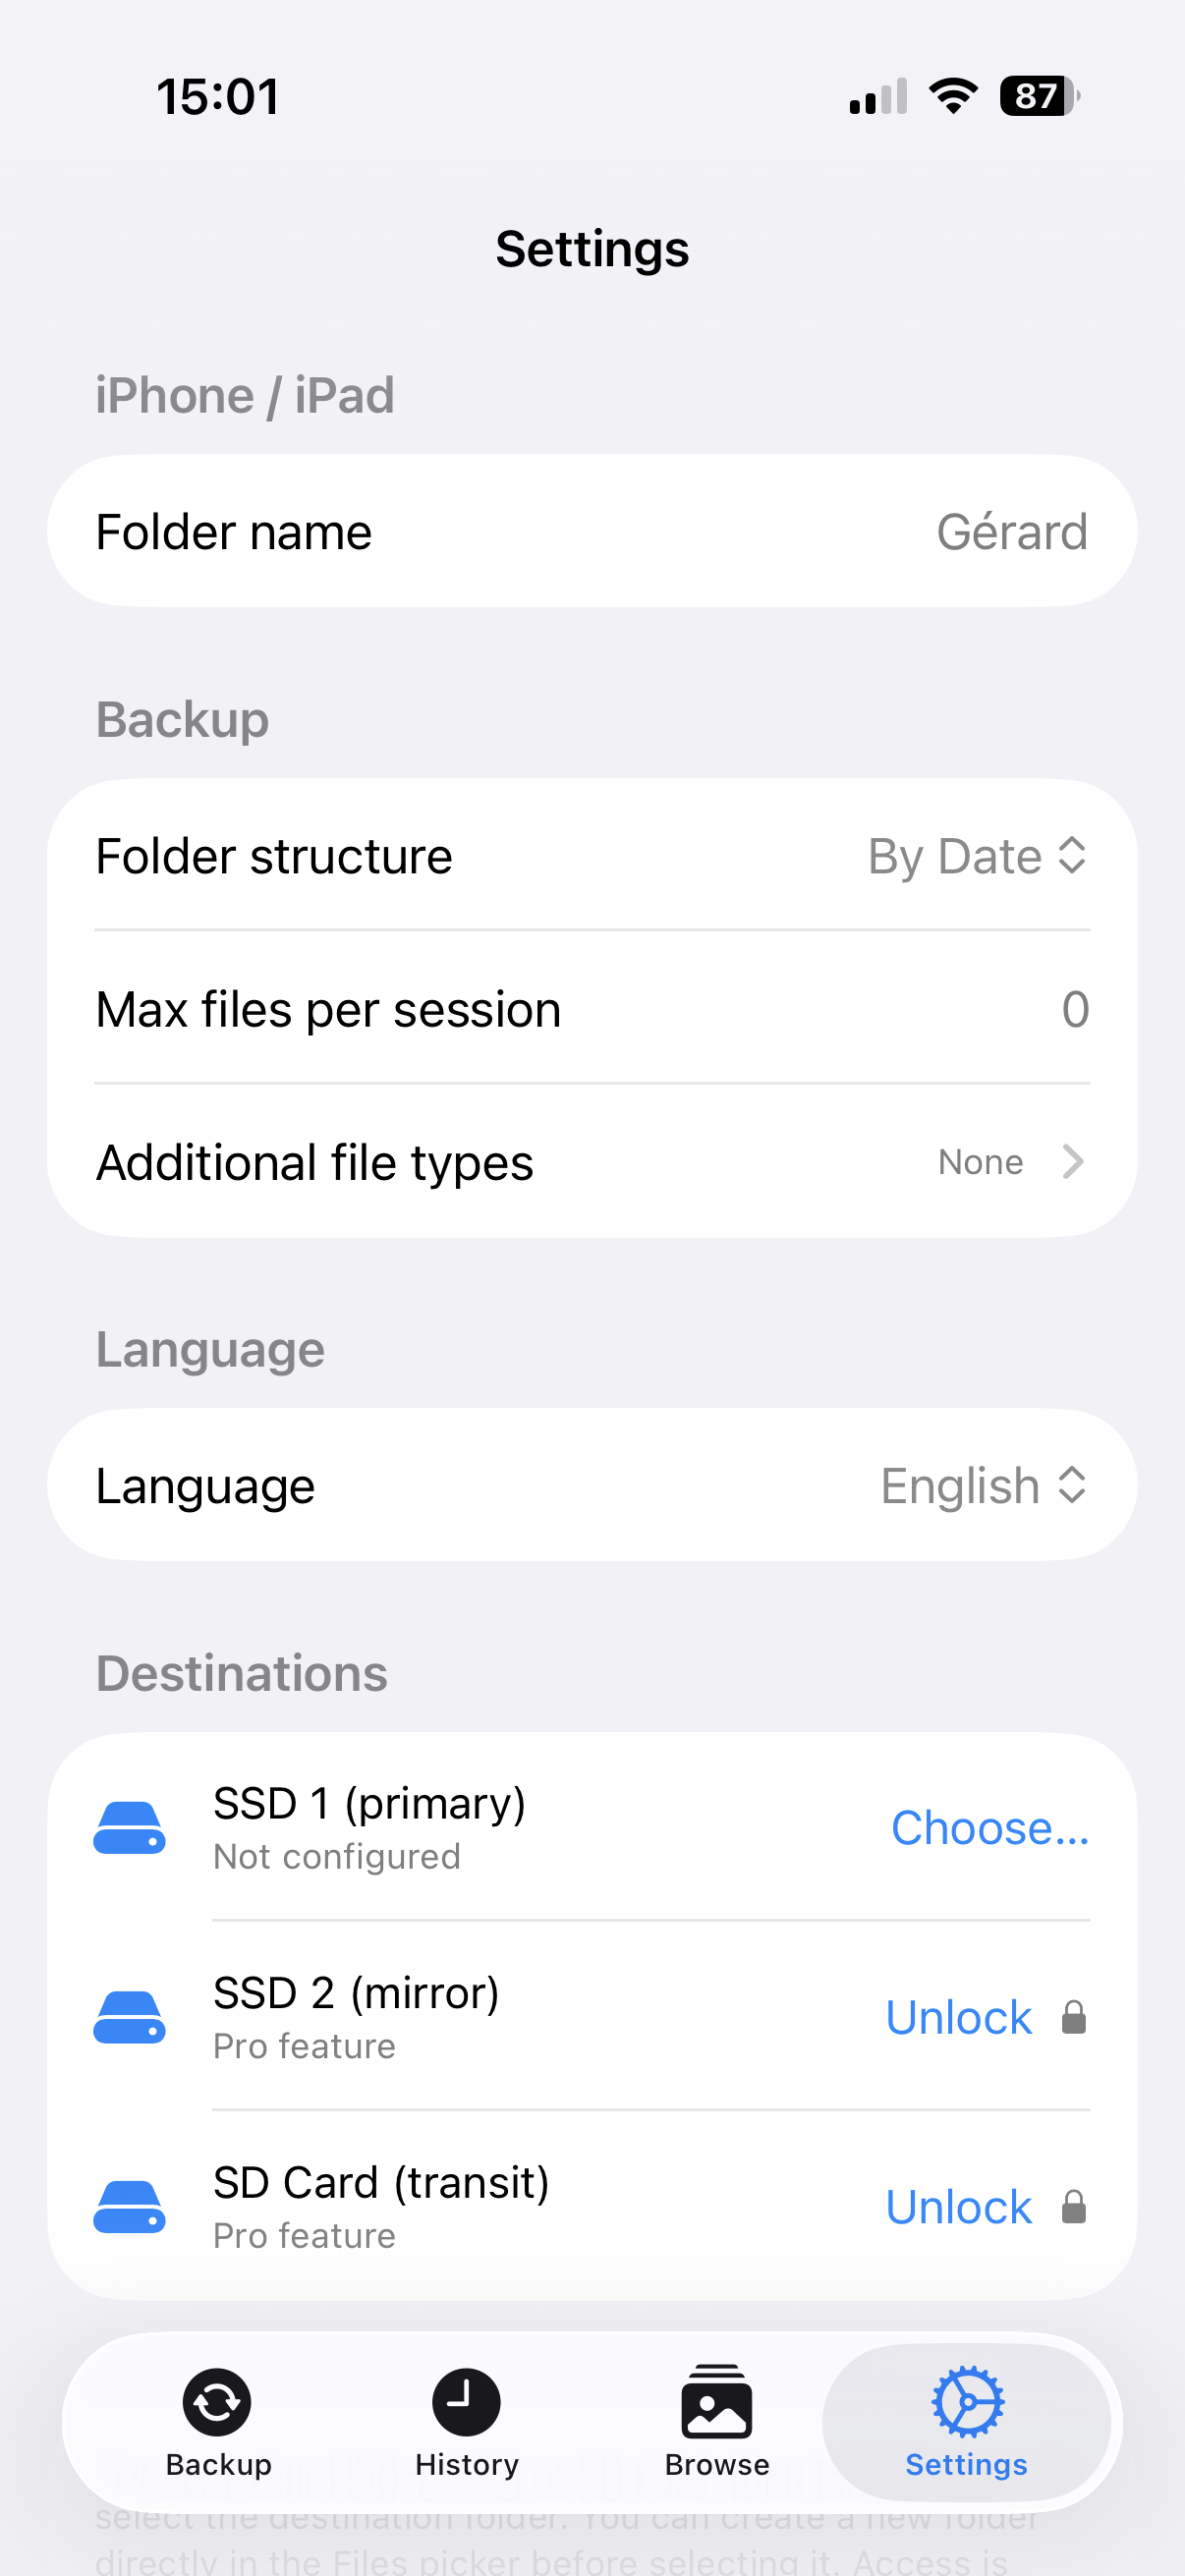
This name is used as the folder name on the SSD. If two people back up to the same SSD, each device needs a different name so their files stay separate. The app will not start a backup until a name is set.
Step 2 — Plug in your SSD
Connect your SSD to your iPhone using its USB-C cable.
Step 3 — Choose a destination folder
Below the device name, the SSD Destinations section shows two slots. Tap Choose… next to “SSD 1 (primary)”.
A file browser will open. Navigate to your SSD — it will appear in the list of locations. Tap on it to select the top-level folder (or a specific folder inside it if you prefer to keep things organised).
Tap Open in the top-right corner.
The SSD name will now appear in Settings, confirming it is configured. A small red trash icon appears next to it — you can tap it at any time to unconfigure that slot.
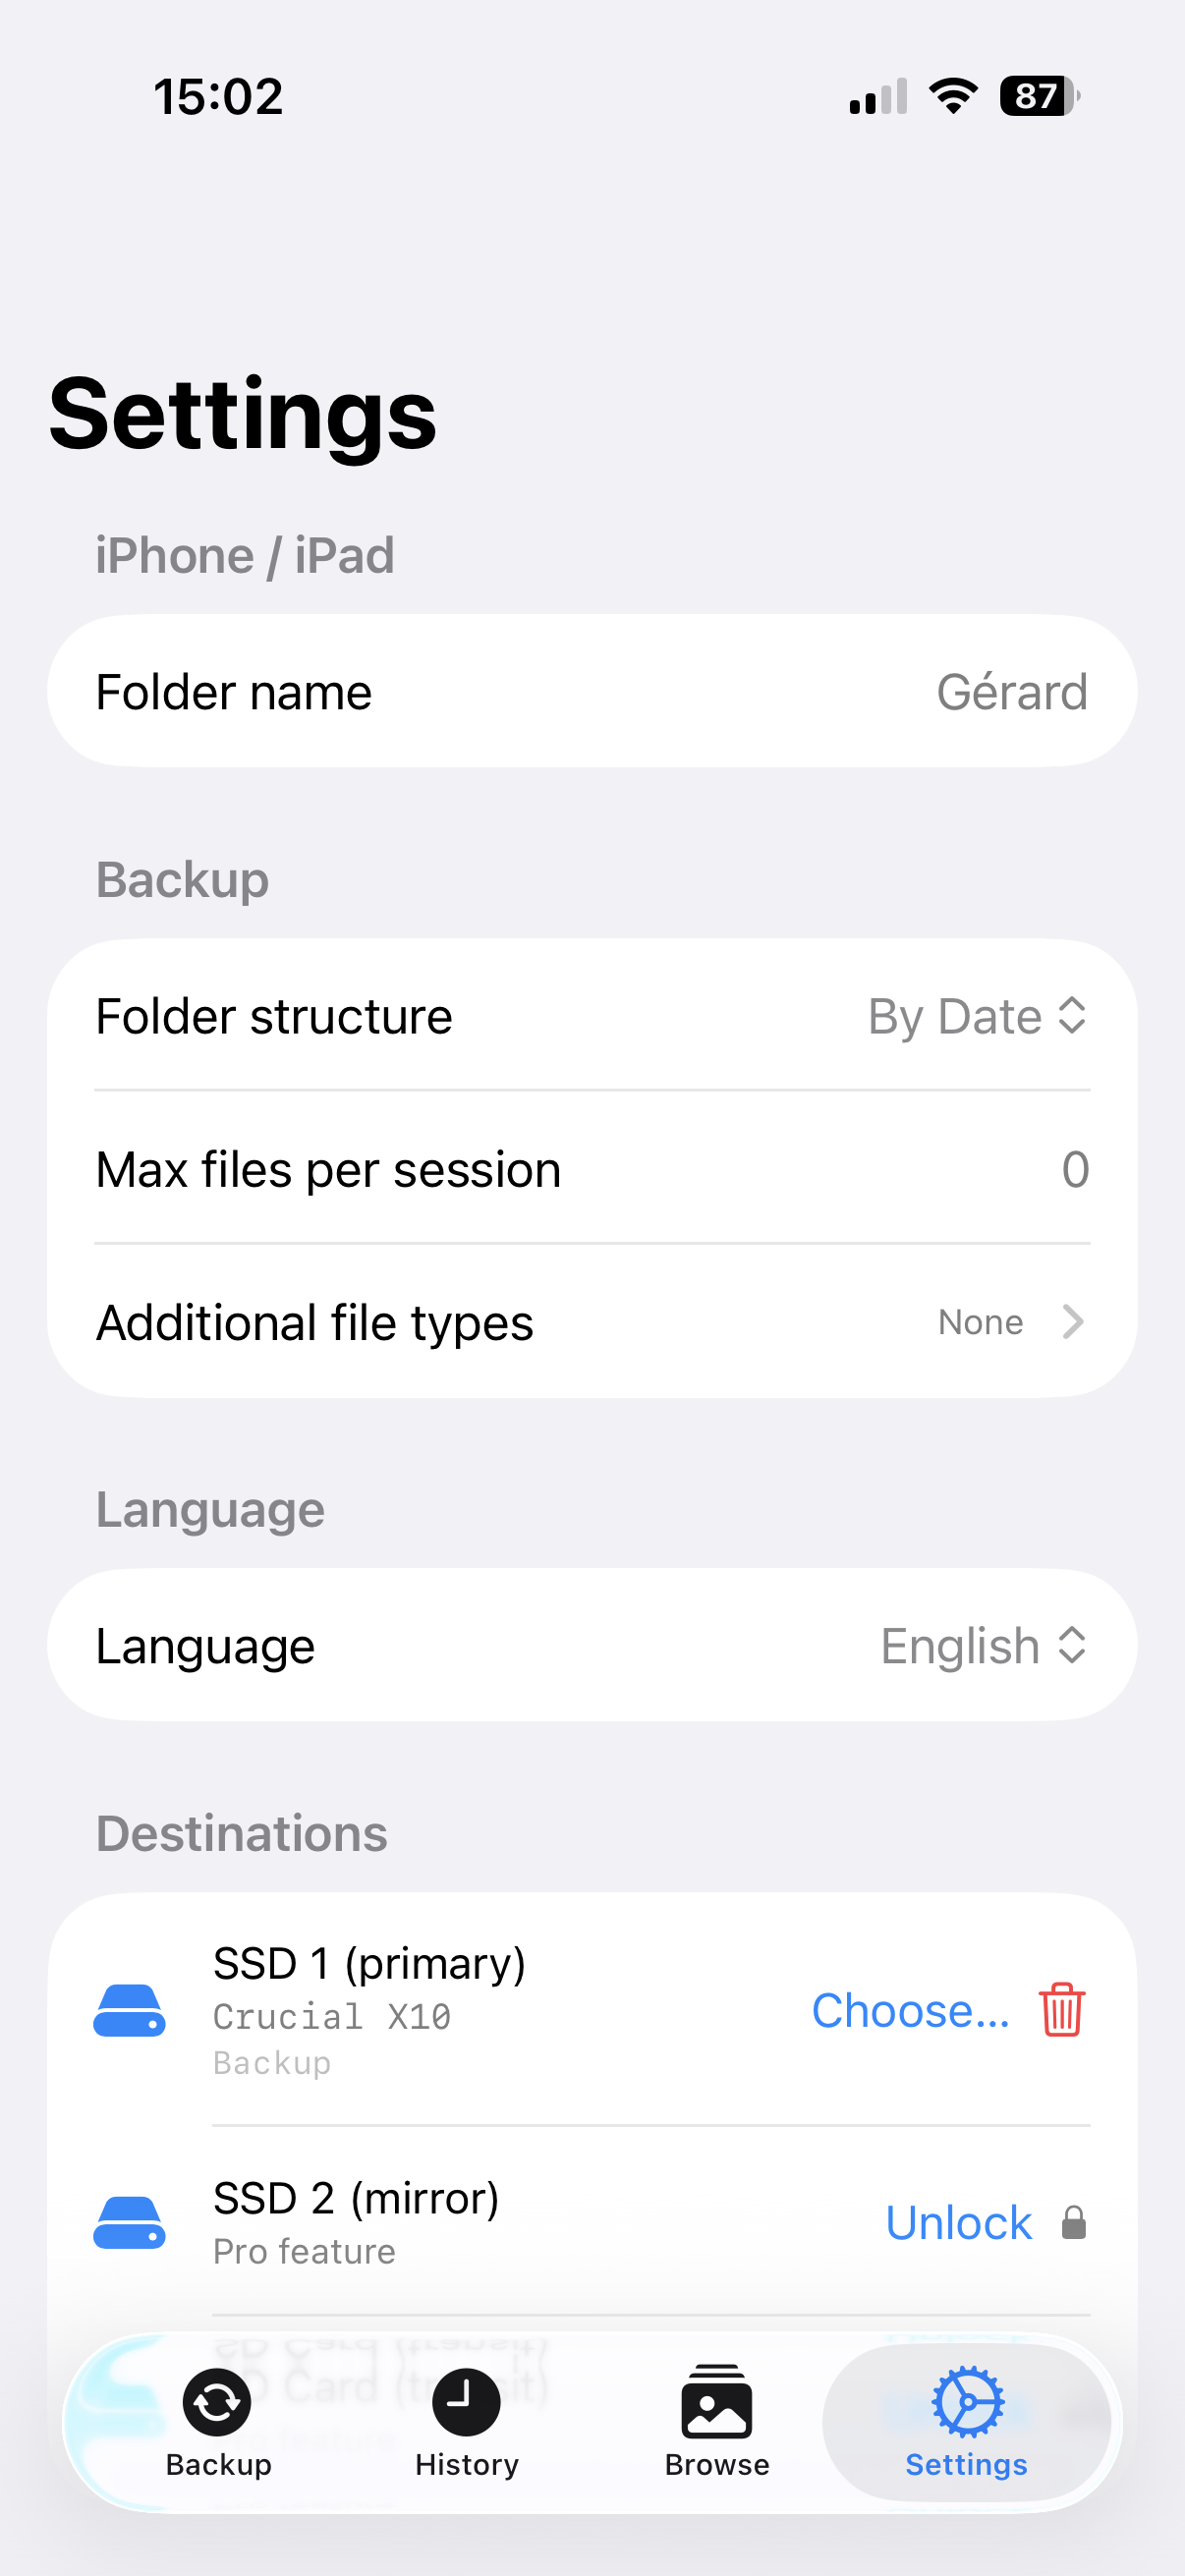
Your choice is remembered. You only need to do this once per SSD. The next time you plug the same SSD in, the app will recognise it automatically.
6. Backing Up Your iPhone Photos & Videos
Step 1 — Go to the Backup tab
Tap the Backup tab (the house icon at the bottom left).
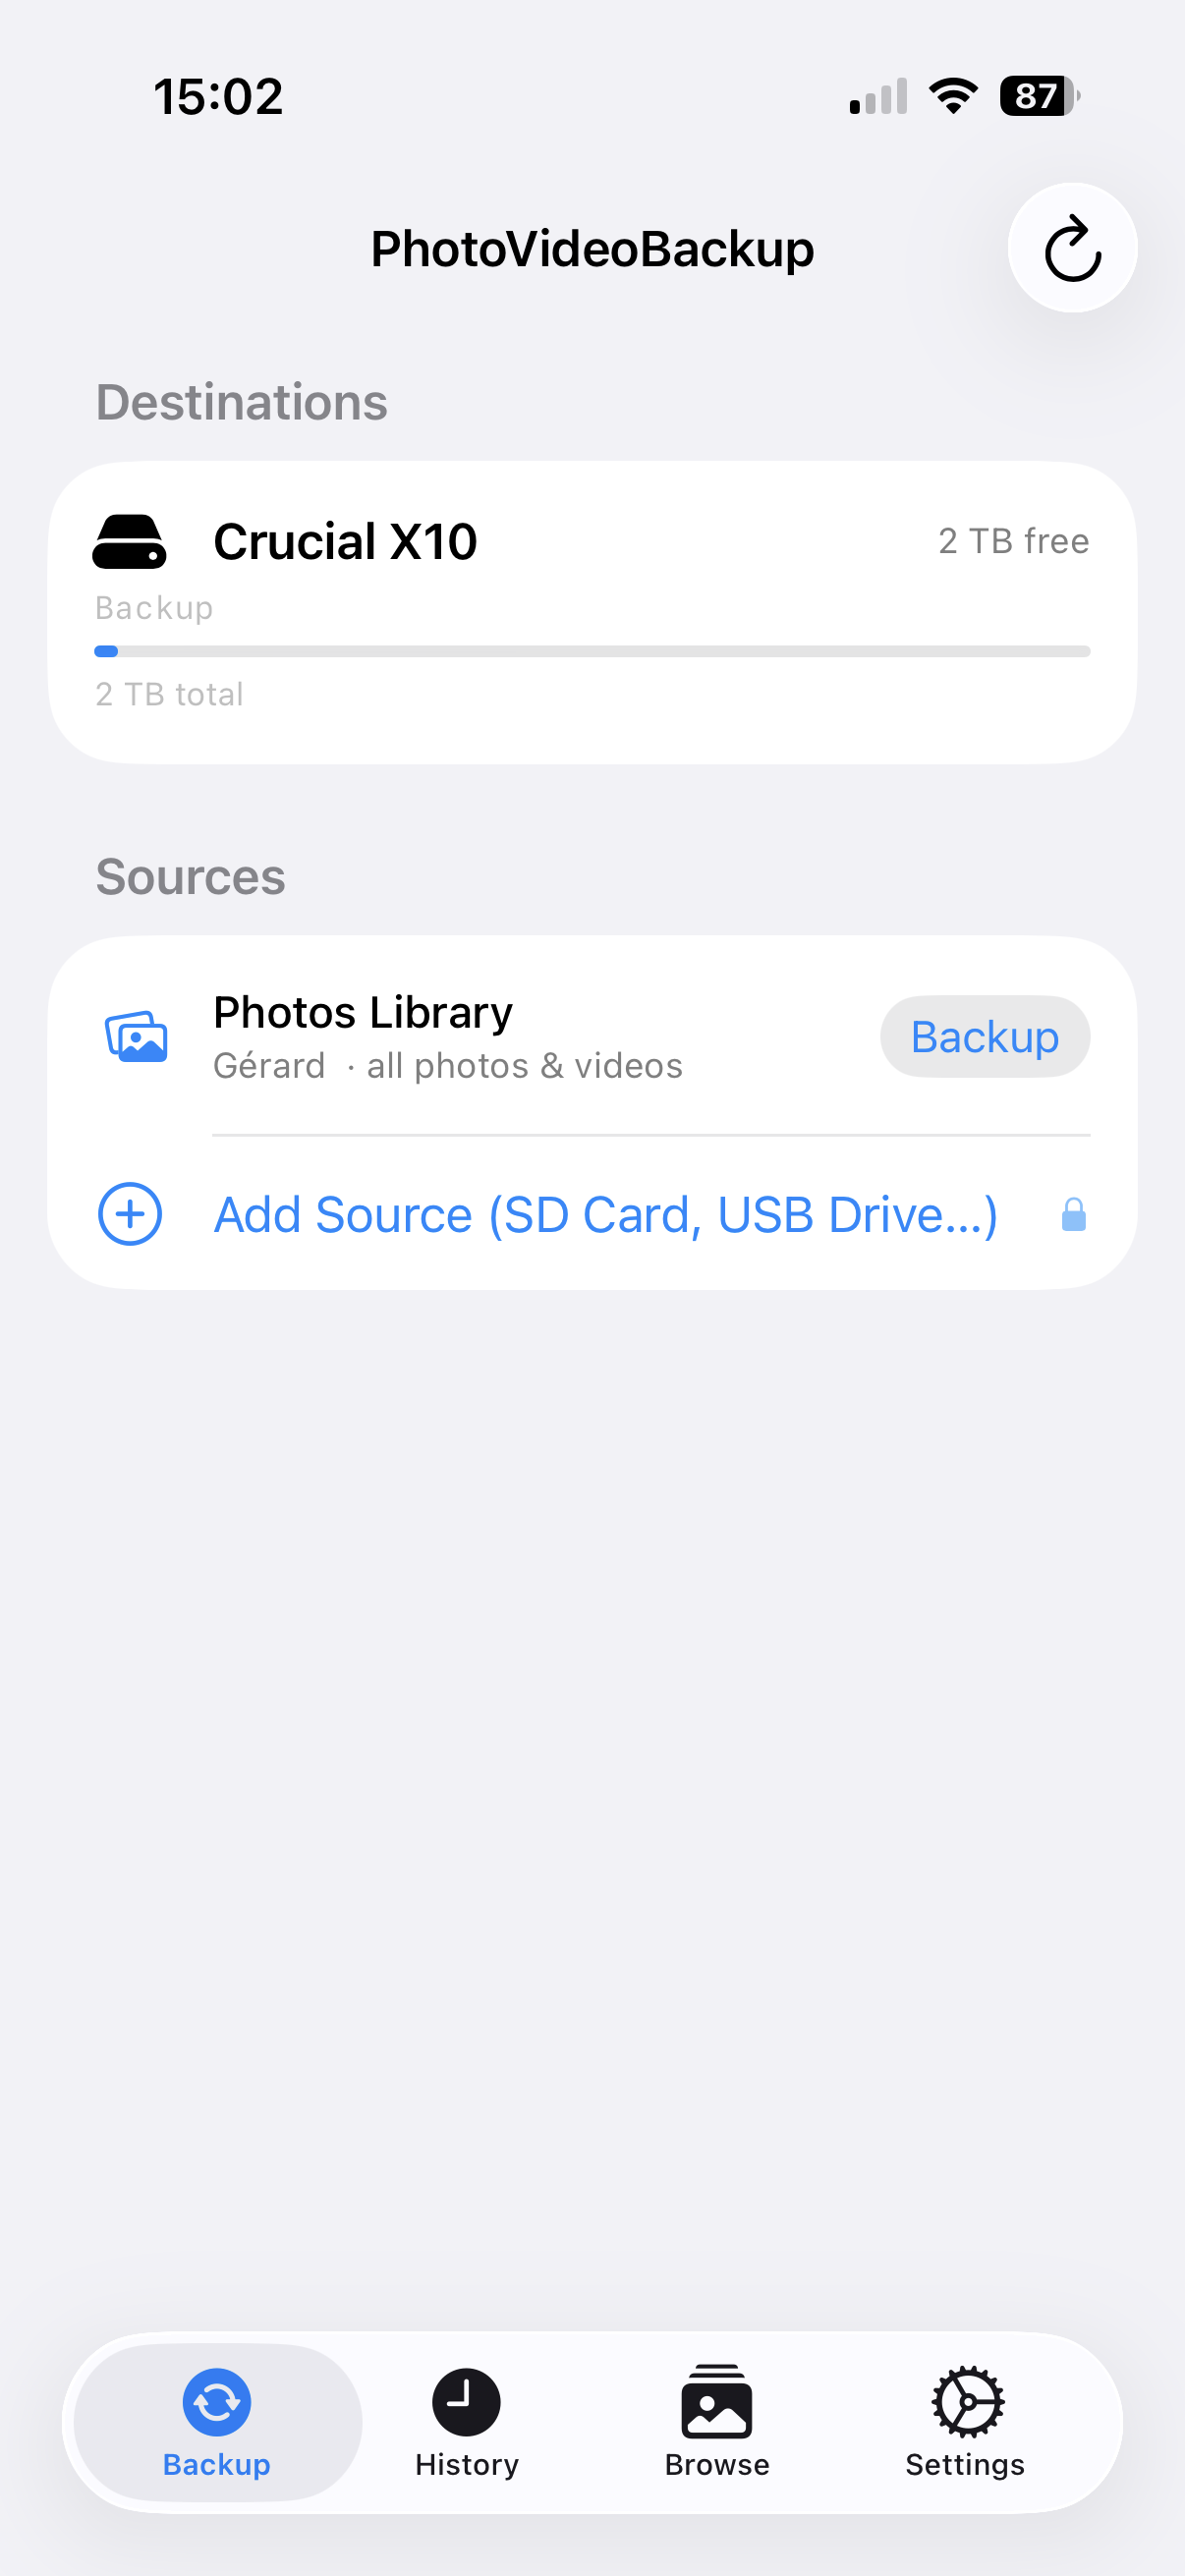
At the top you will see your SSD with its name, how much space is free, and a bar showing how full it is. Below that is a Sources section.
Step 2 — Start the backup
In the Sources section, find the Photos Library row. It shows the device name you set in Settings (for example “iPhone de Gérard · all photos & videos”).
If you see “Name not configured” and an orange warning (see below), go to Settings and fill in the Folder name field first.
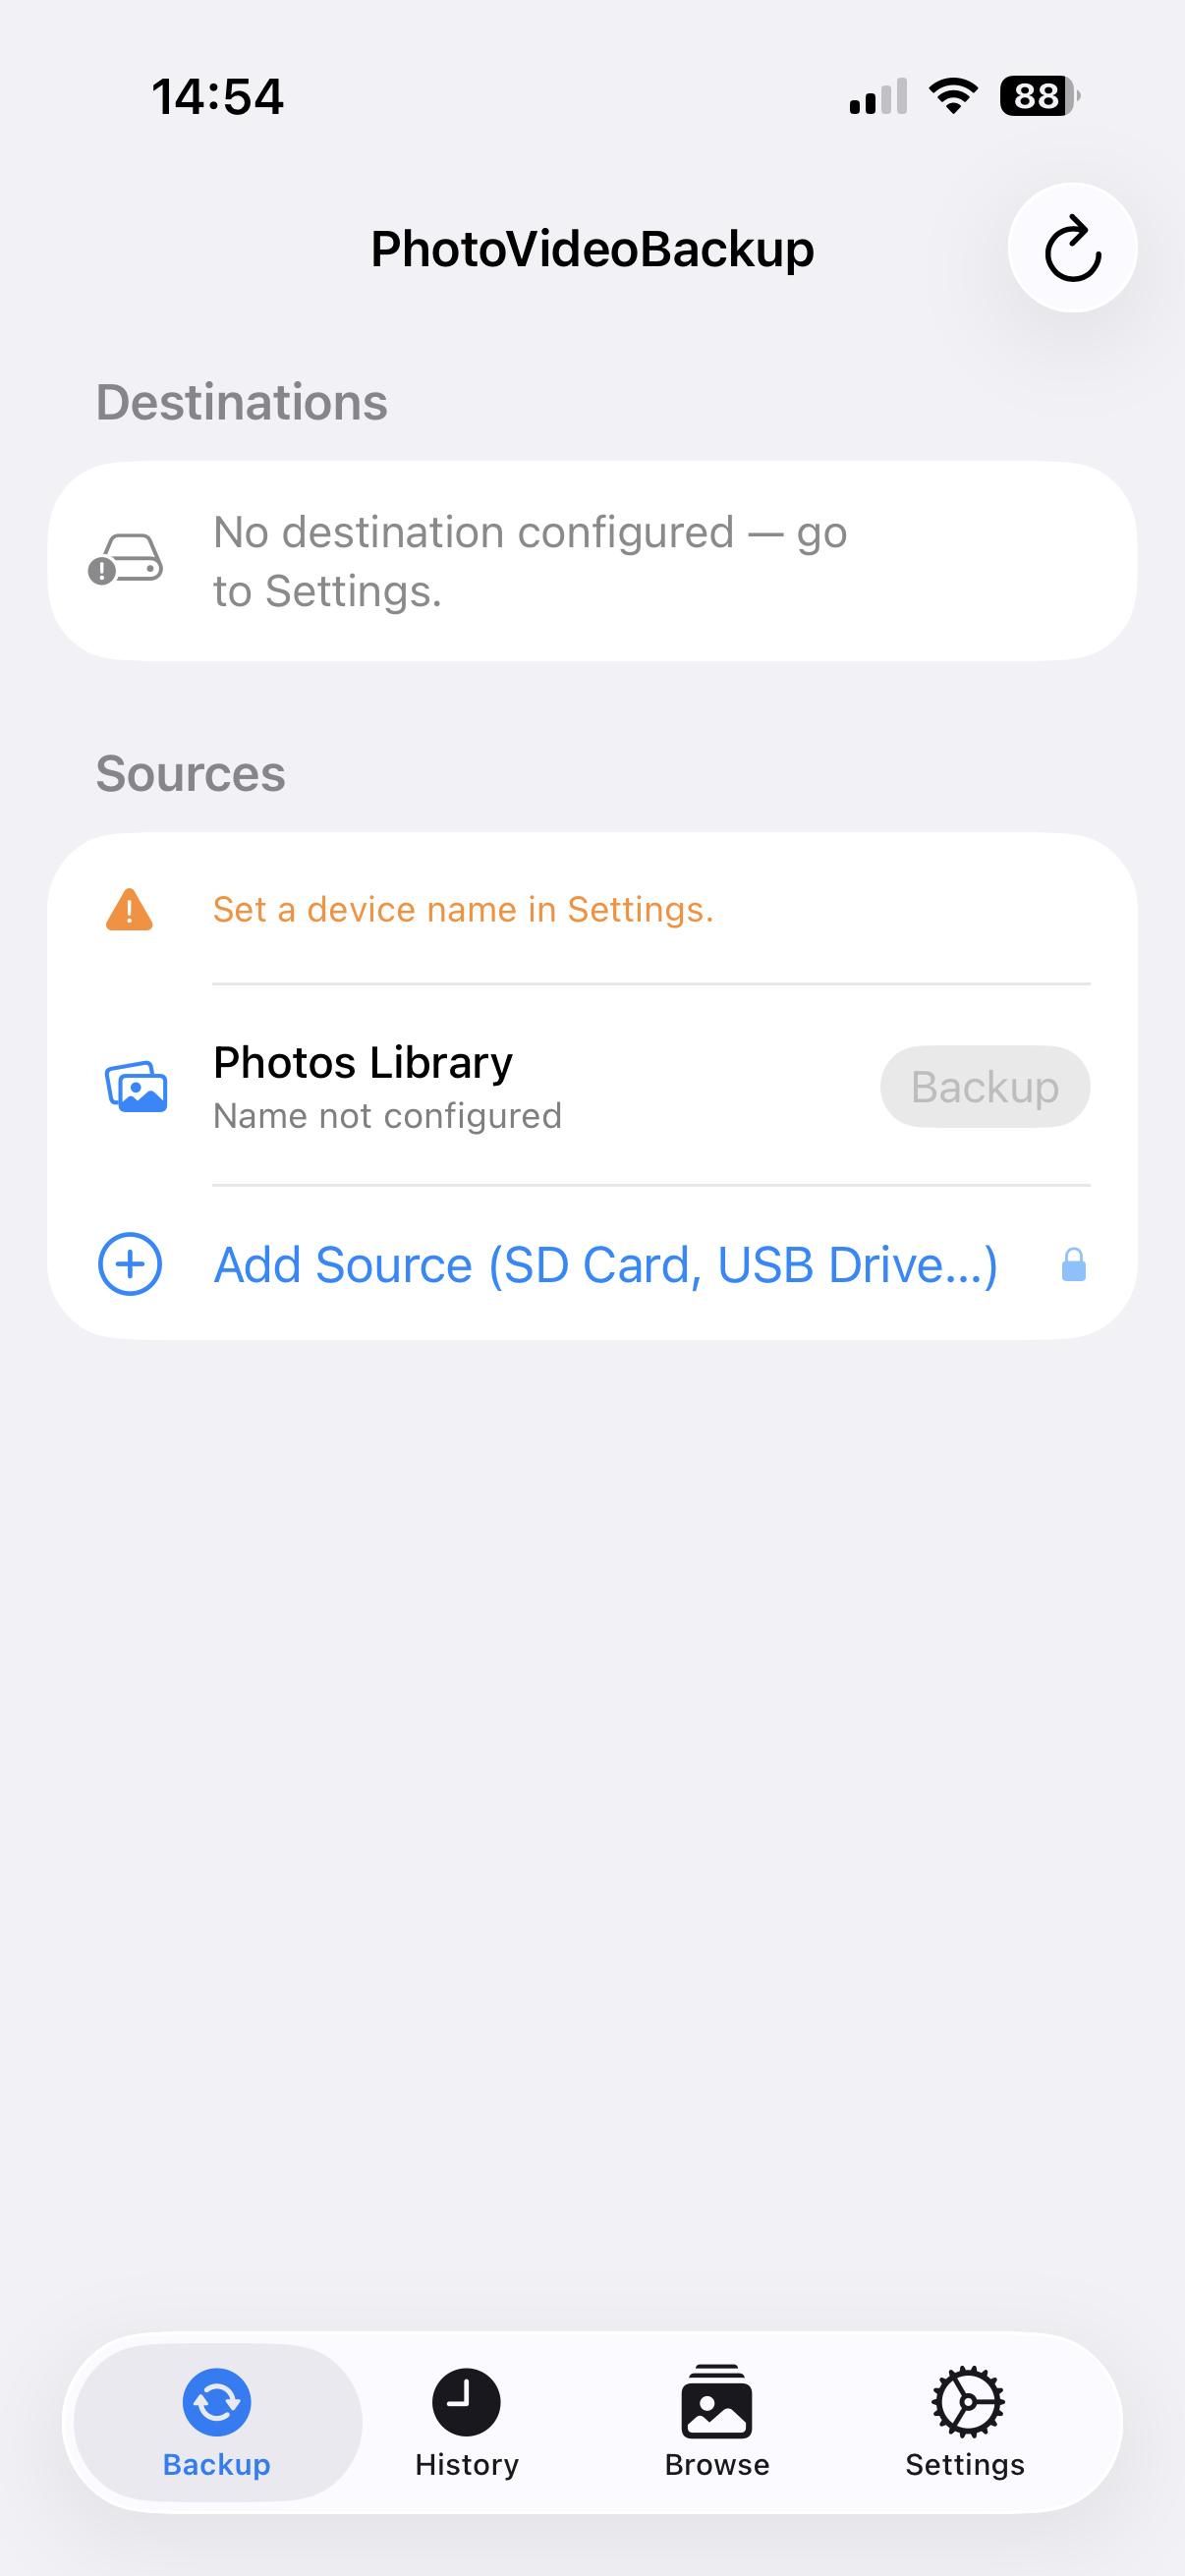
Tap the Backup button on that row.
The app will start scanning your photo library and then copying files. You can watch the progress on screen (see Section 8).
First backup takes longer. If you have thousands of photos, expect this to take several minutes or more. Subsequent backups are much faster — the app skips files that are already on the SSD.
7. Backing Up a Camera SD Card (Pro)
This section explains how to back up a memory card from a camera such as a Blackmagic, Insta360 X5, DJI Mini 3 Pro, DJI 360 / Action camera, GoPro, or any other camera.
This feature requires the Pro upgrade. See Section 2.
Step 1 — Connect the SD card
Plug your SD card reader into your iPhone and insert the memory card.
If your SSD is already plugged in, you will need a small USB-C hub to connect both at the same time.
Step 2 — Add the card as a source
On the Backup tab, tap Add Source (SD Card, USB Drive…) at the bottom of the Sources section.
A file browser will open. Navigate to your SD card and tap Open.
Step 3 — Give it a name
A dialog box will ask you to name this source. The folder name from the card is suggested, but you can type anything — for example Blackmagic, Insta360, or Trip to Japan.
Tap Add.
The source now appears in the list. The app automatically recognises known devices:
| Icon | Device |
|---|---|
| Airplane | DJI Mini 3 Pro |
| Video badge | DJI 360 / Action (Neo 2, etc.) |
| Camera aperture | Insta360 X5 |
| Camera (red) | GoPro HERO series |
| SD card | Everything else |
GoPro cards are scanned for .mp4 and .jpg files; low-resolution proxy files (.lrv) and thumbnail files (.thm) are automatically skipped.
Step 4 — Start the backup
Tap Backup on the row for your camera source.
Removing a source
Tap the red – button on the left of a source row to remove it from the list. This does not delete any files — it simply removes that card from the app’s list of sources.
8. The Backup in Progress
While the backup runs, a Backup in Progress panel appears at the bottom of the Backup tab. As of version 2.5.0 it is pinned there and always visible — you no longer need to scroll past your destinations and sources to see it.
The moment you tap a backup button, the panel appears immediately so you know the request was received — even before the destinations (or the NAS) have finished connecting. While the app gets ready you will see, in order:
- Preparing… — connecting to your destinations.
- Analyzing source… — the app is going through your source and counting the media files. A live count (“N files found”) climbs as it works, so on a large photo library you can see it is busy, not stuck. This step can take a little while before the first file is copied — that is normal.
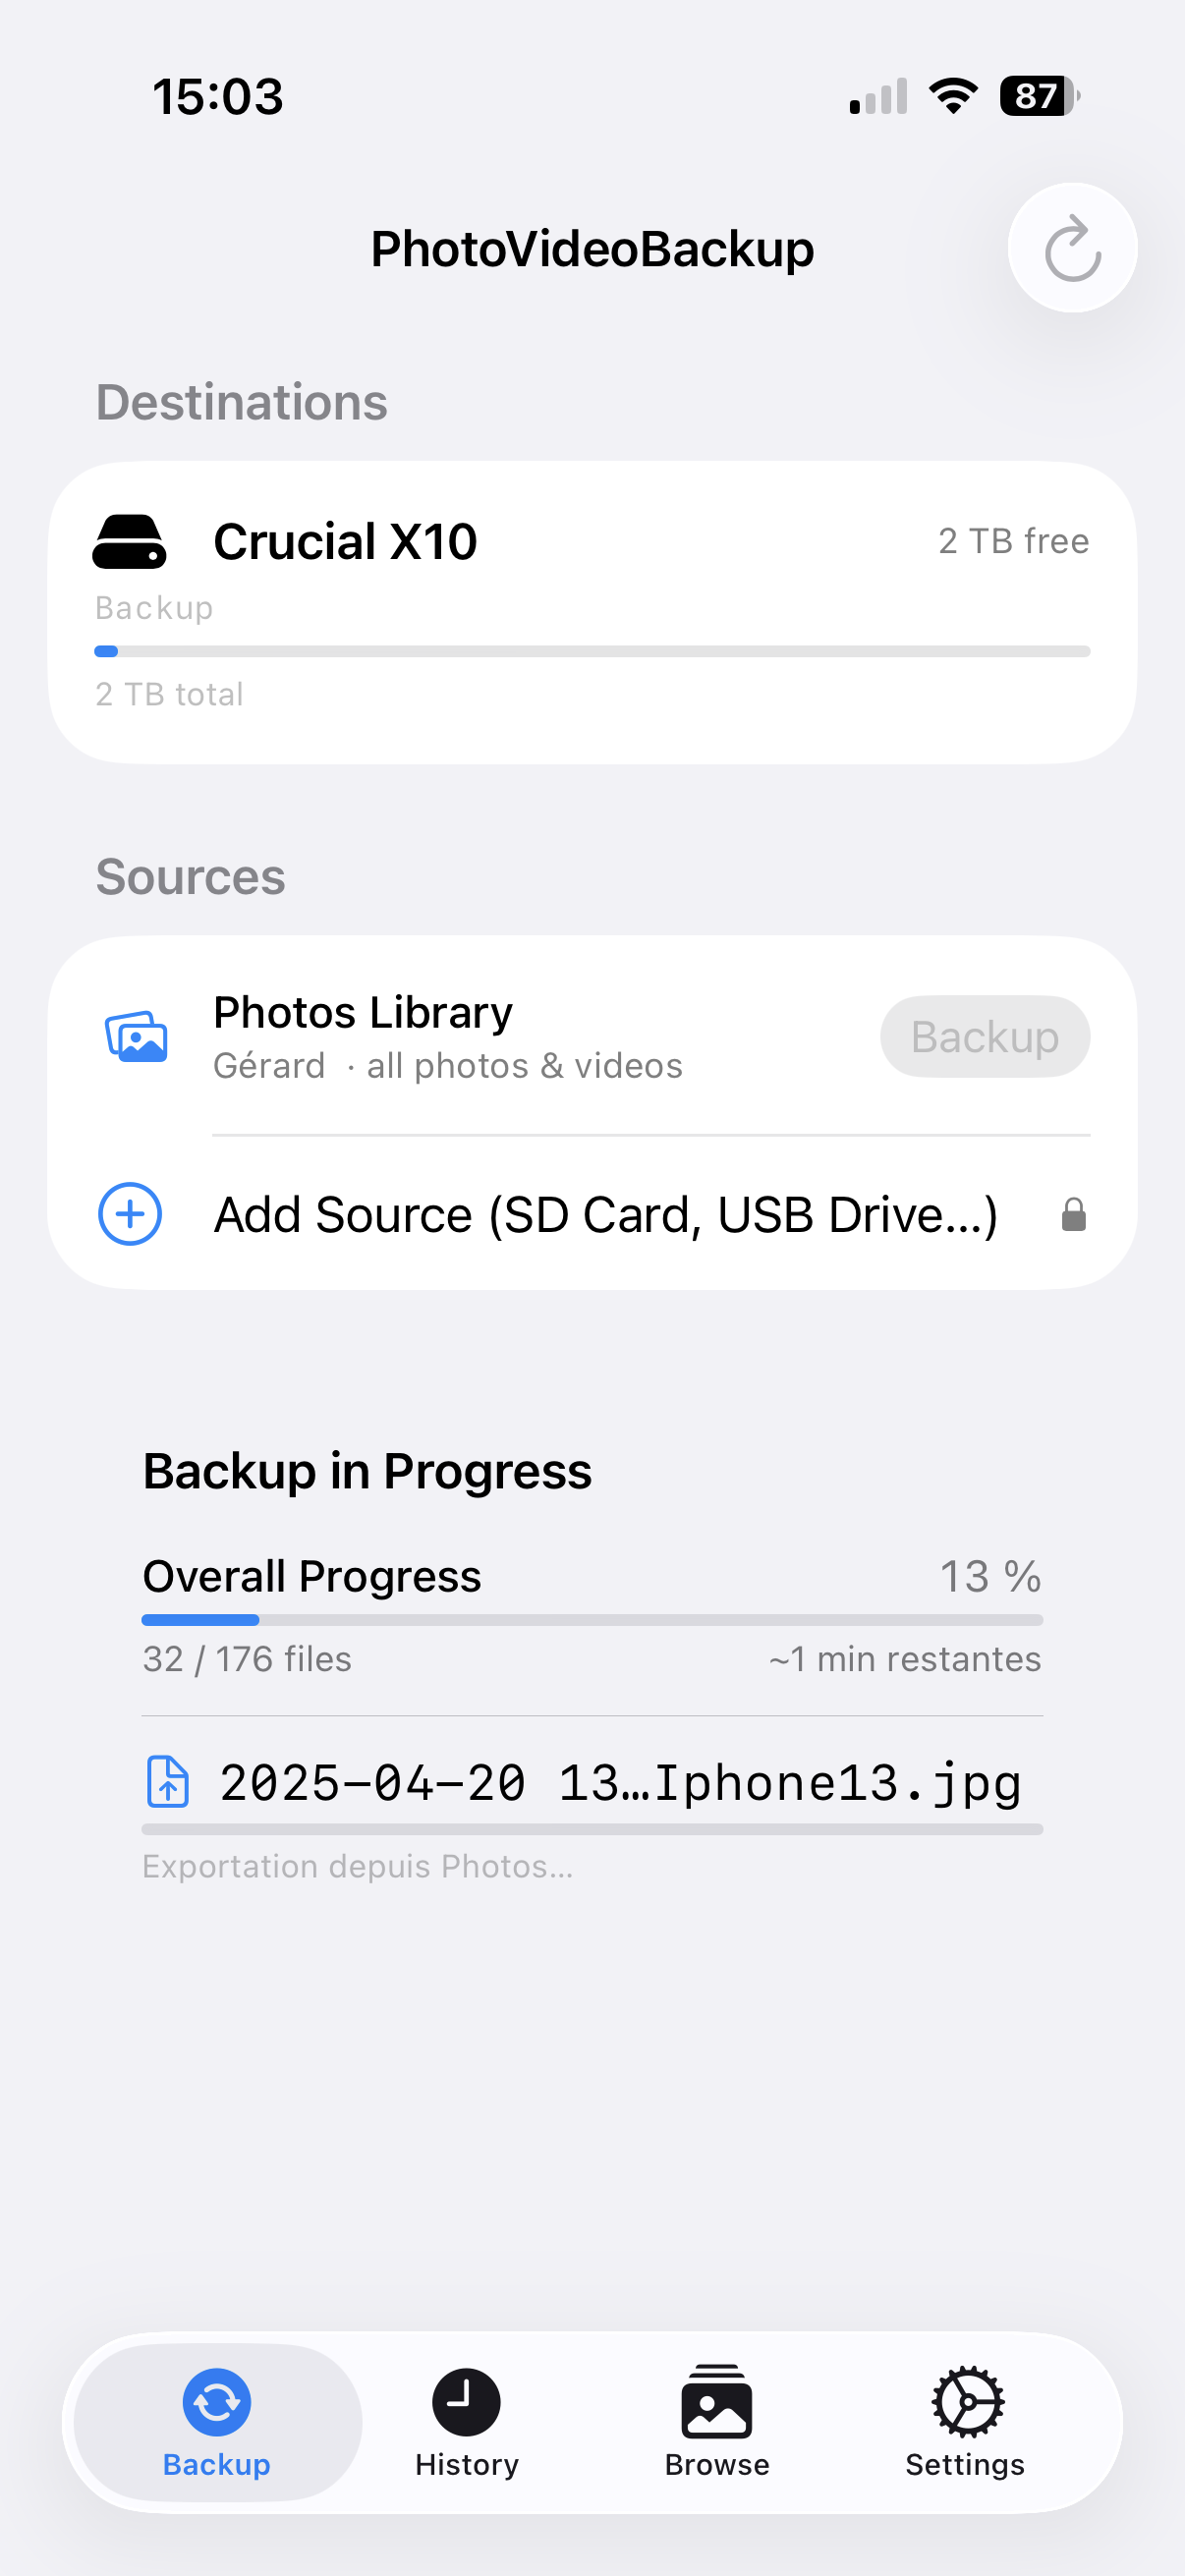
Once copying starts, here is what each part means:
| Element | What it tells you |
|---|---|
| Overall Progress | The percentage of the total backup completed, and how many files done out of the total |
| Time remaining | An estimate of how long is left, updated continuously as the backup runs |
| Current file name | The file being processed right now |
| Phase label | What the app is doing at this moment (see below) |
Phases explained simply:
- Scanning — The app is counting your files and checking which ones need to be copied.
- Exporting from Photos — The app is retrieving the full-quality version of a photo from the iPhone’s photo system (or downloading it from iCloud if needed).
- Copying — The file is being written to the SSD.
- Verifying — The app is double-checking that the copy on the SSD is a perfect match of the original.
- Skipped — The file was already on the SSD from a previous backup. Nothing to do.
Do not unplug the SSD or the SD card while a backup is running.
Tip: If you switch to another app while the backup is running, a notification will appear as soon as it finishes — so you do not need to keep the app open on screen.
9. When the Backup Is Done
When the backup finishes, a Backup Complete banner appears at the bottom of the Backup tab.
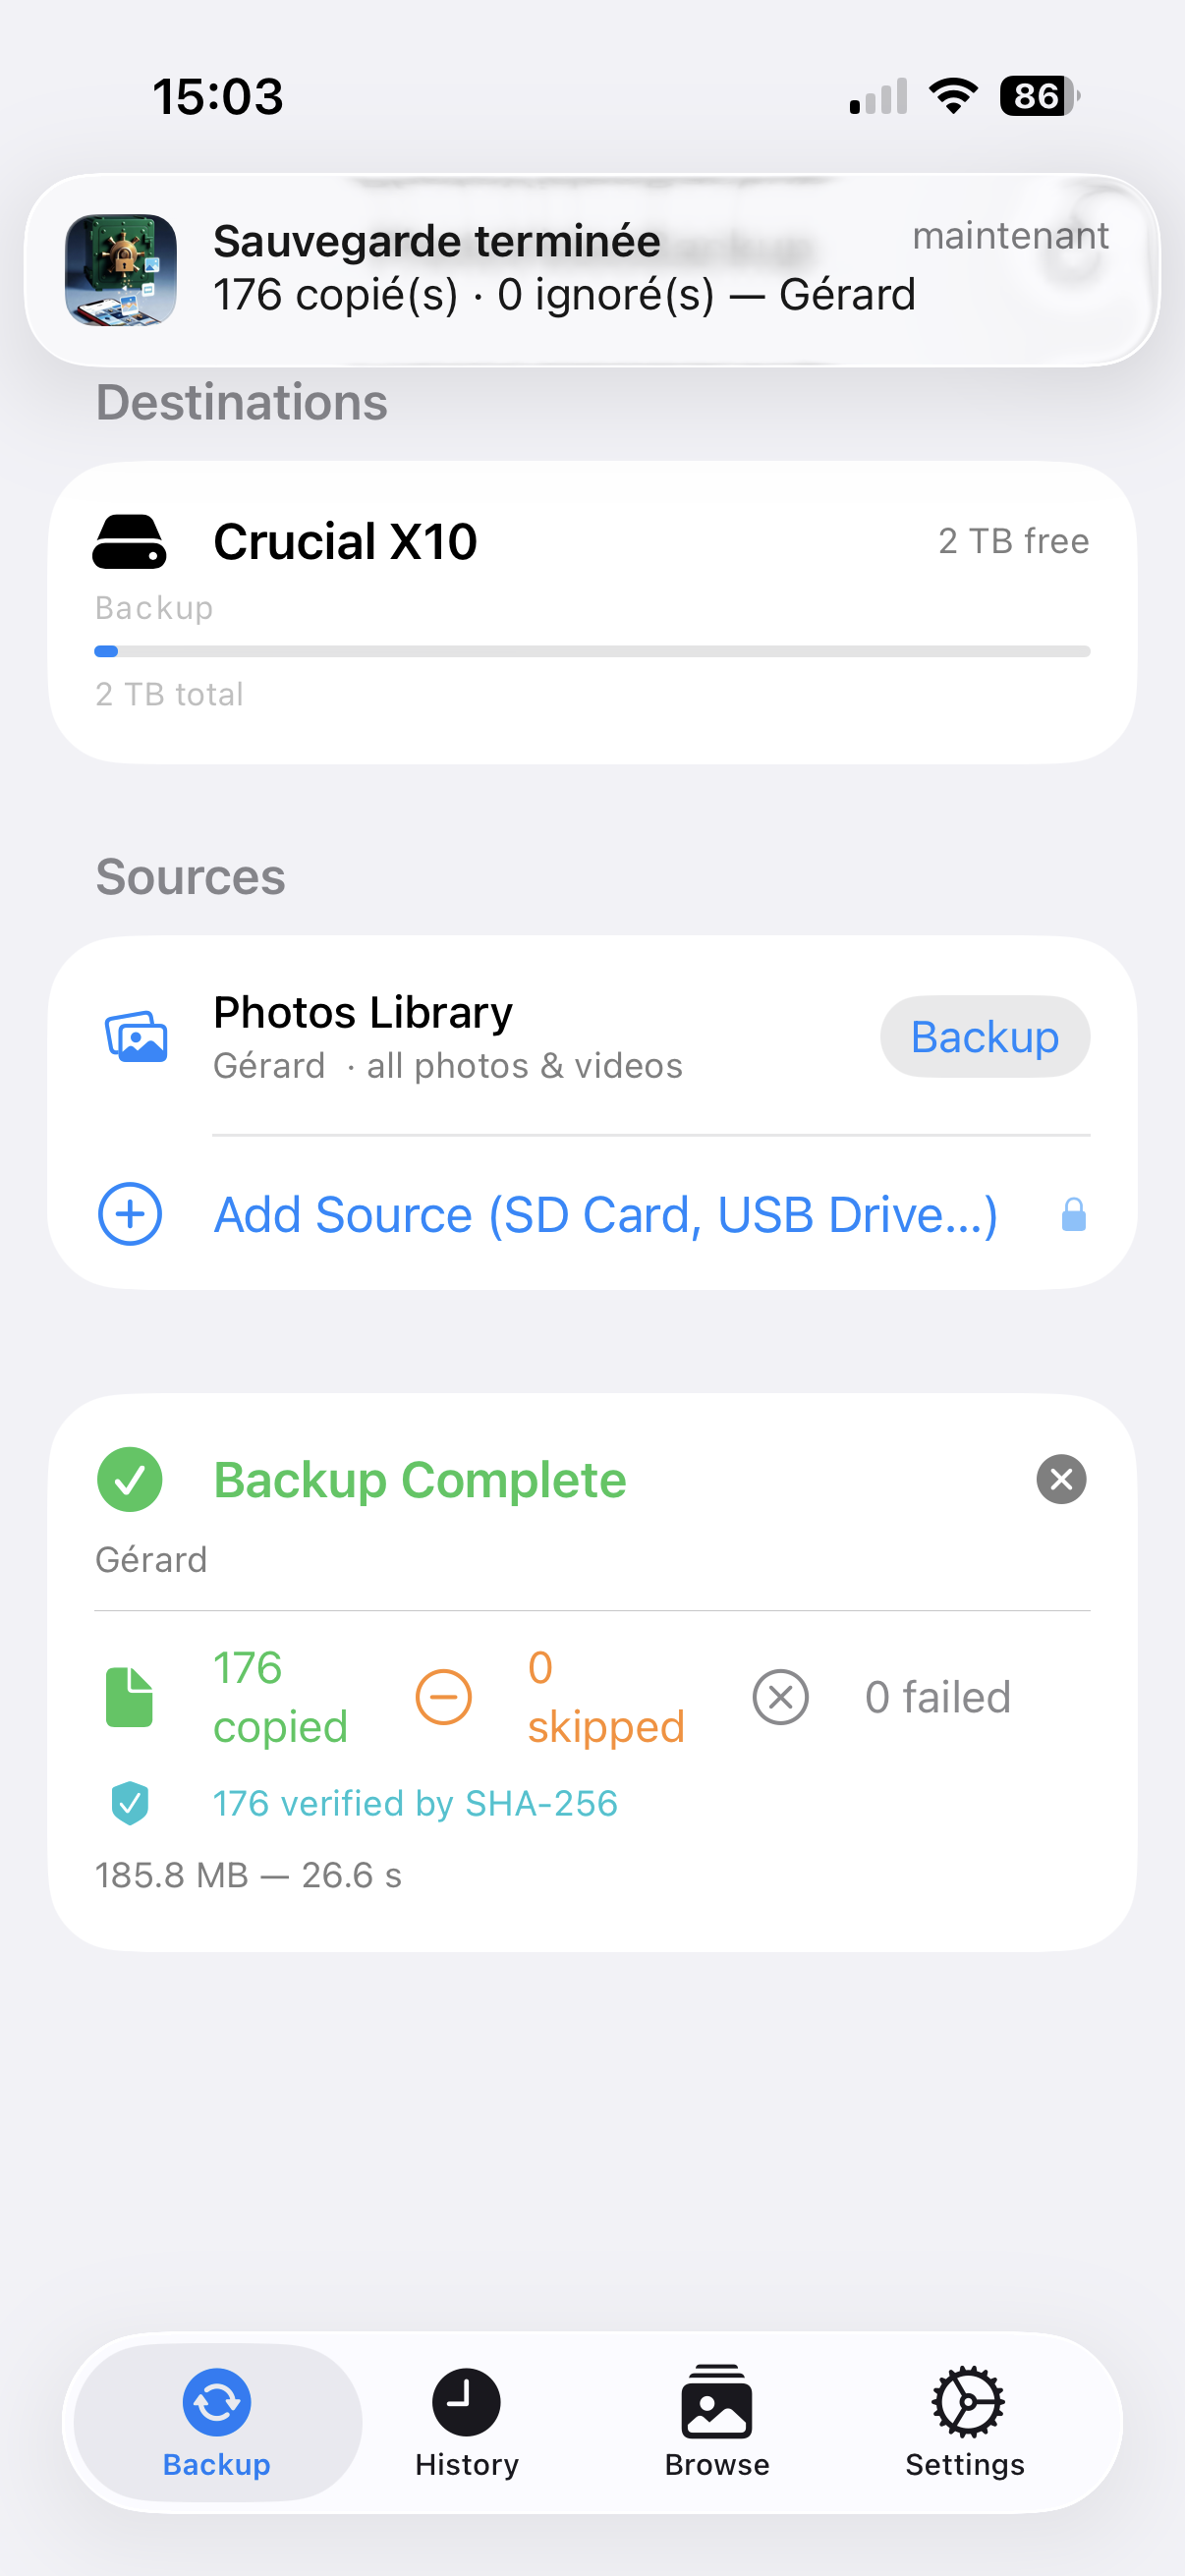
| Number | What it means |
|---|---|
| Copied | Files successfully saved to the SSD for the first time |
| Skipped | Files that were already on the SSD — not copied again (this is normal and safe) |
| Failed | Files that could not be copied (rare — see below) |
The banner also shows the total amount of data copied and how long the backup took.
Tap the ✕ button in the top-right corner of the banner to dismiss it.
What if some files failed?
A small number of failures is rare but can happen if:
- A file on the SD card is corrupted (damaged card).
- The SSD ran out of space mid-backup.
- The iPhone did not have enough free space for a particularly large file — only that file is skipped, and the rest of the backup continues.
- The connection was briefly interrupted.
For a detailed list of which files failed, open the History tab and tap on the session.
10. Viewing Your Backup History
The History tab (clock icon, centre of the tab bar) keeps a record of every backup session.
Each row shows the source that was backed up, the destination drive(s), the folder organisation mode, the number of files, and a colour indicator — green for success, orange for partial, red if one or more files failed.
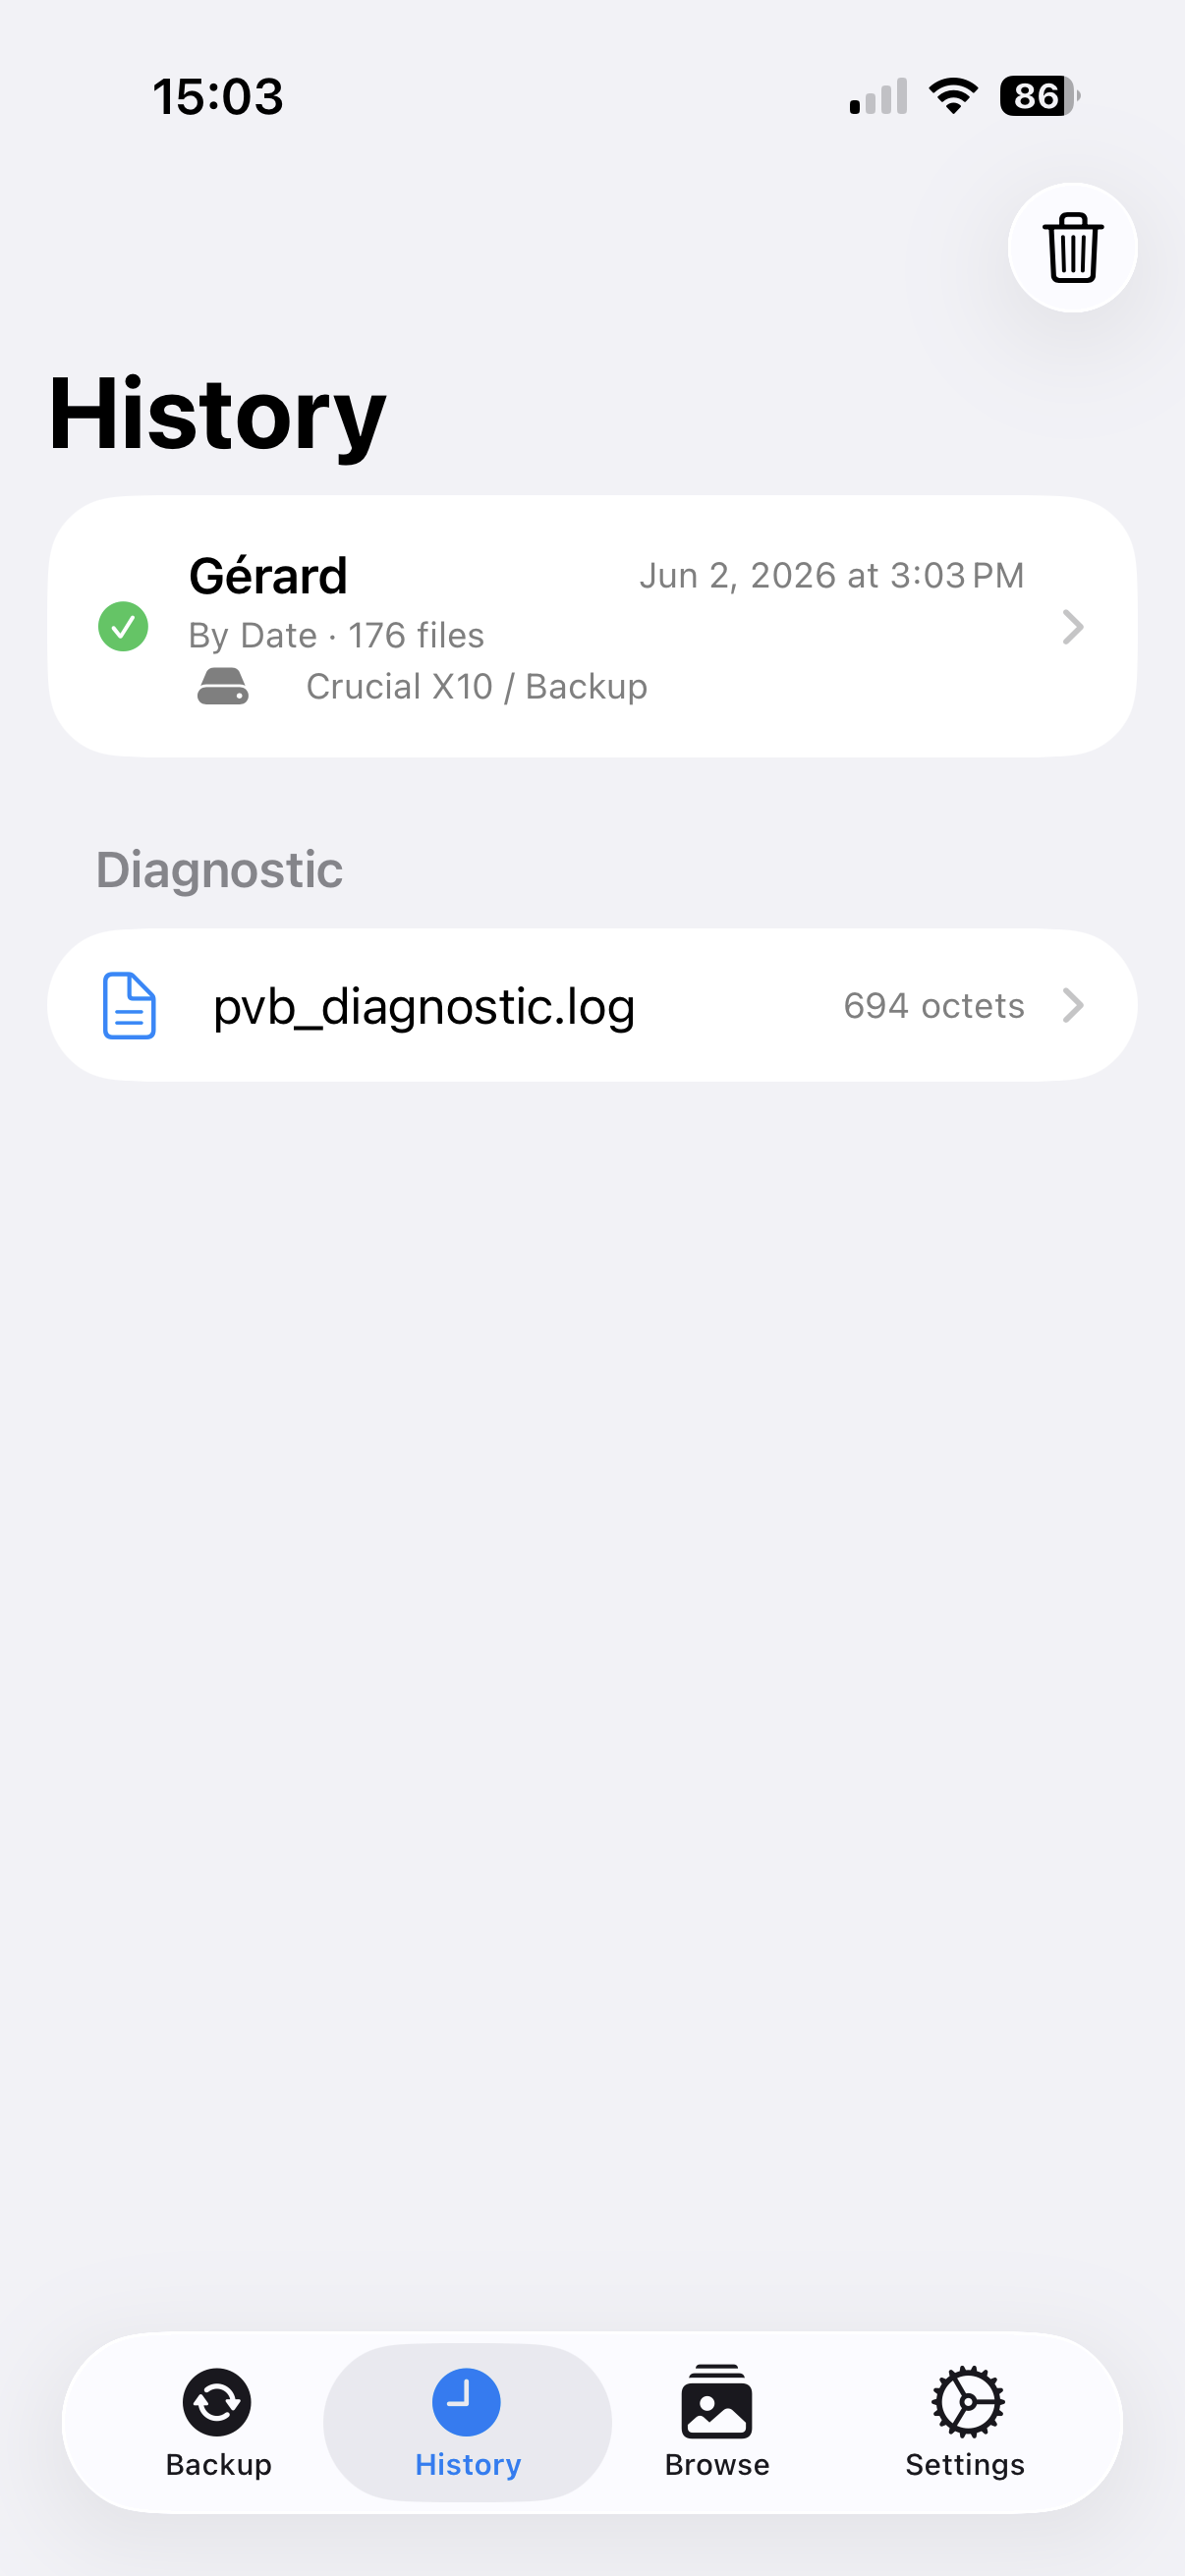
What “Partial” means. A session is orange/Partial when it stopped before finishing for one of three reasons, and — as of version 2.5.1 — the report and the completion notification tell you which one: you tapped Stop, the file limit you set was reached, or the destination disconnected mid-backup (an SSD unplugged, or a NAS that dropped off Wi-Fi). In the disconnection case just reconnect the drive and run the backup again — the files already copied are skipped, so it picks up where it left off.
Tap any row to open the full report for that session. The report shows a summary with source, destination, folder structure, file counts, and SHA-256 verification status.
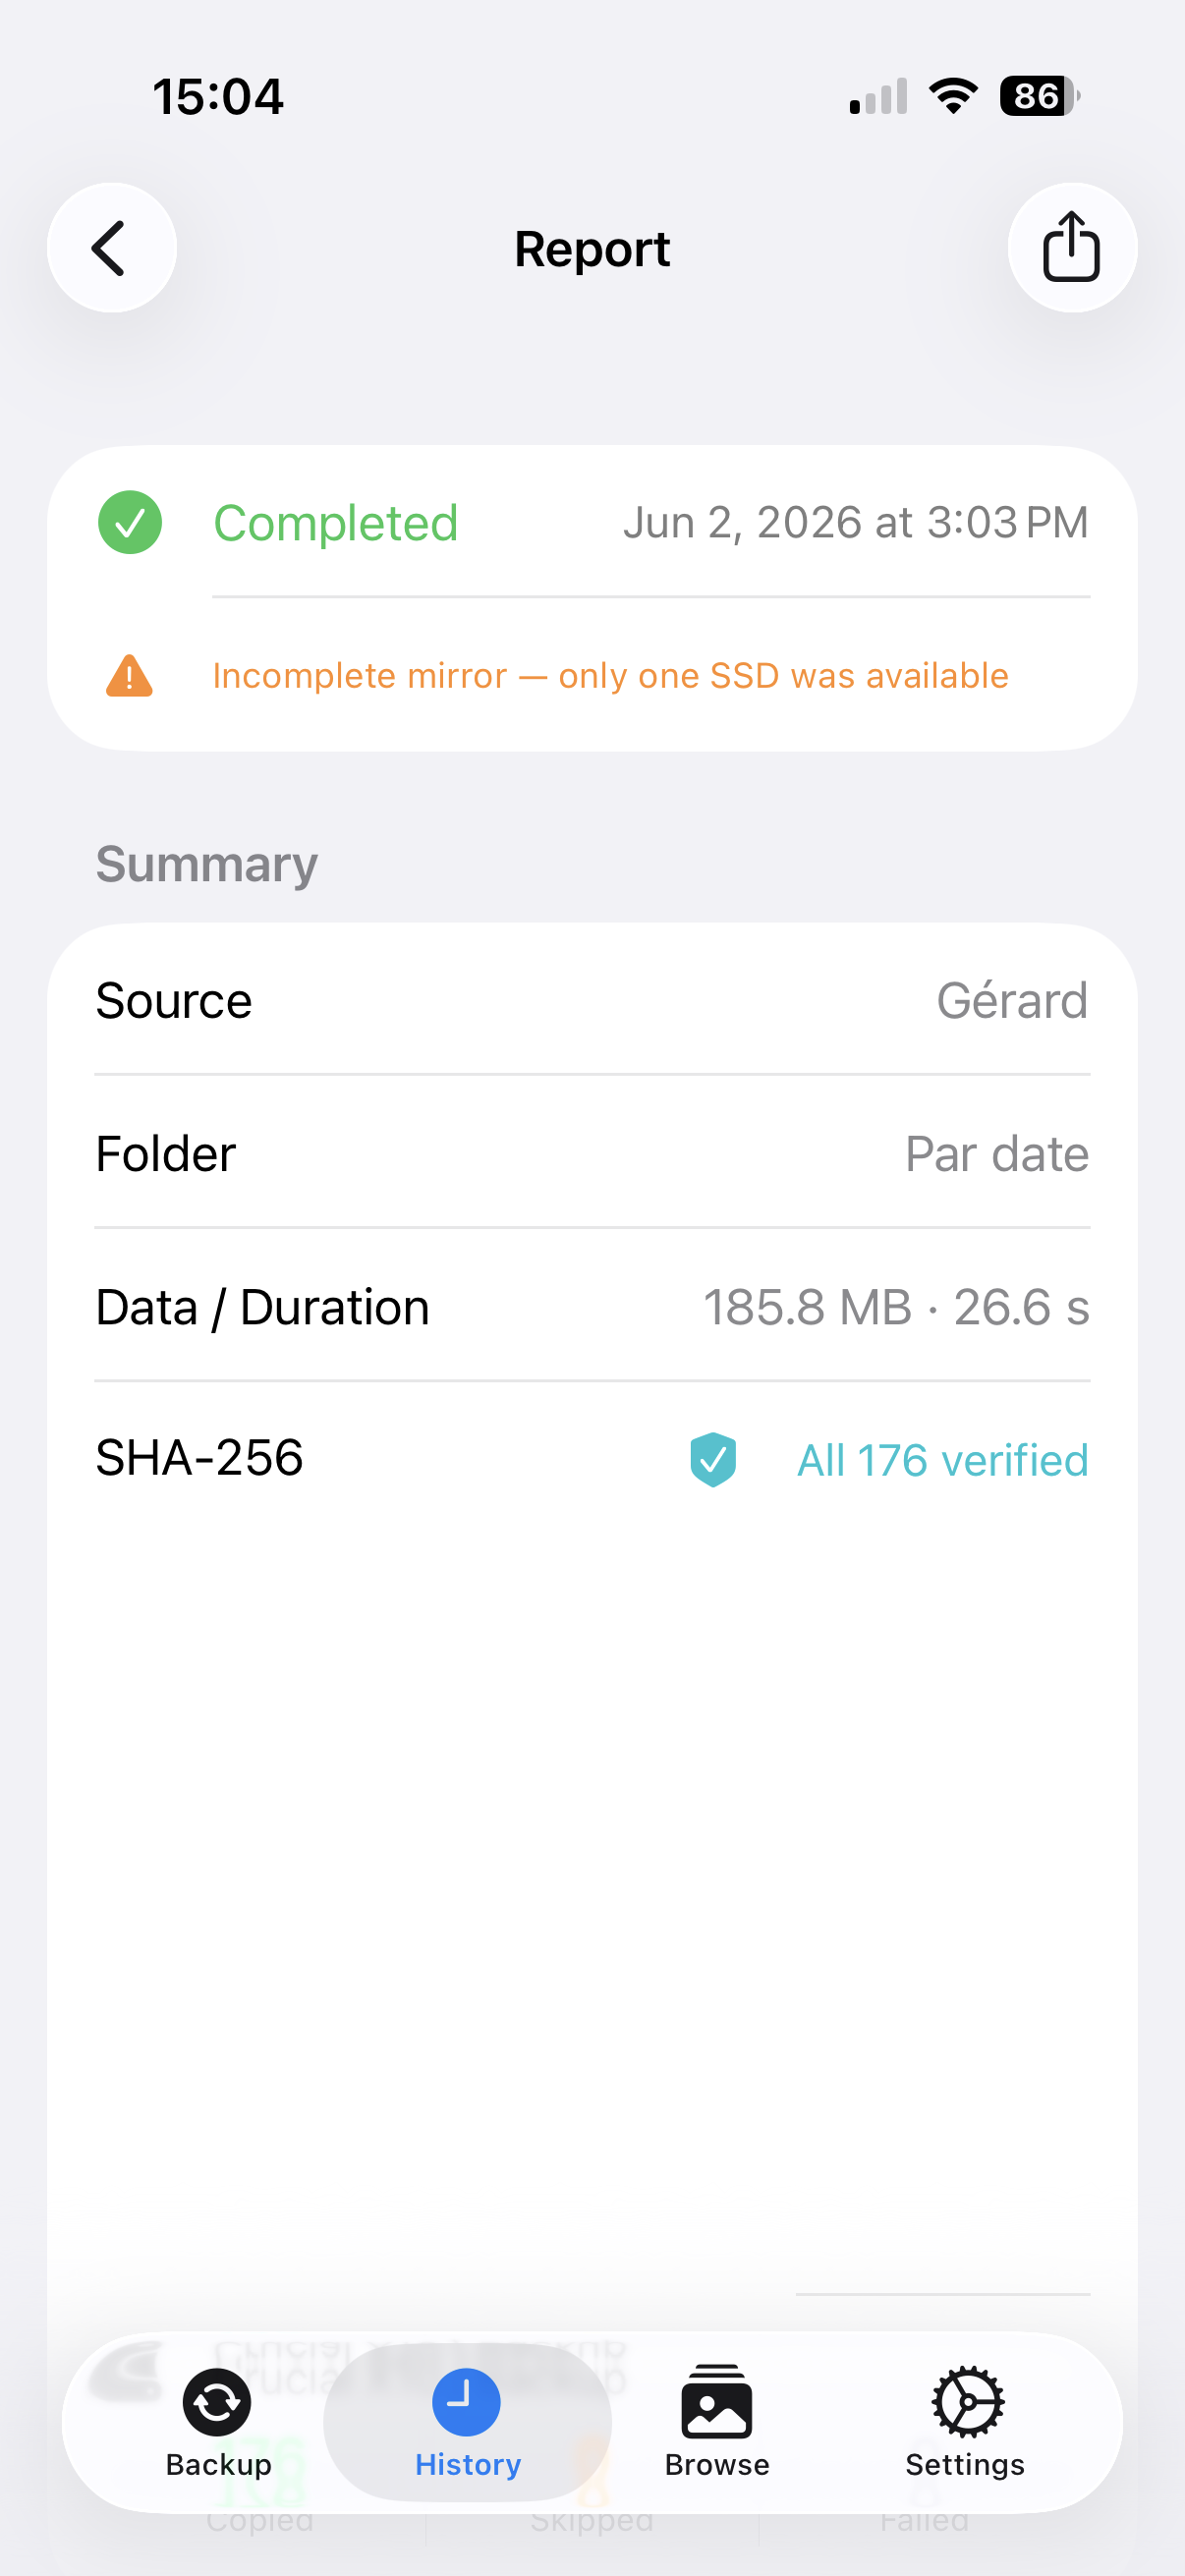
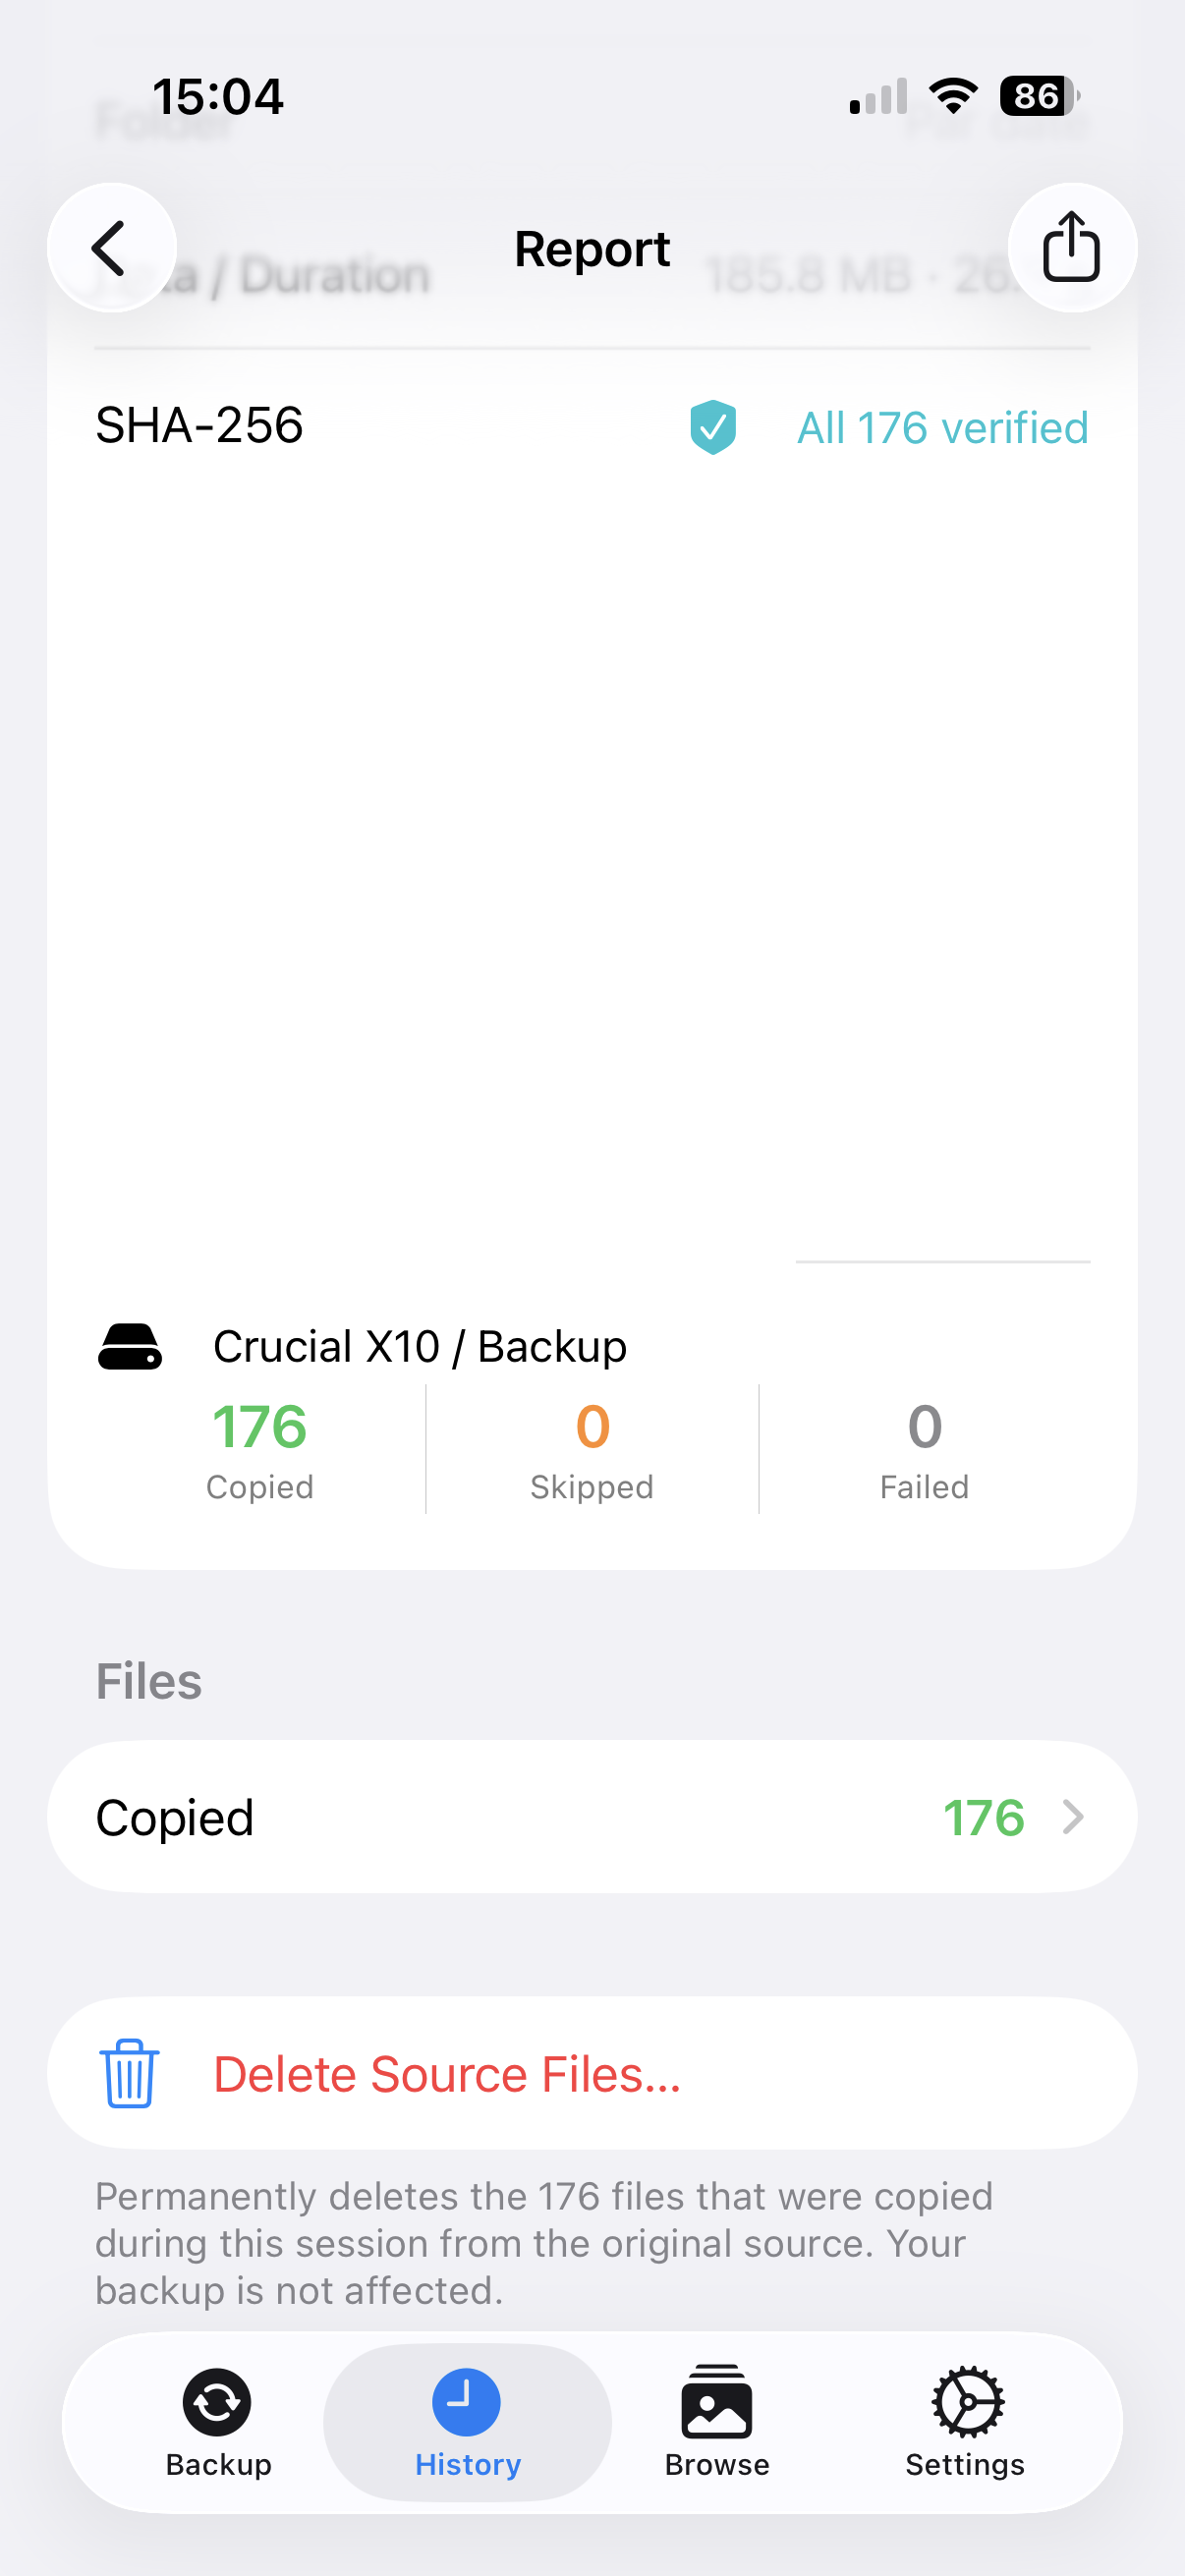
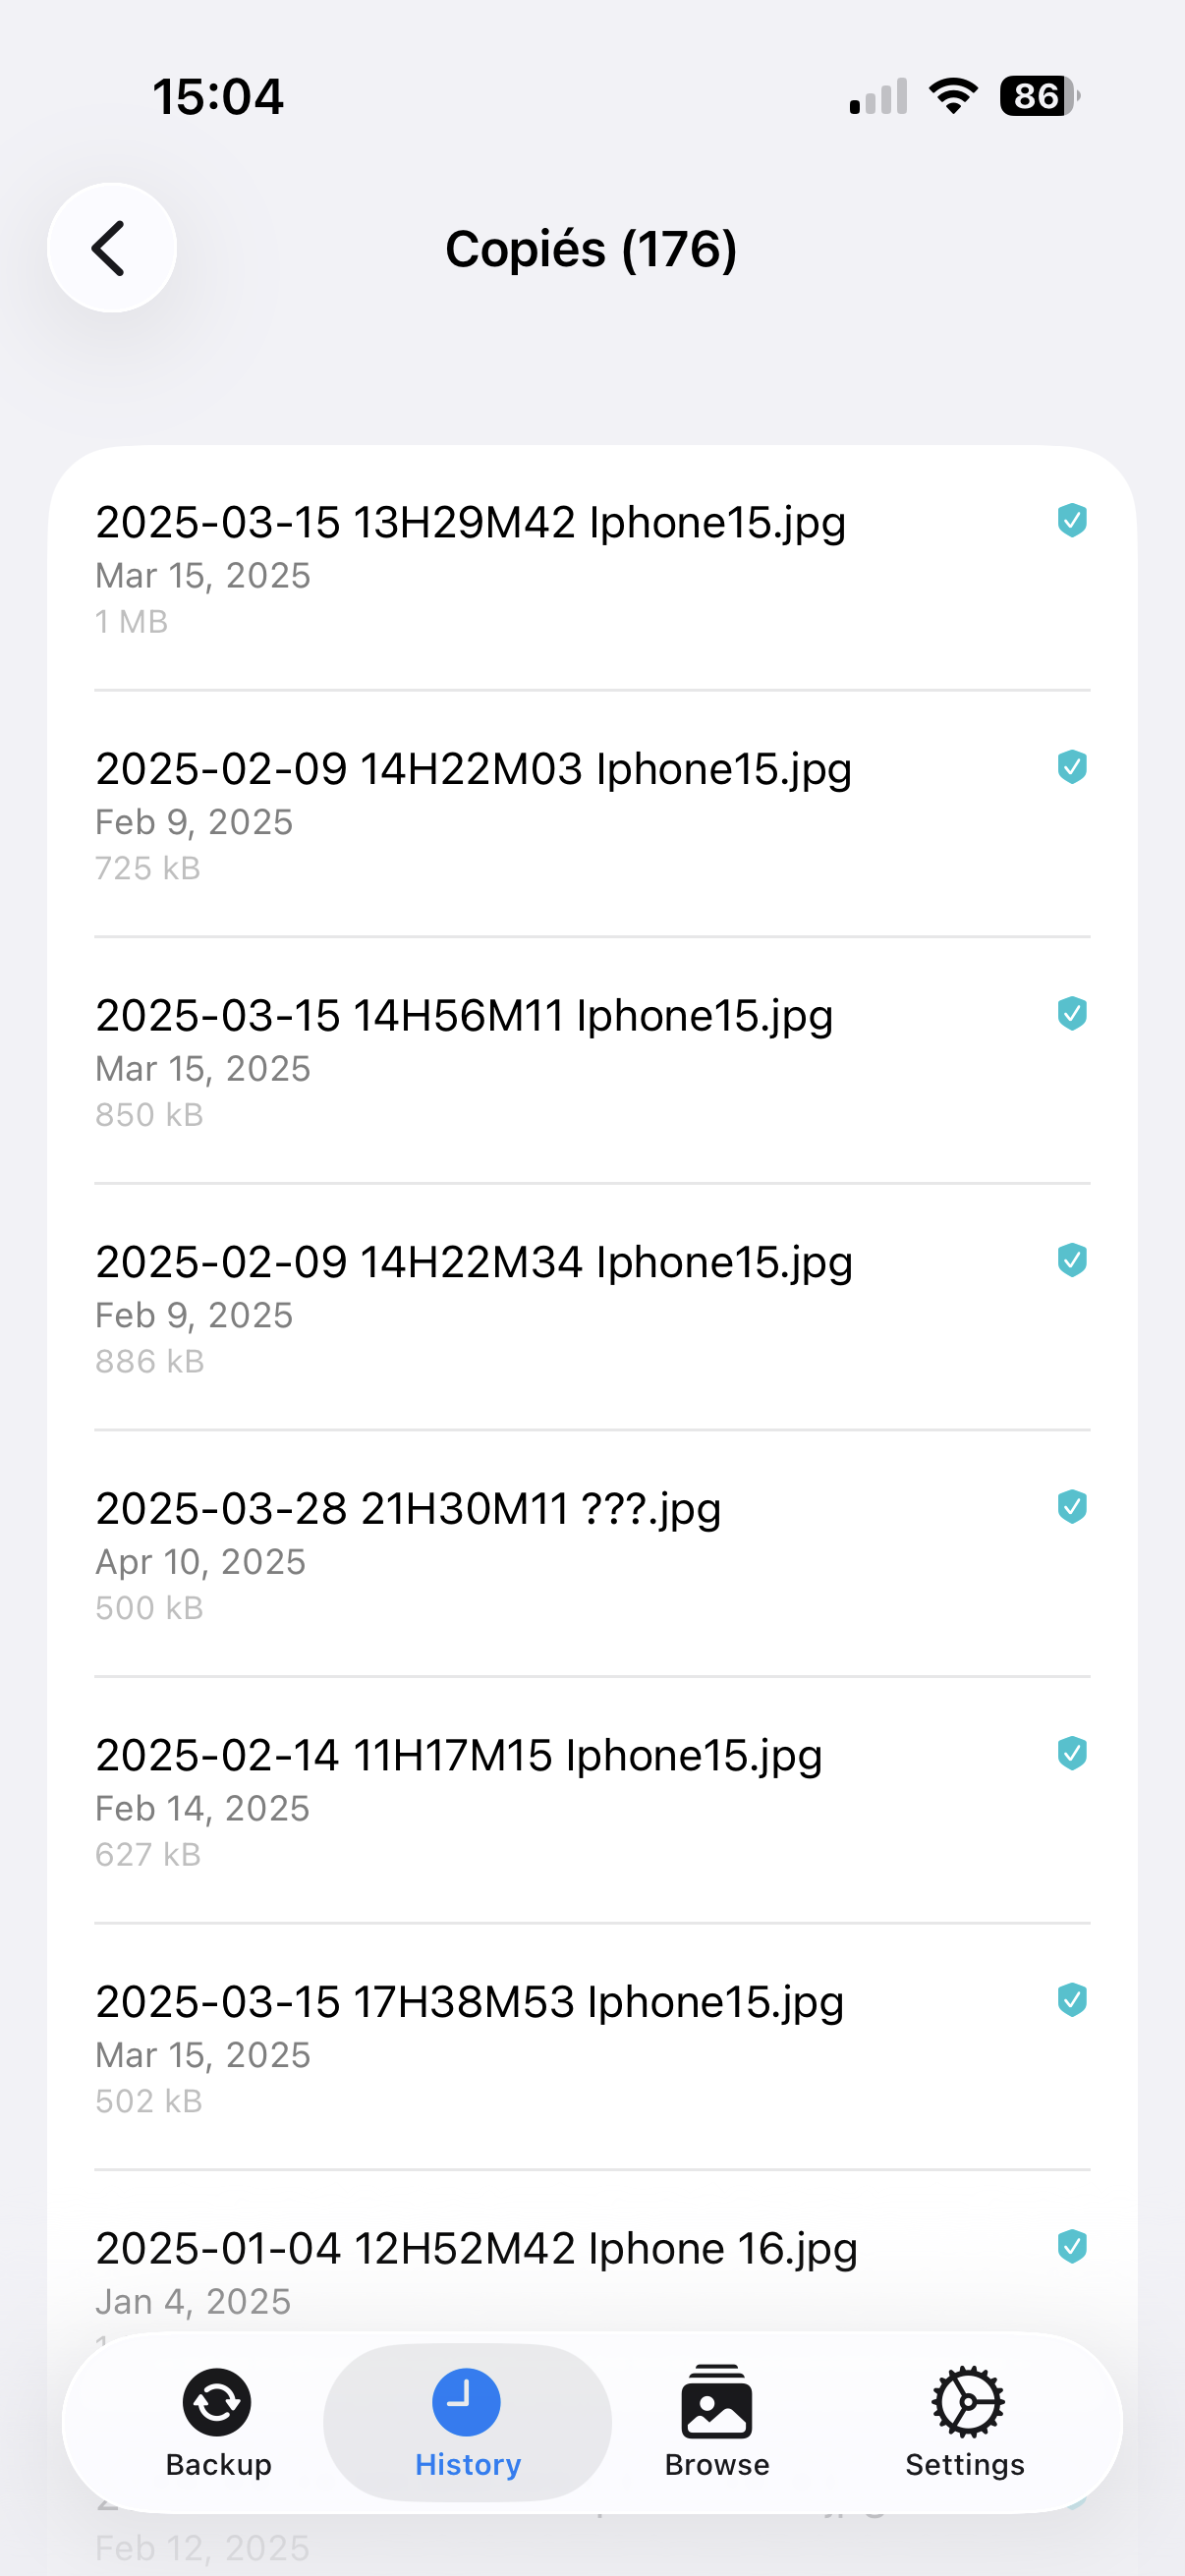
Tap Copied, Skipped, or Failed to drill into the per-file list. Each copied file shows a SHA-256 badge confirming its integrity.
Sharing a report
Inside a session report, tap the Share button (the box-with-arrow icon) to export the report as an HTML file. You can save it, email it, or open it in Safari for a nicely formatted view.
Deleting source files after backup
Once your backup is complete, the app can delete the original files from the source — freeing up space on your SD card or in your Photos Library.
Inside a session report, scroll down to find the Delete Source Files… button. This button only appears when:
- The session contains successfully copied files, and
- The original source is currently connected (SD card plugged in) or available (Photos Library).
Tapping the button shows a confirmation screen that tells you exactly how many files will be deleted and from which source. A four-digit code is displayed on screen — you must type that code to confirm. This prevents accidental deletion.
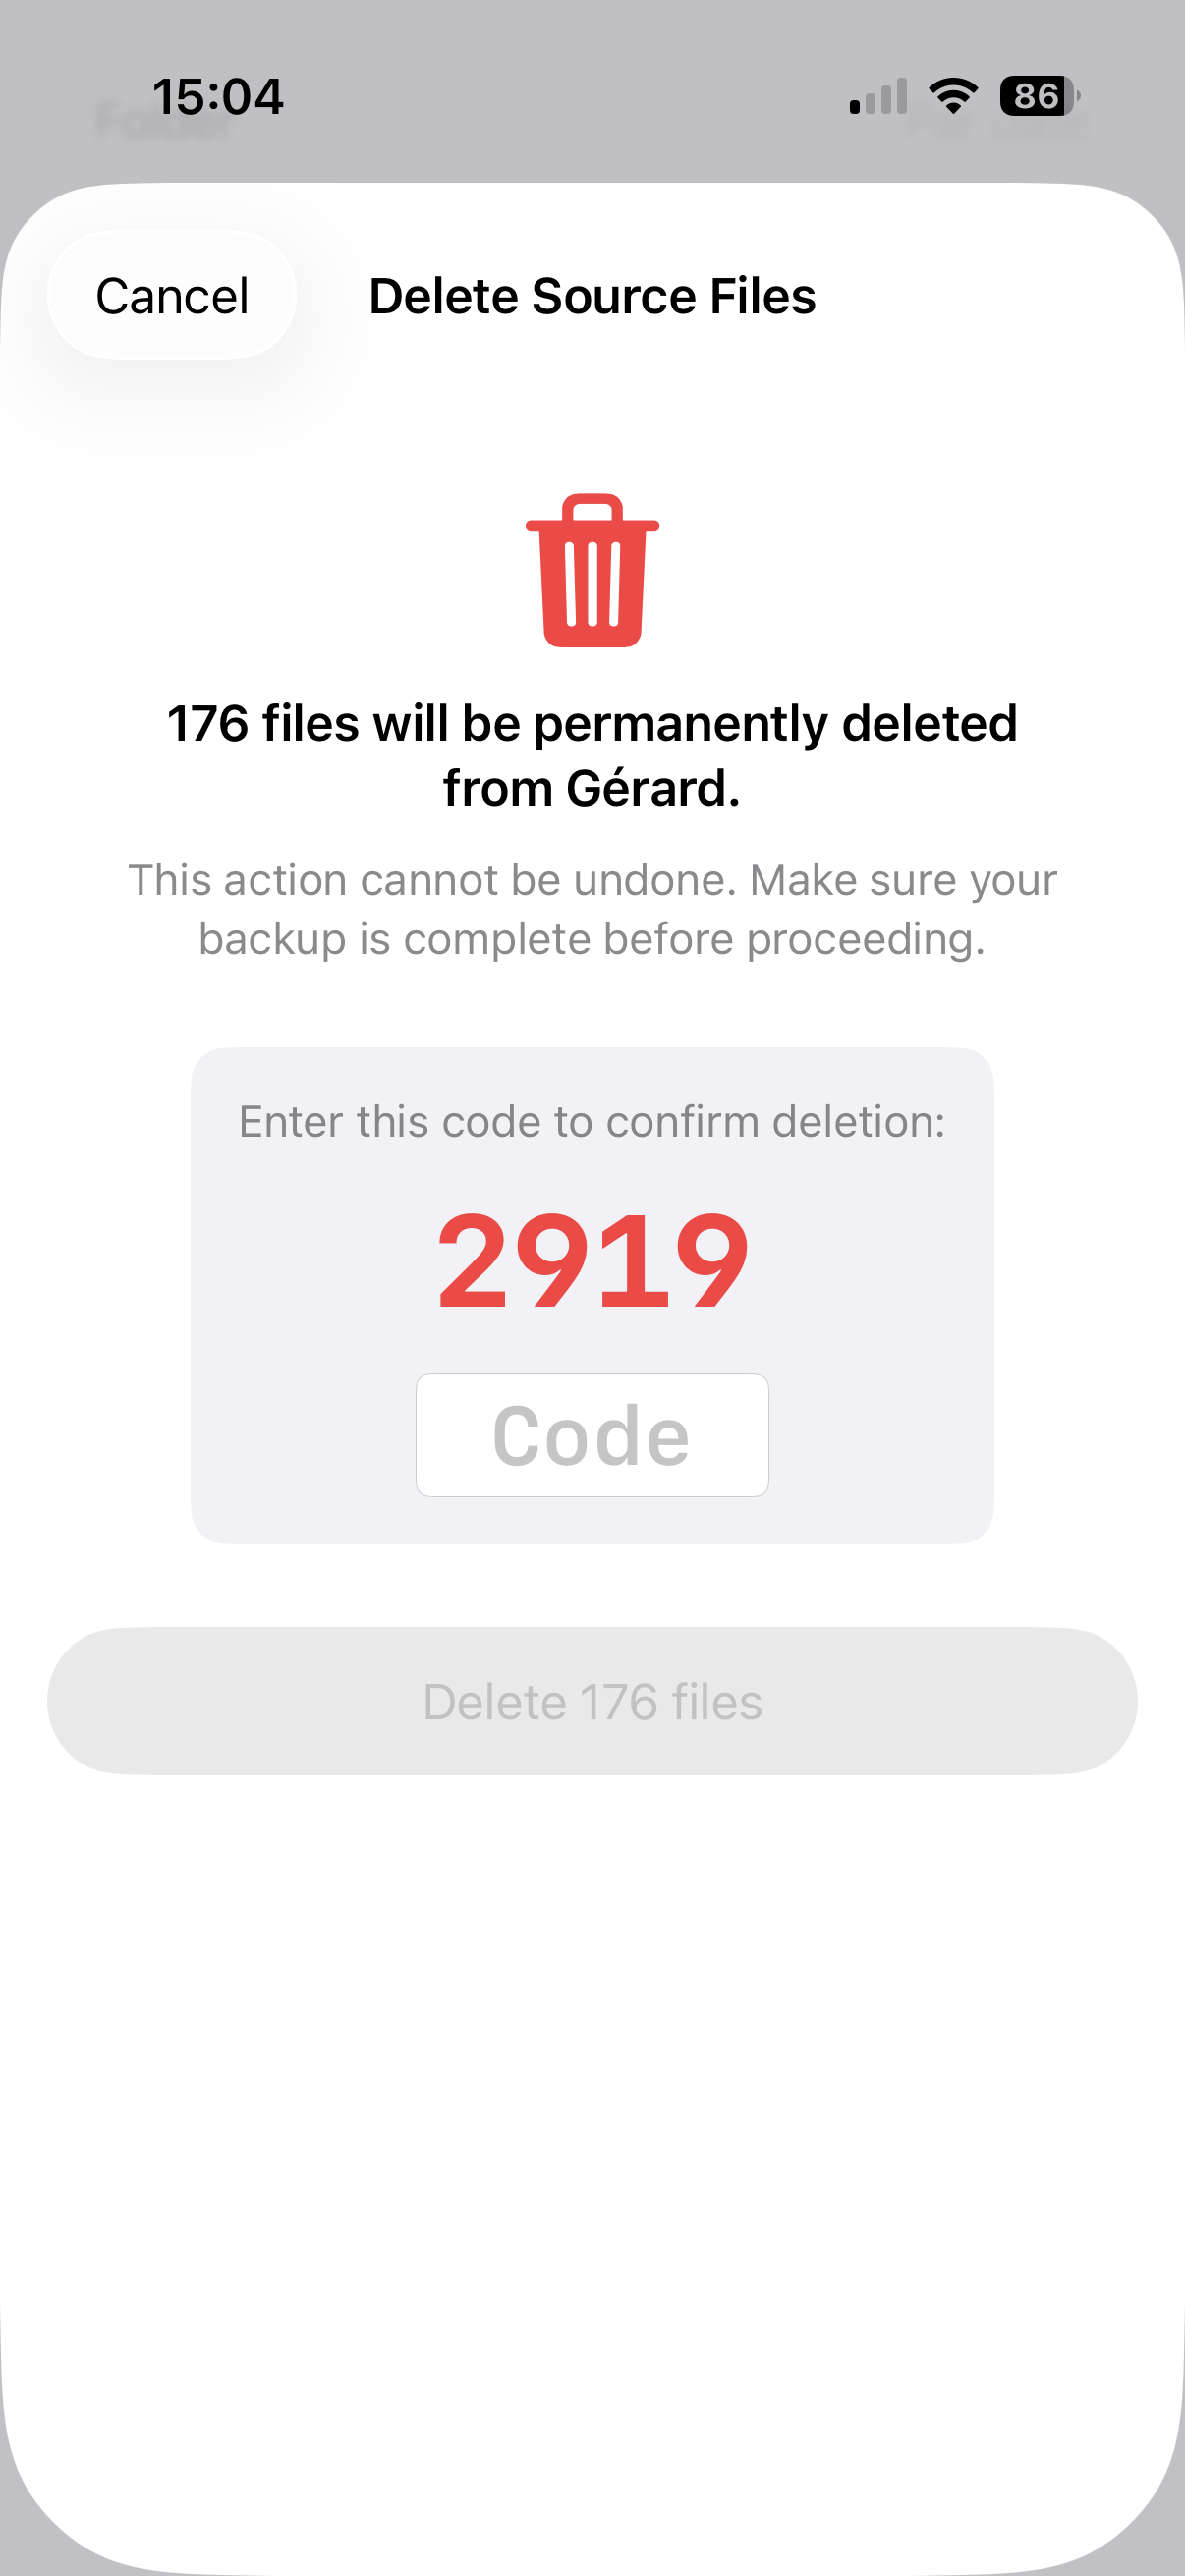
Note: For Photos Library sources, iOS will show an additional system confirmation dialog before deleting.
This action is permanent. Your backup on the SSD is not affected — only the original source files are removed.
Clearing the history
To delete all records, scroll to the bottom of the History tab and tap Clear History. This only deletes the records inside the app — it does not delete any files on your SSD.
11. Browsing and Sharing Your Backed-Up Files
The Browse tab (photo stack icon, third from left in the tab bar) lets you view everything that has been copied to your SSD, directly inside the app.
Your SSD must be plugged in to browse its contents.
Navigating your backup
Tap the Browse tab. You will see your SSD name with the list of device folders inside it — one folder per device or camera that has been backed up.
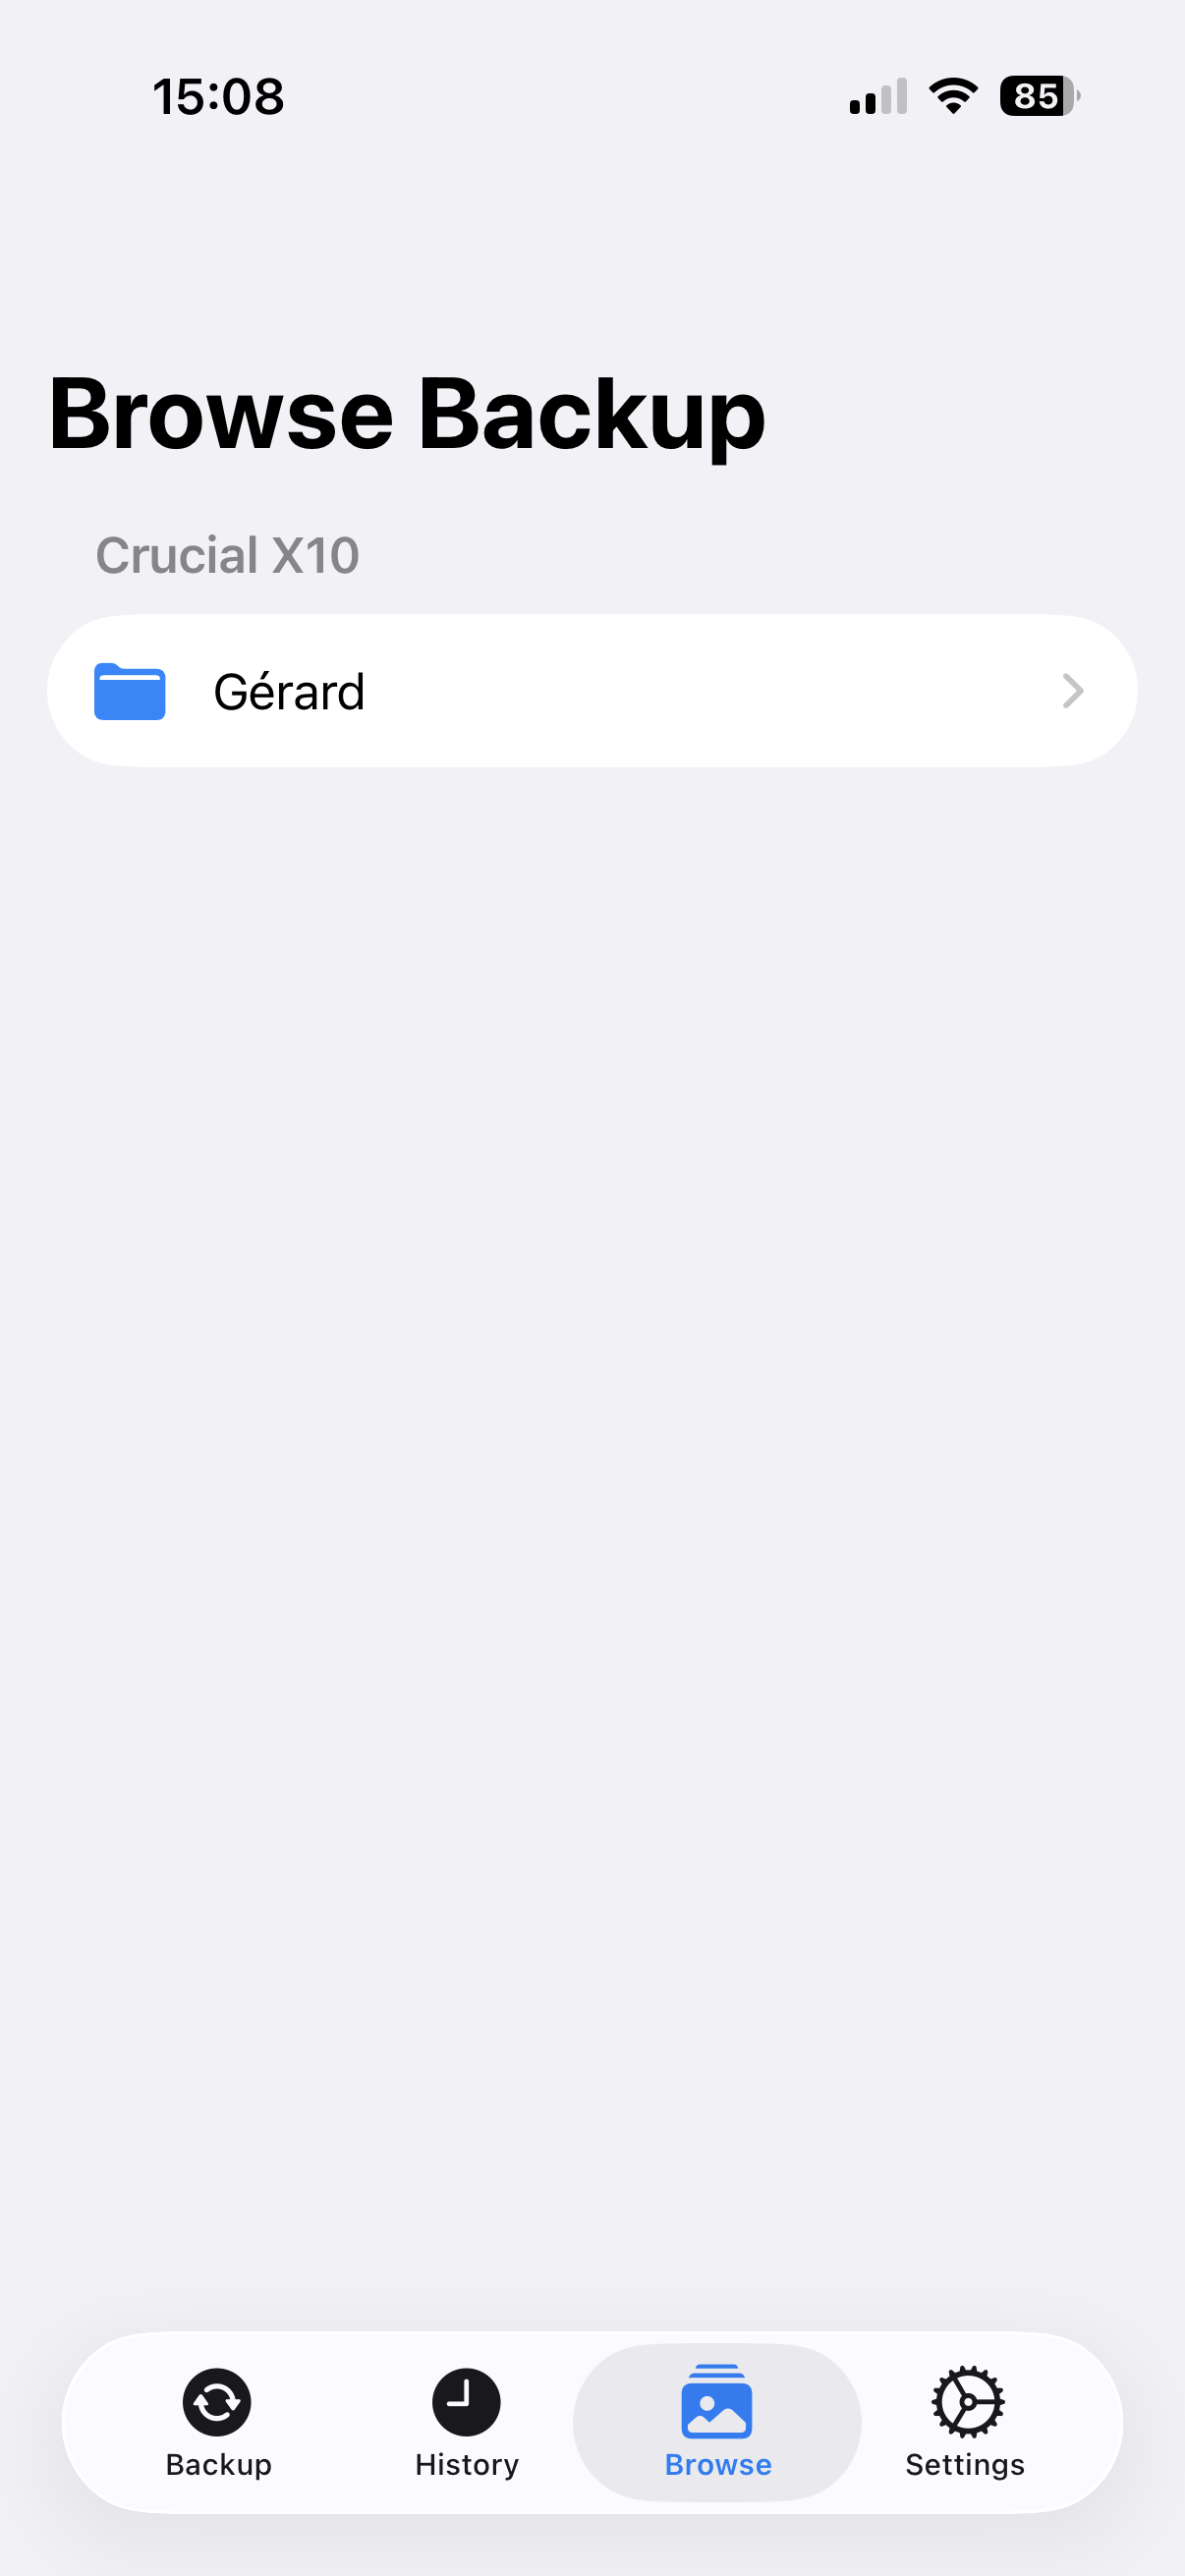
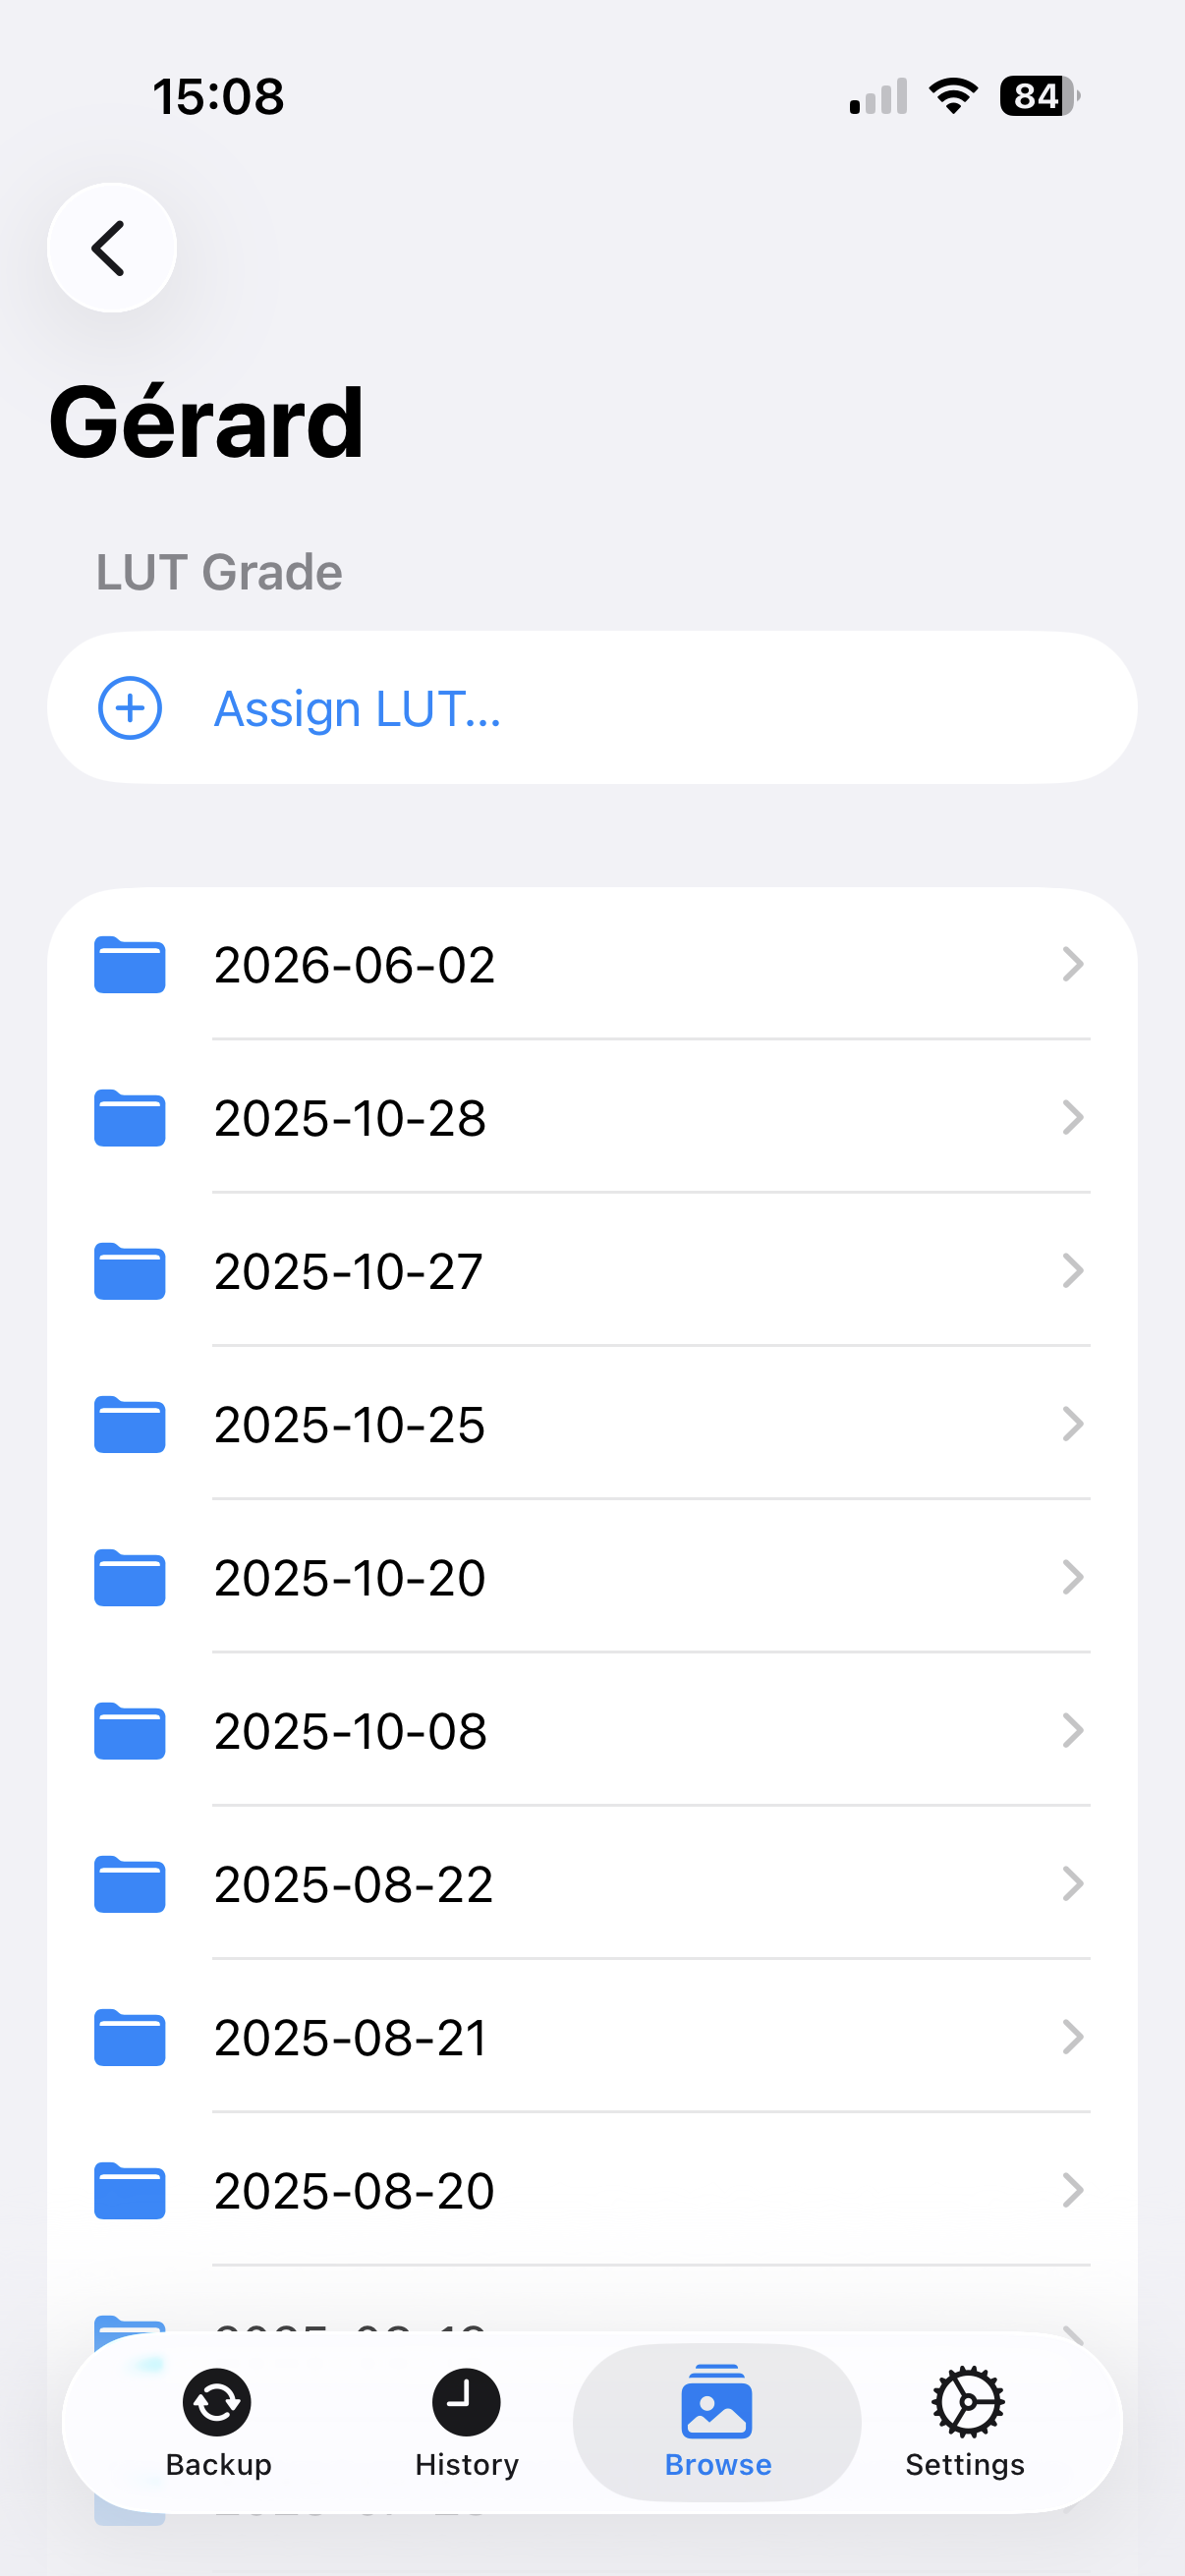
Tap a device folder to open it. At the top you will see a LUT Grade section (see below). Below that, the backup dates are listed from newest to oldest.
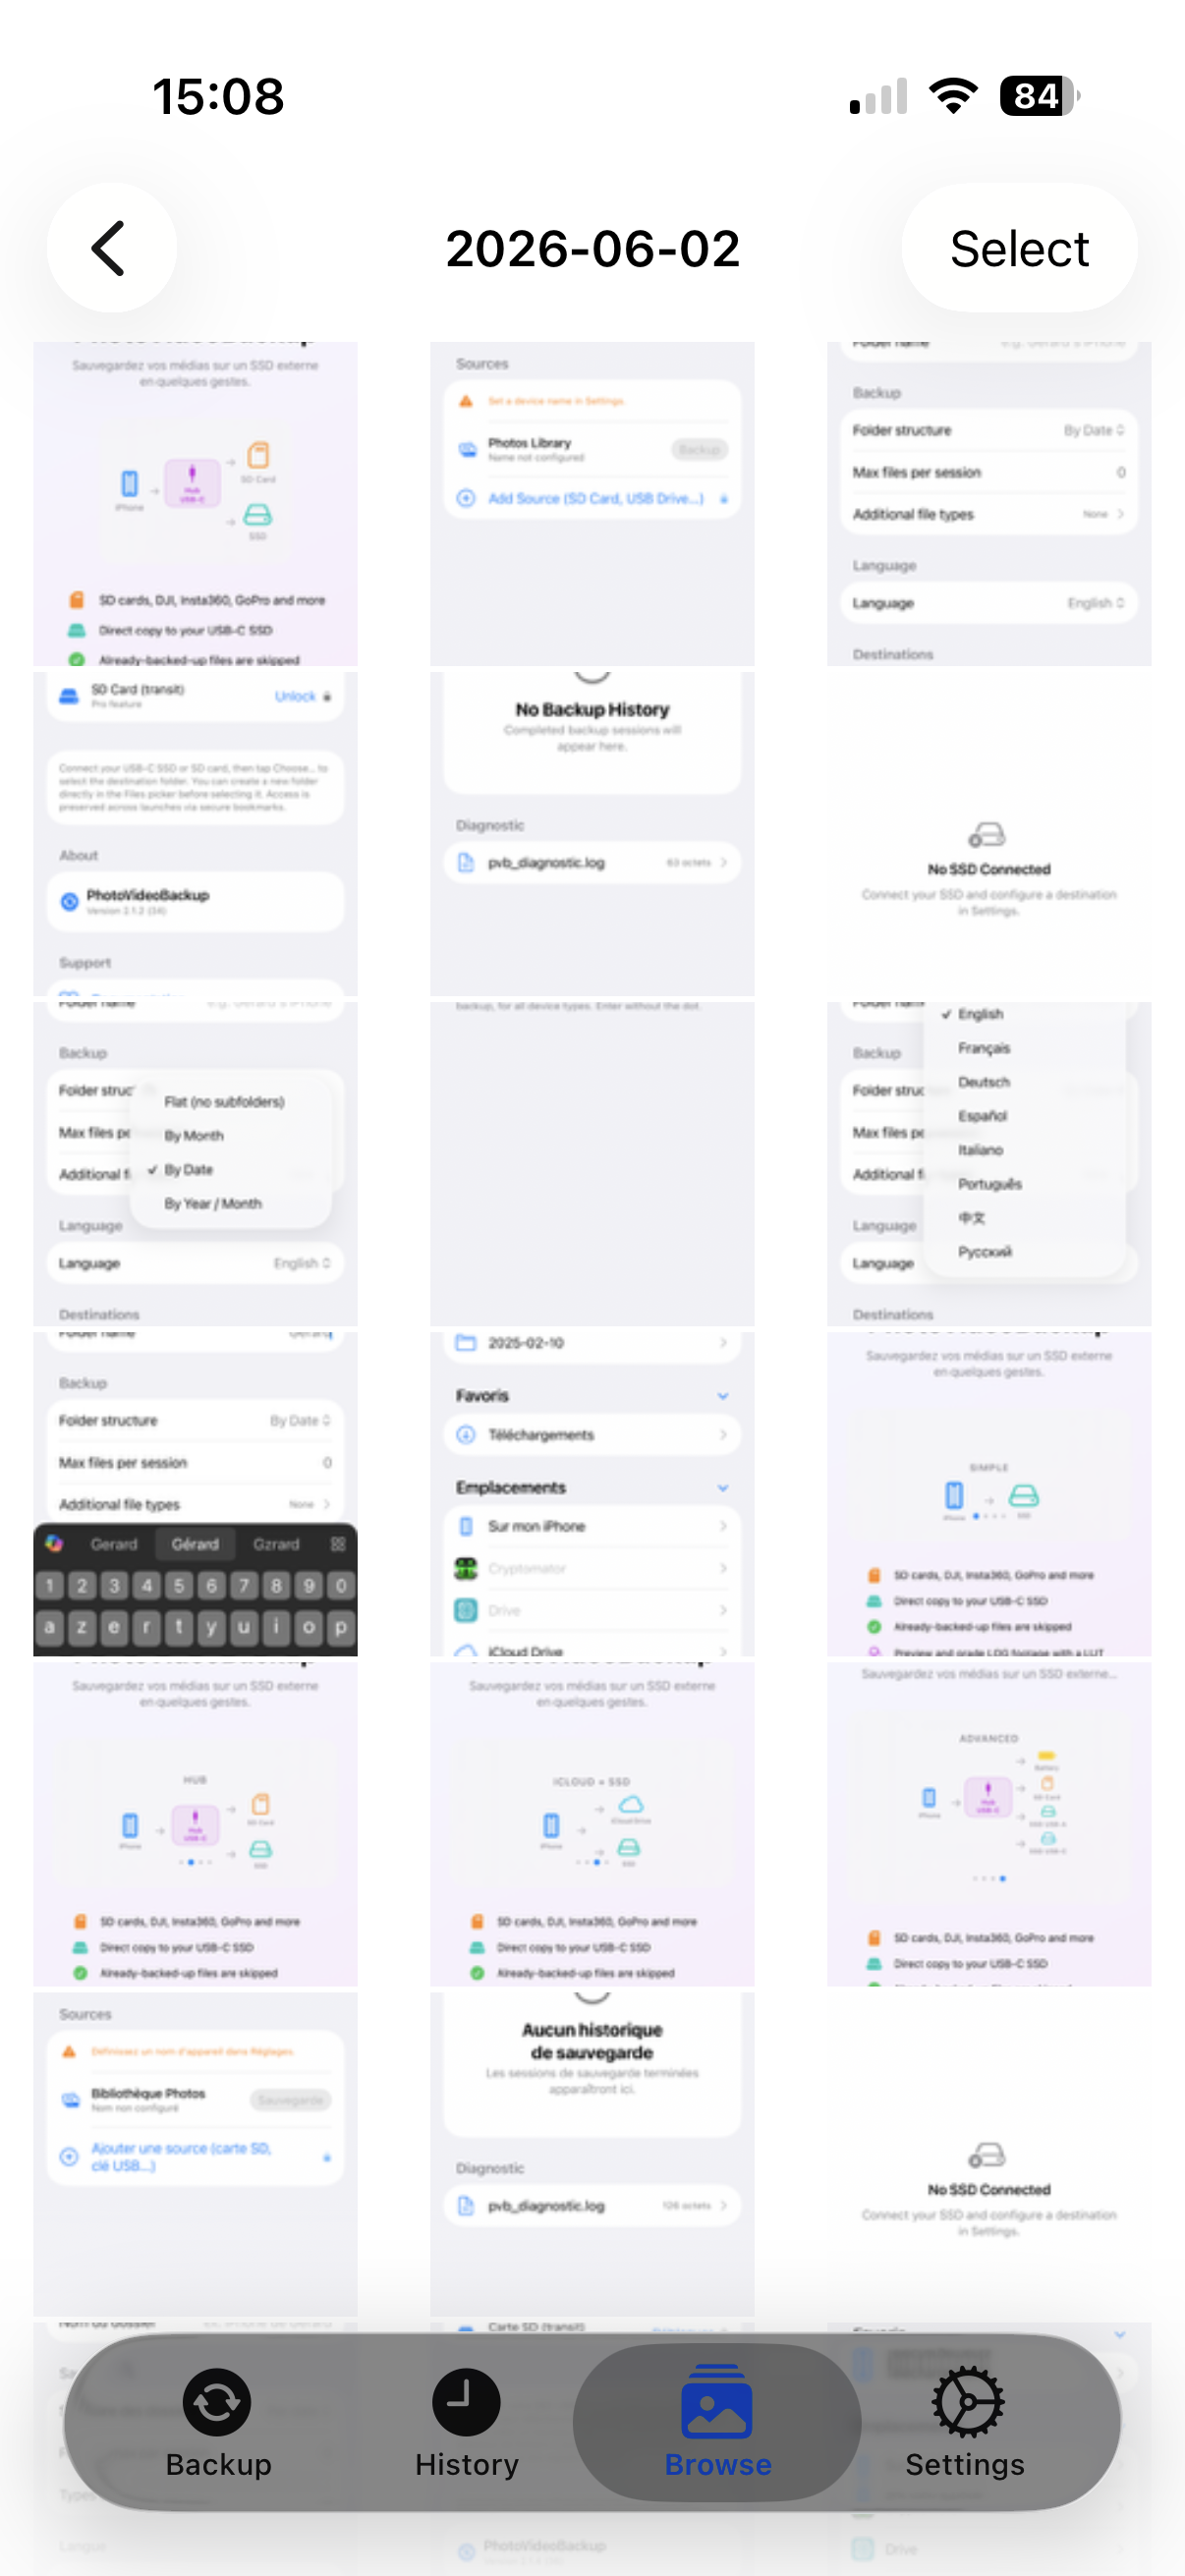
Tap a date to open the media grid for that day: a gallery of thumbnails for all the files copied on that date. Photos show a preview; videos show a thumbnail with a play icon.
Tap a photo to view it full size. Tap a video to play it in full-screen with transport controls.
Selecting and sharing files
To send files to another app, AirDrop them, or attach them to a message:
- Tap Select in the top-right corner of the media grid.
- Tap the thumbnails you want — each one gets a blue checkmark. Unselected items appear dimmed.
- Tap Share (N) in the top-right corner.
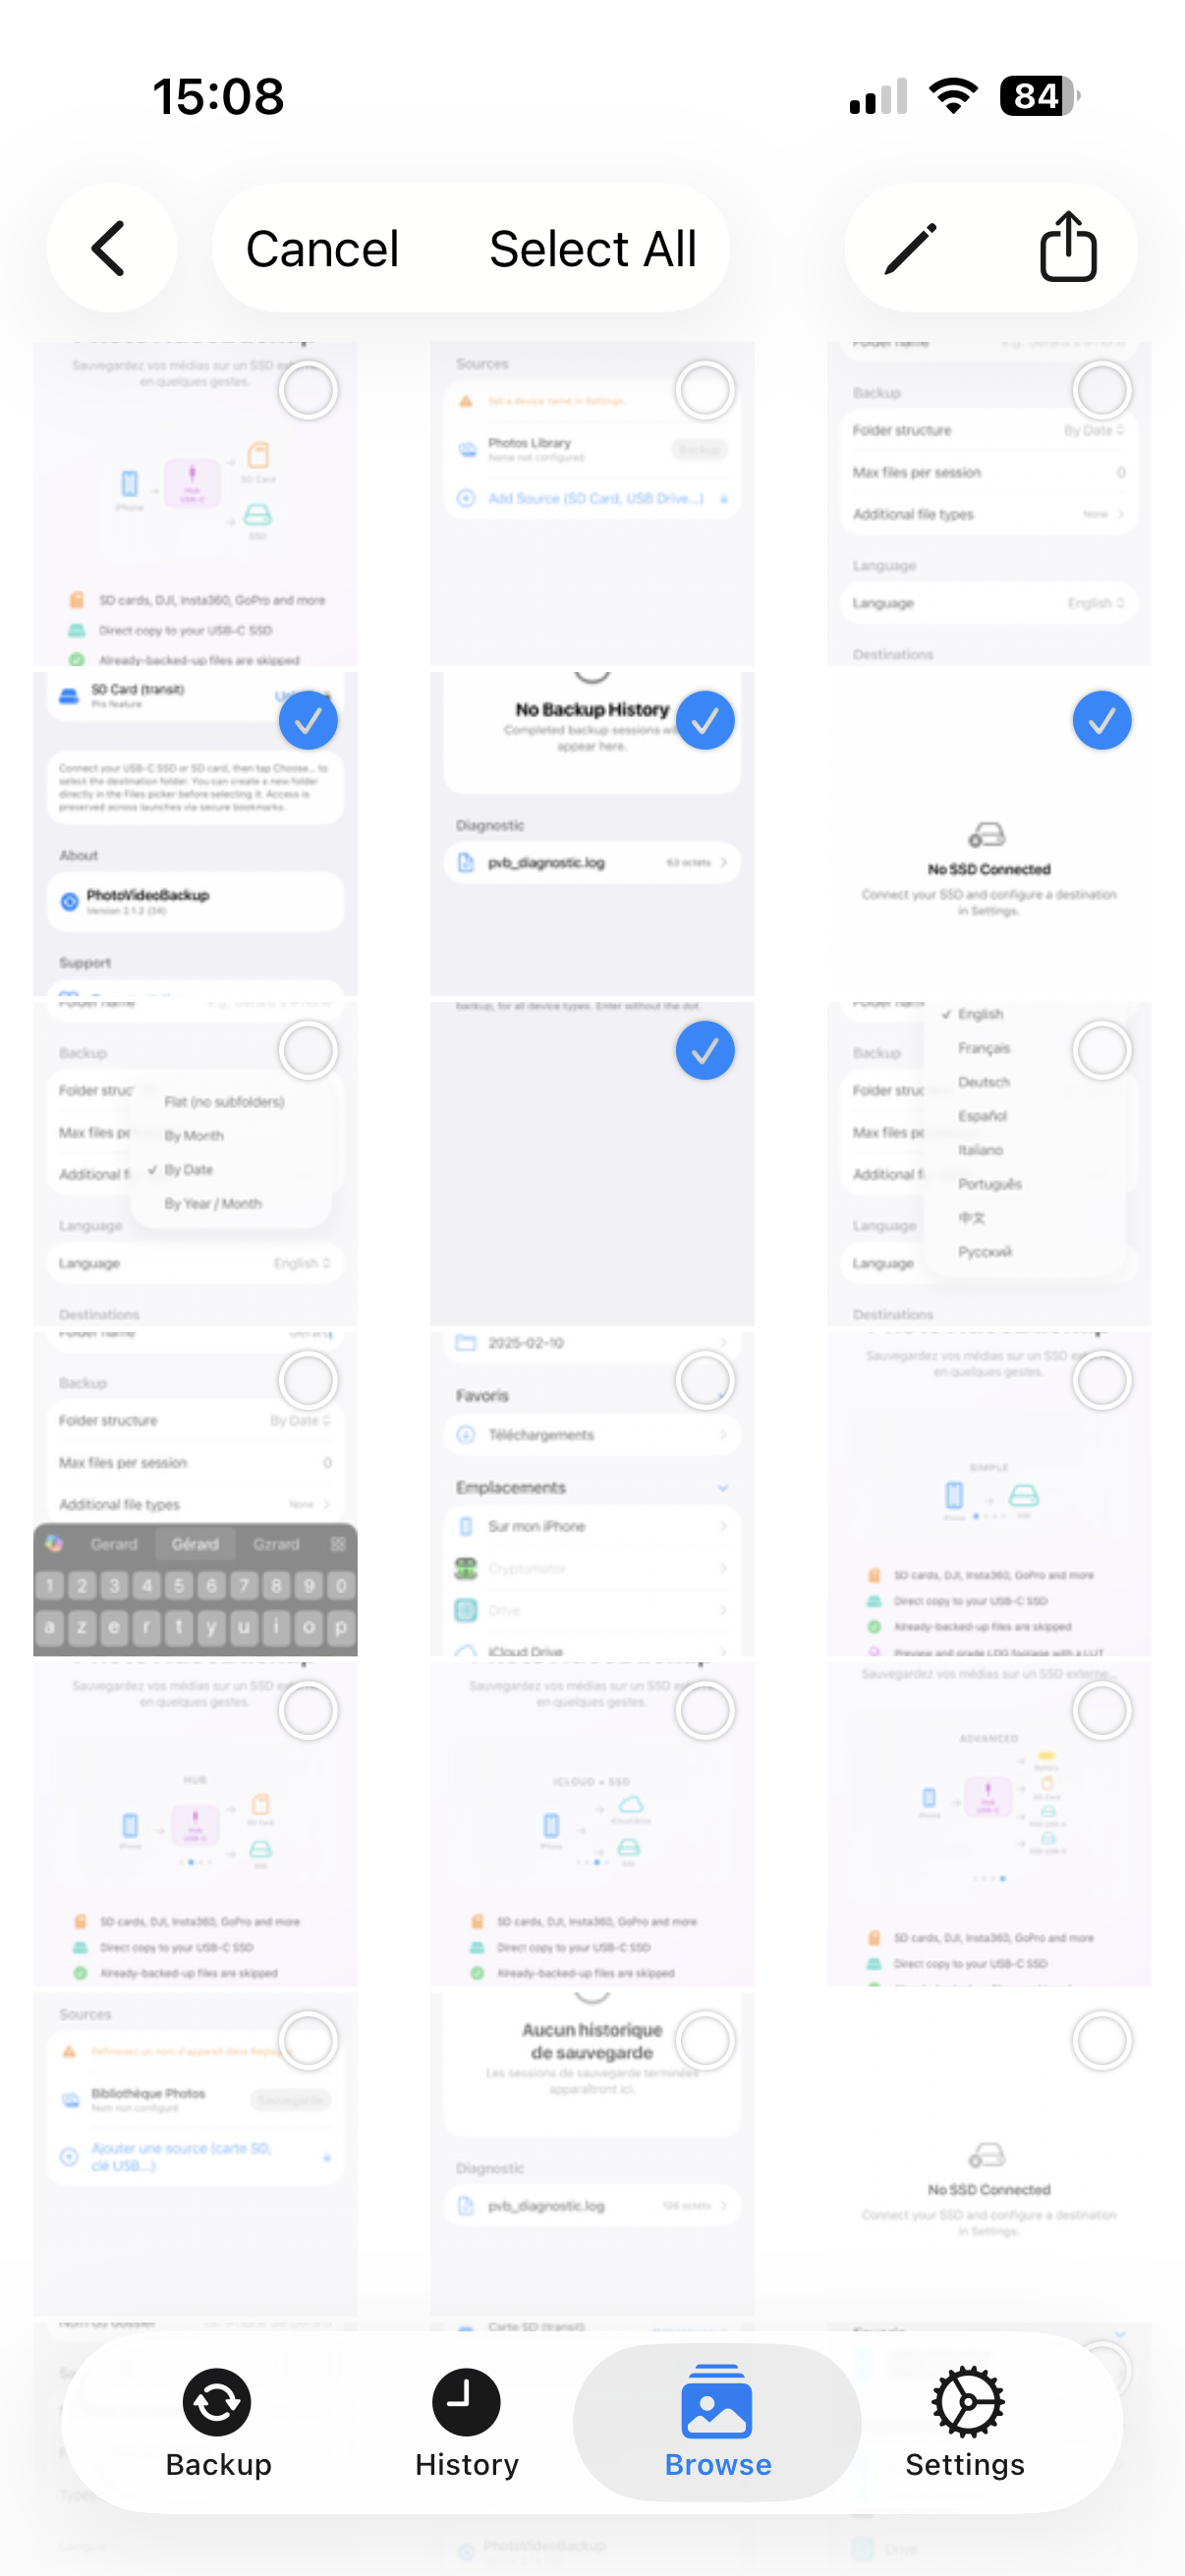
The app copies the selected files to a temporary folder and opens the standard iOS share sheet. From there you can:
- Send via AirDrop to a nearby Mac or iPhone
- Attach to a Messages or Mail message
- Save to the Photos library
- Open in VLC, LumaFusion, DaVinci Resolve, or any other compatible app
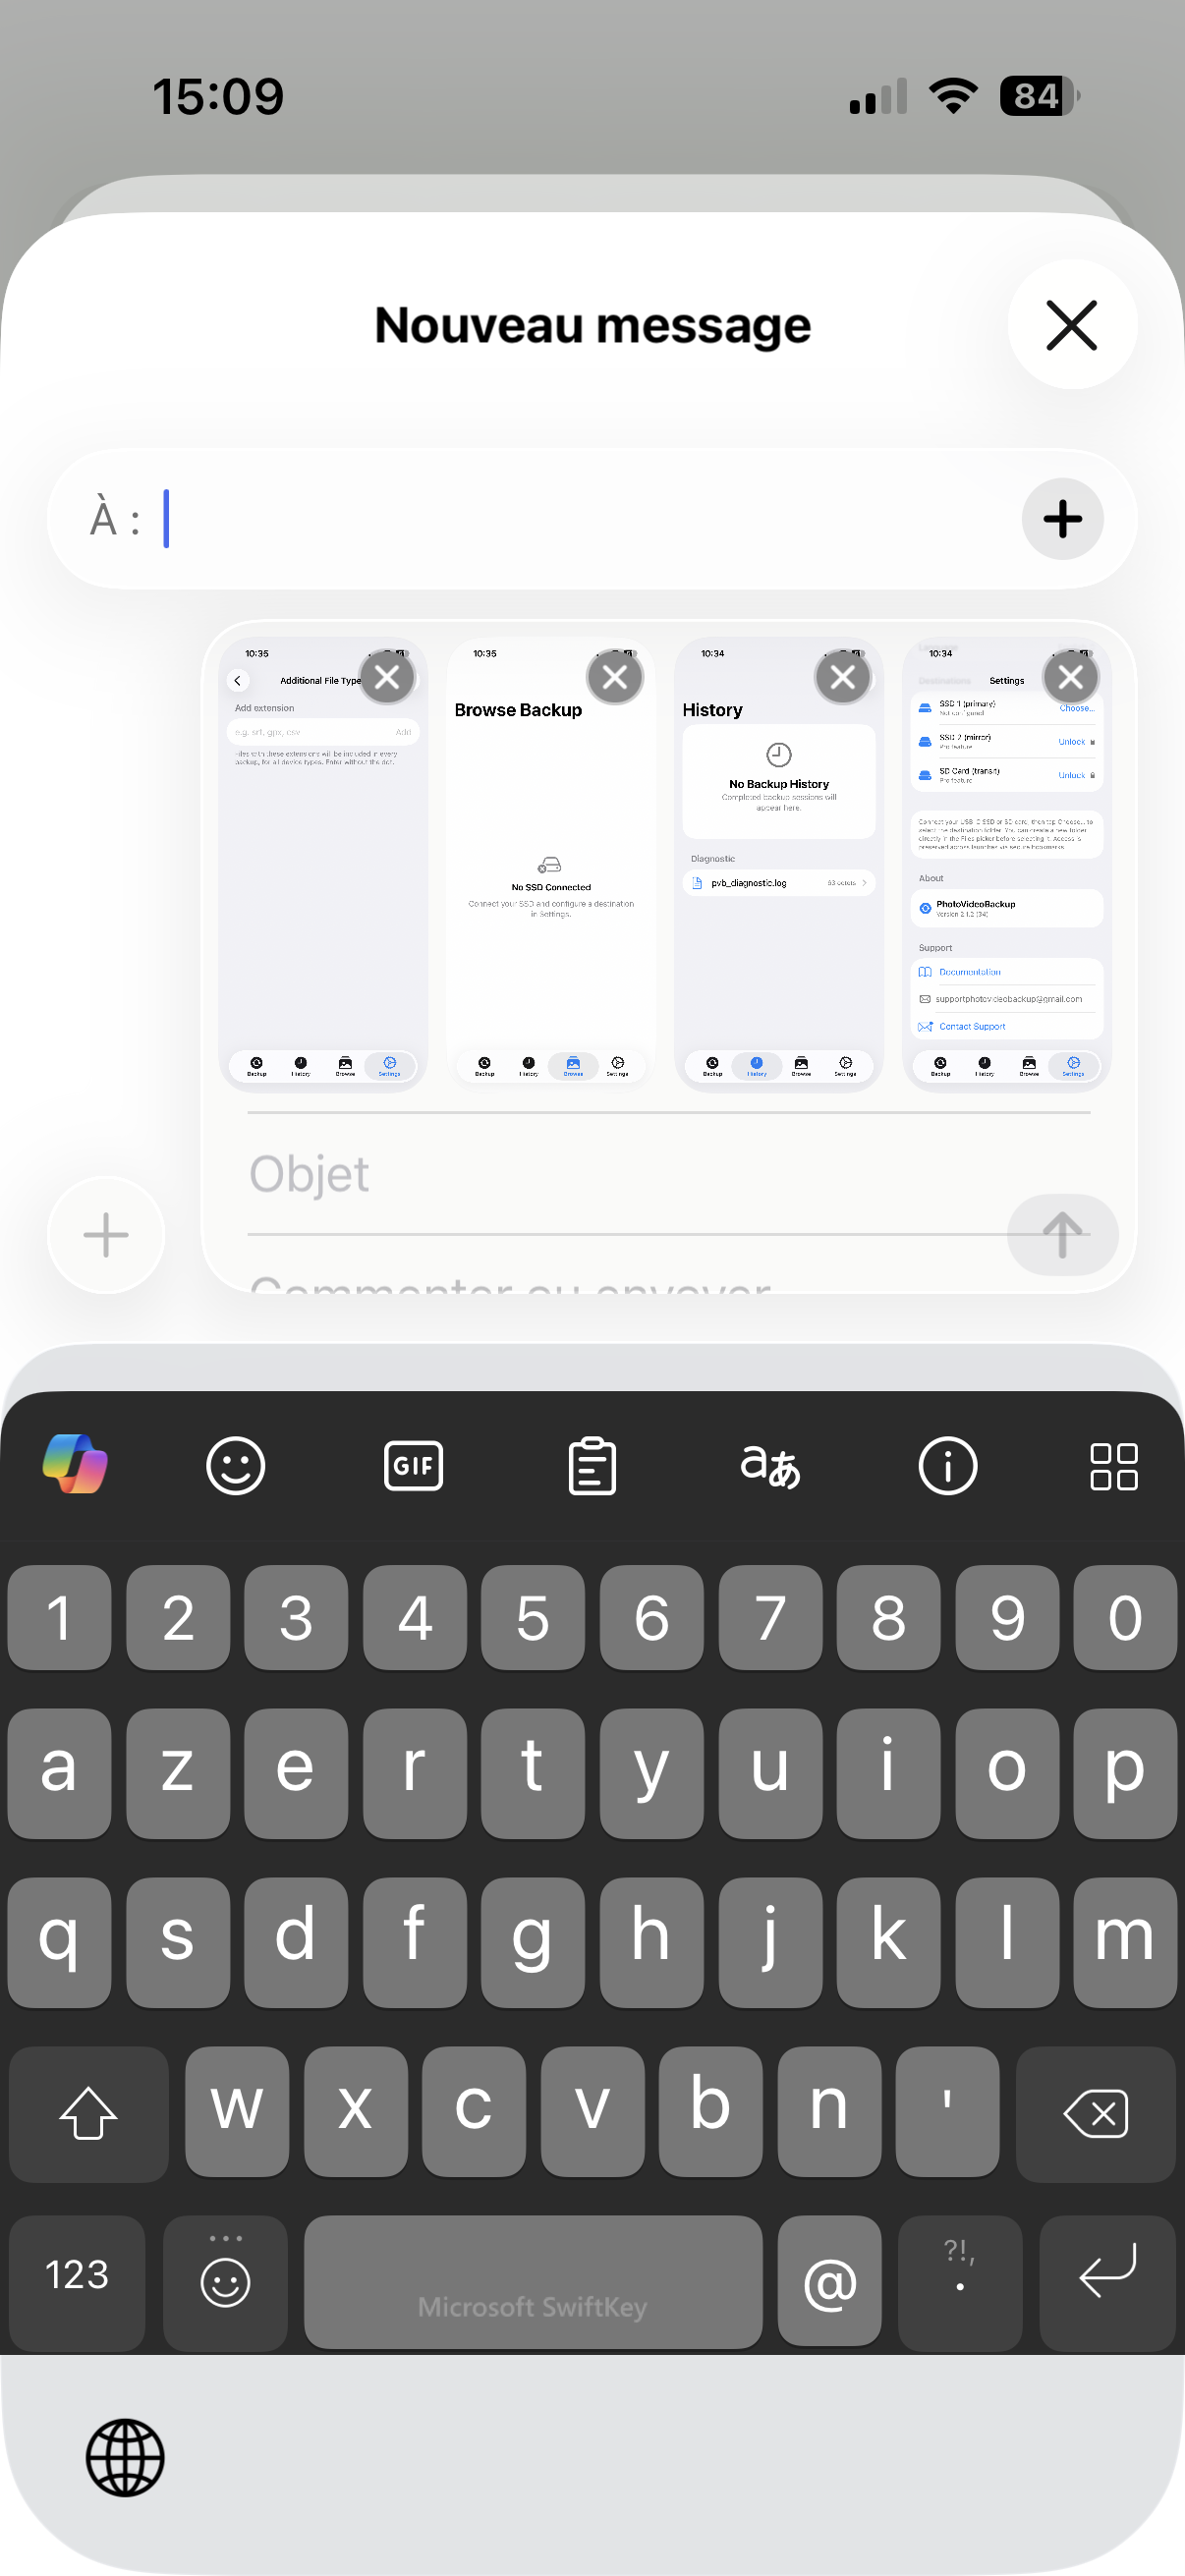
Tap Cancel in the toolbar to exit selection mode without sharing.
Batch rename files
You can rename a group of files at once using a pattern with date tokens, an index counter, and the original filename.
- Tap Select in the top-right corner of the media grid.
- Tap individual files, or tap Select All to select everything in the folder.
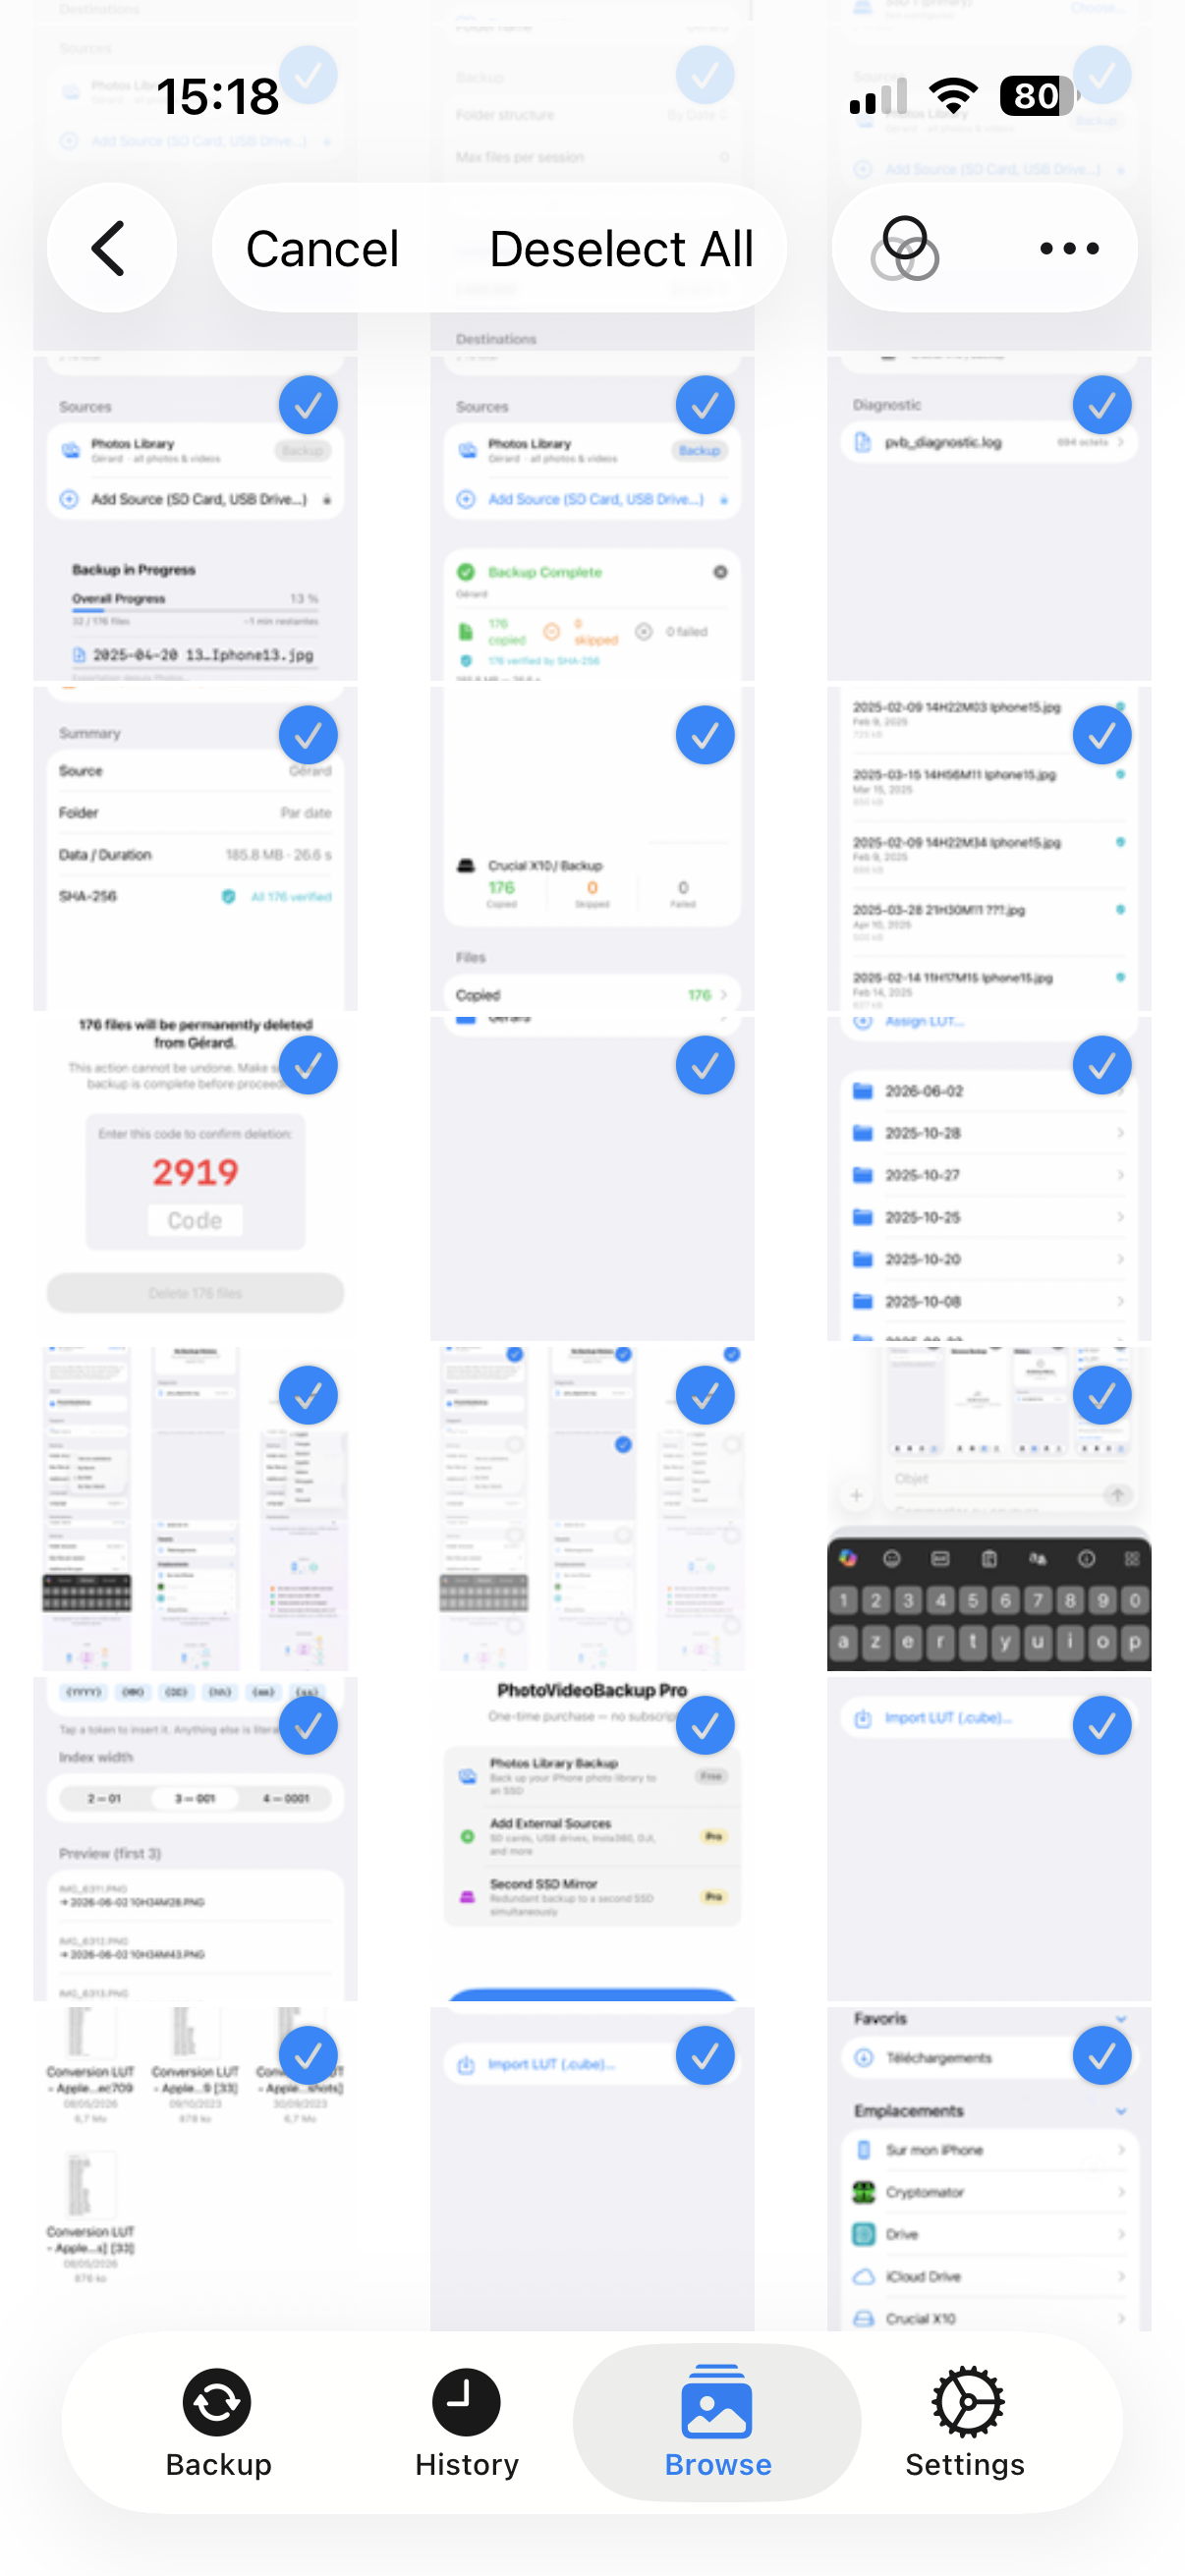
- Tap Rename (N) in the toolbar.
The rename sheet opens with a pattern editor.
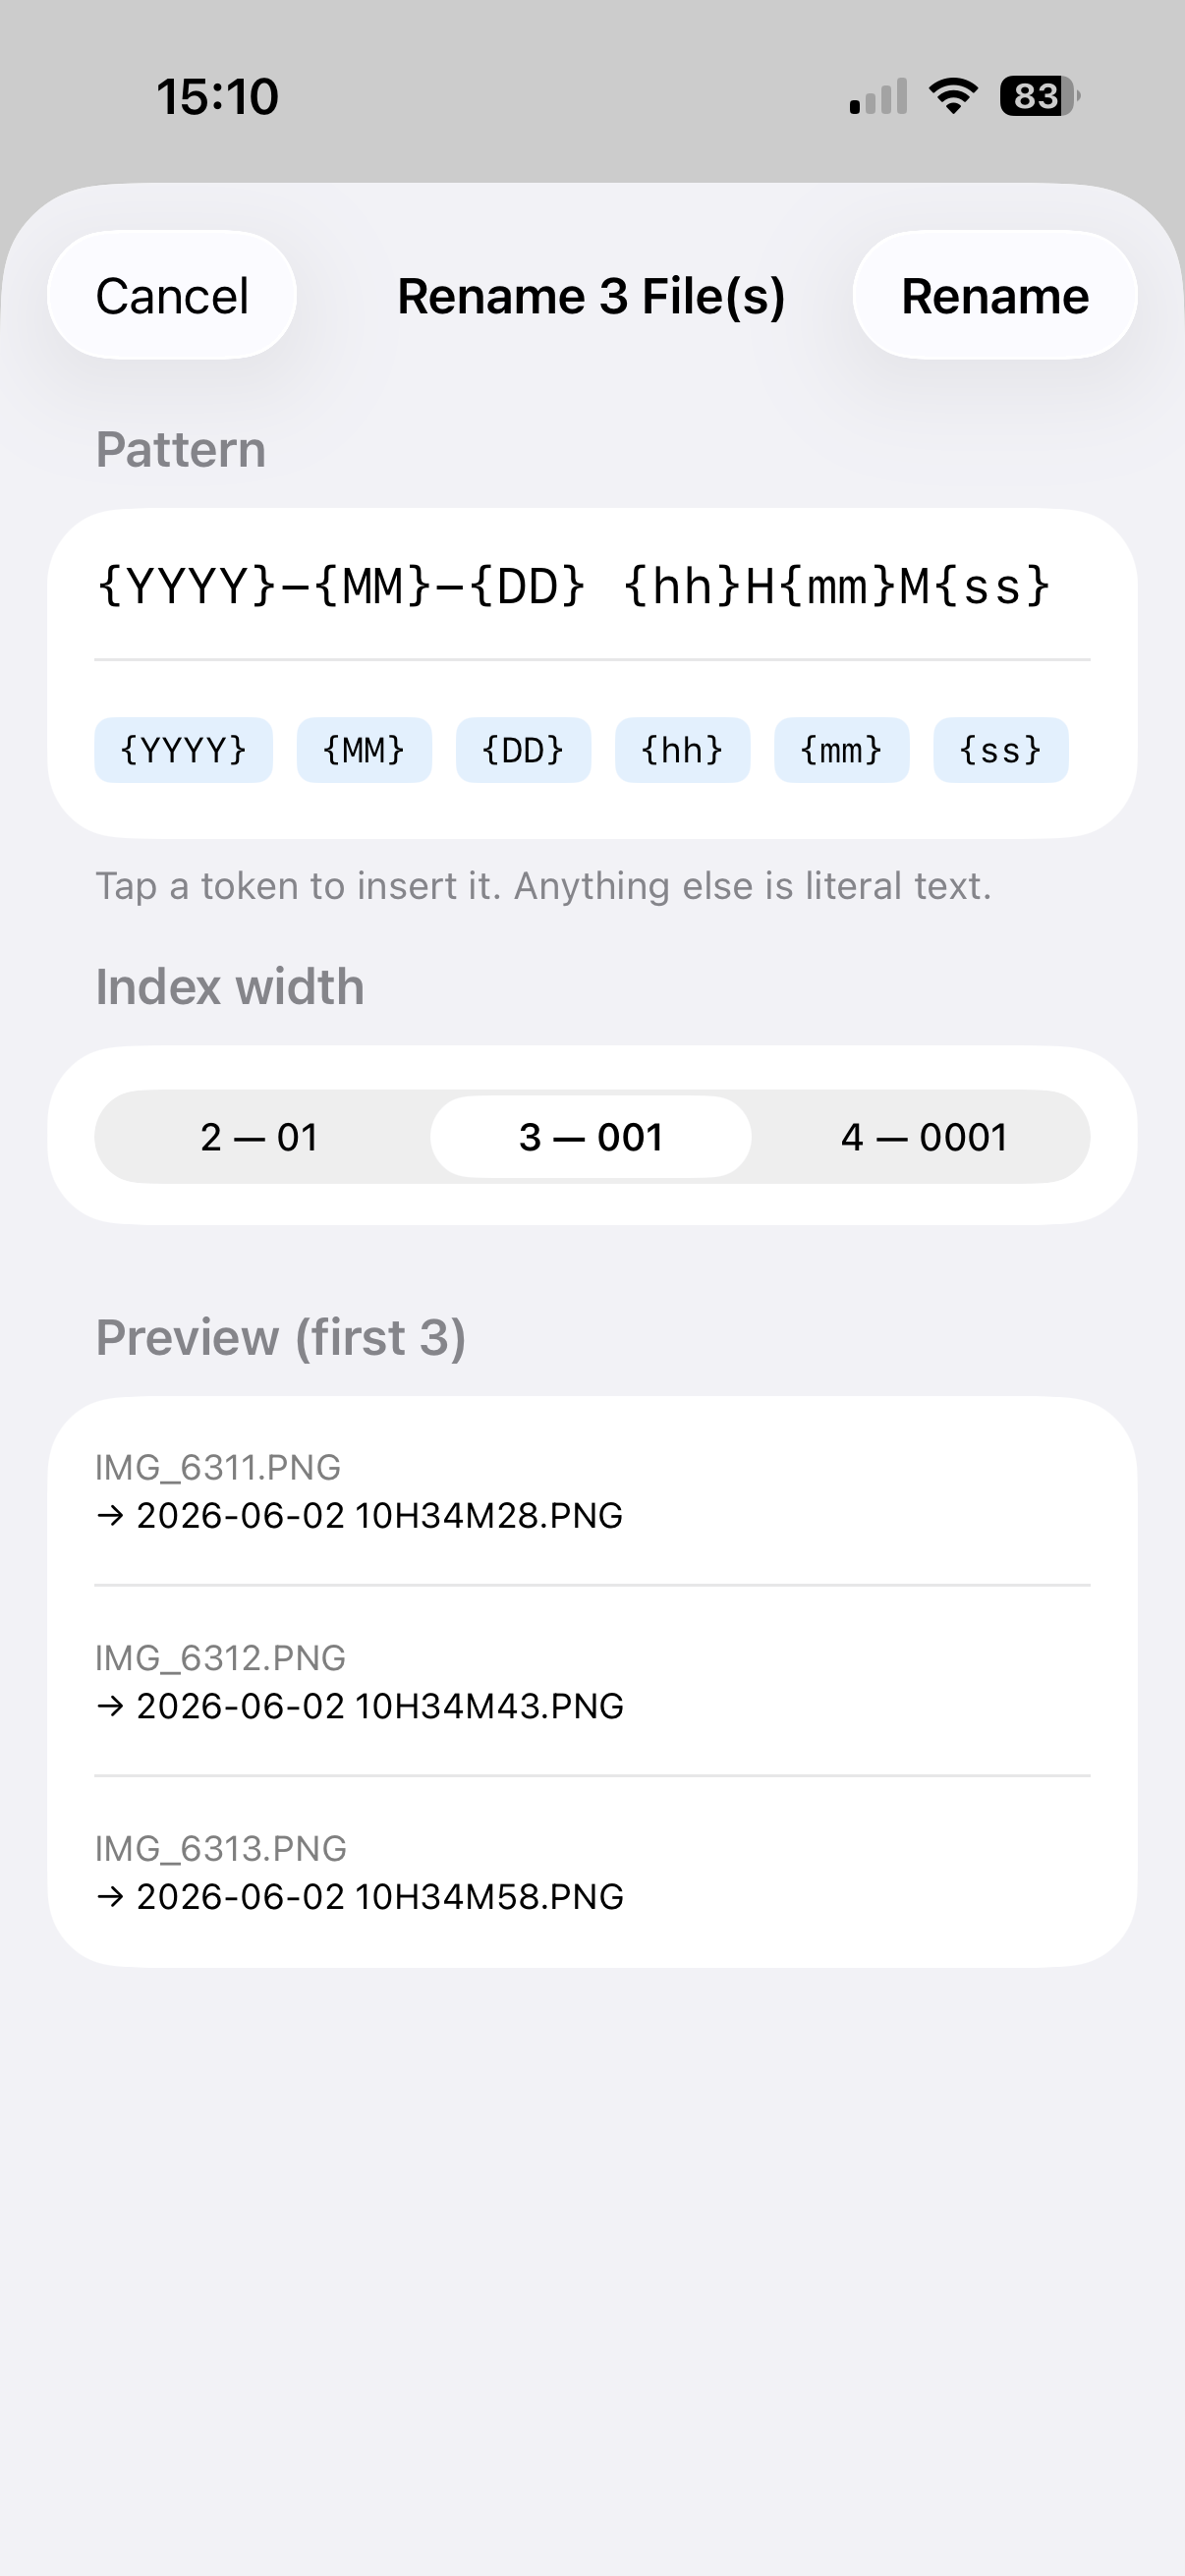
Available tokens:
| Token | Replaced by |
|---|---|
{YYYY} |
Capture year — e.g. 2026 |
{MM} |
Capture month — e.g. 06 |
{DD} |
Capture day — e.g. 02 |
{hh} |
Capture hour — e.g. 10 |
{mm} |
Capture minute — e.g. 34 |
{ss} |
Capture second — e.g. 28 |
{index} |
Sequential number (width selectable: 2, 3, or 4 digits) |
{original} |
Original filename without extension |
Anything typed between tokens is treated as literal text. Tap a token chip to insert it at the cursor.
The Index width picker controls zero-padding: 2 → 01, 3 → 001, 4 → 0001.
The Preview section shows how the first three filenames will look before you confirm. Tap Rename to apply.
Dates are taken from the file’s capture date (EXIF for photos, video container metadata for videos) — not the filesystem date.
If a target filename already exists, the app appends
_2,_3… automatically to avoid conflicts.
LUT Grade — apply a look to LOG footage
If you shoot in LOG (DJI D-Log M, GoPro Protune, etc.), your footage looks flat and grey until a LUT (Look Up Table) is applied. The Browse tab lets you assign a LUT to any device folder and preview or permanently grade your footage without leaving the app.
Step 1 — Import a LUT
Tap the device folder. In the LUT Grade section, tap Assign LUT….
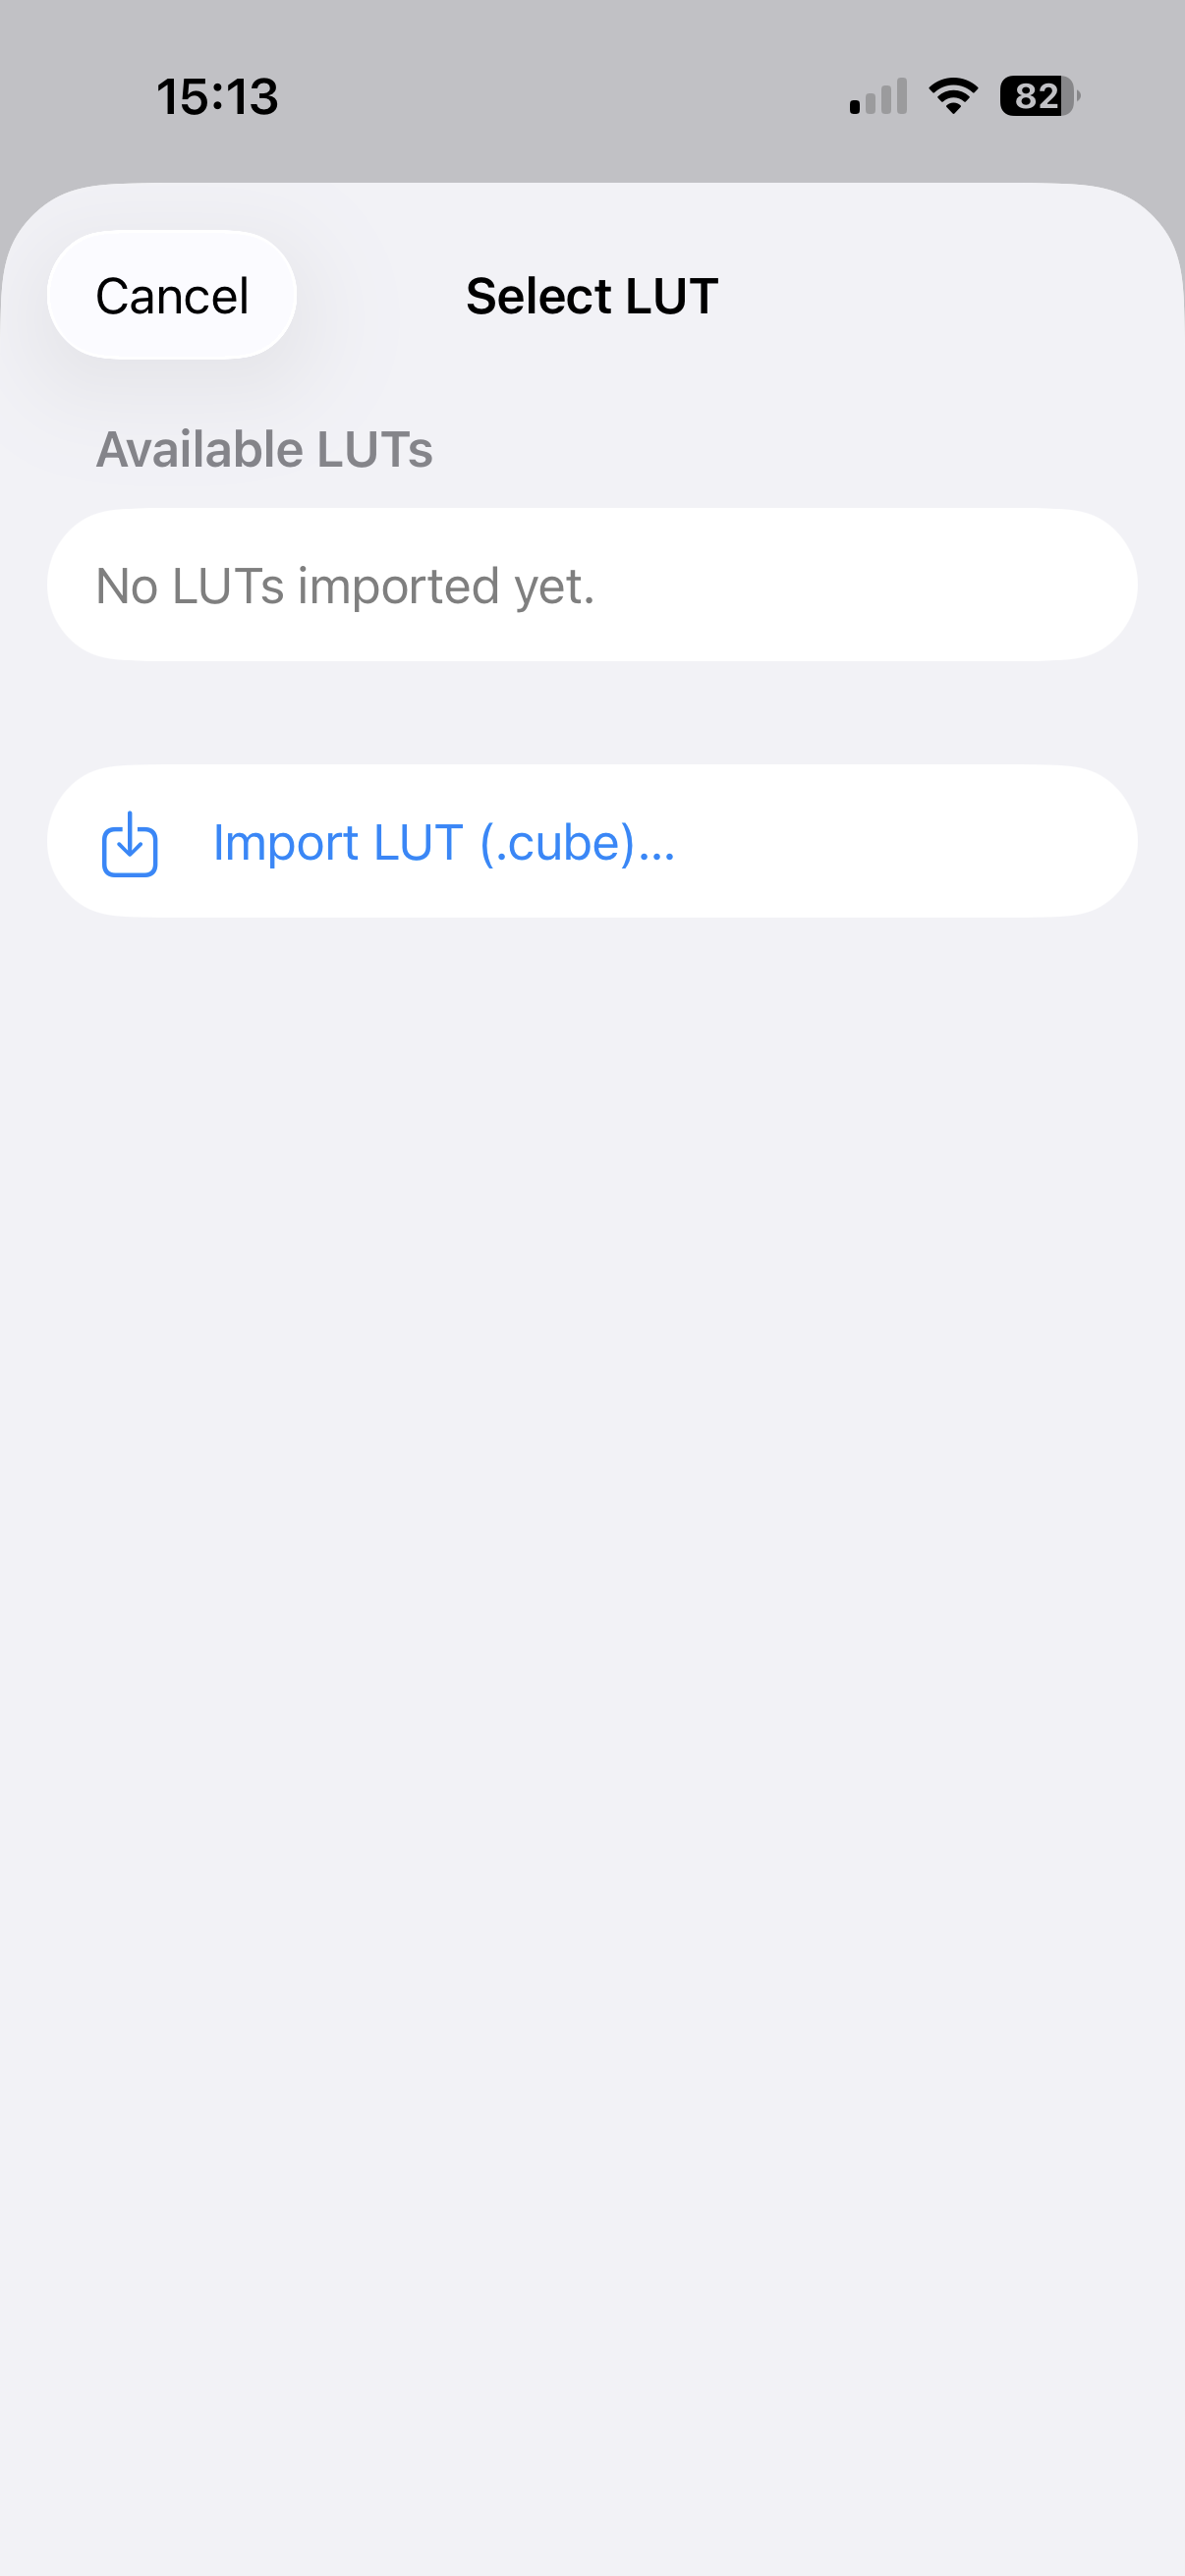
Tap Import LUT (.cube)… to open the file picker and select a .cube file from your Files app, iCloud Drive, or any connected drive. The LUT is copied into the app’s storage and is available for all future sessions.
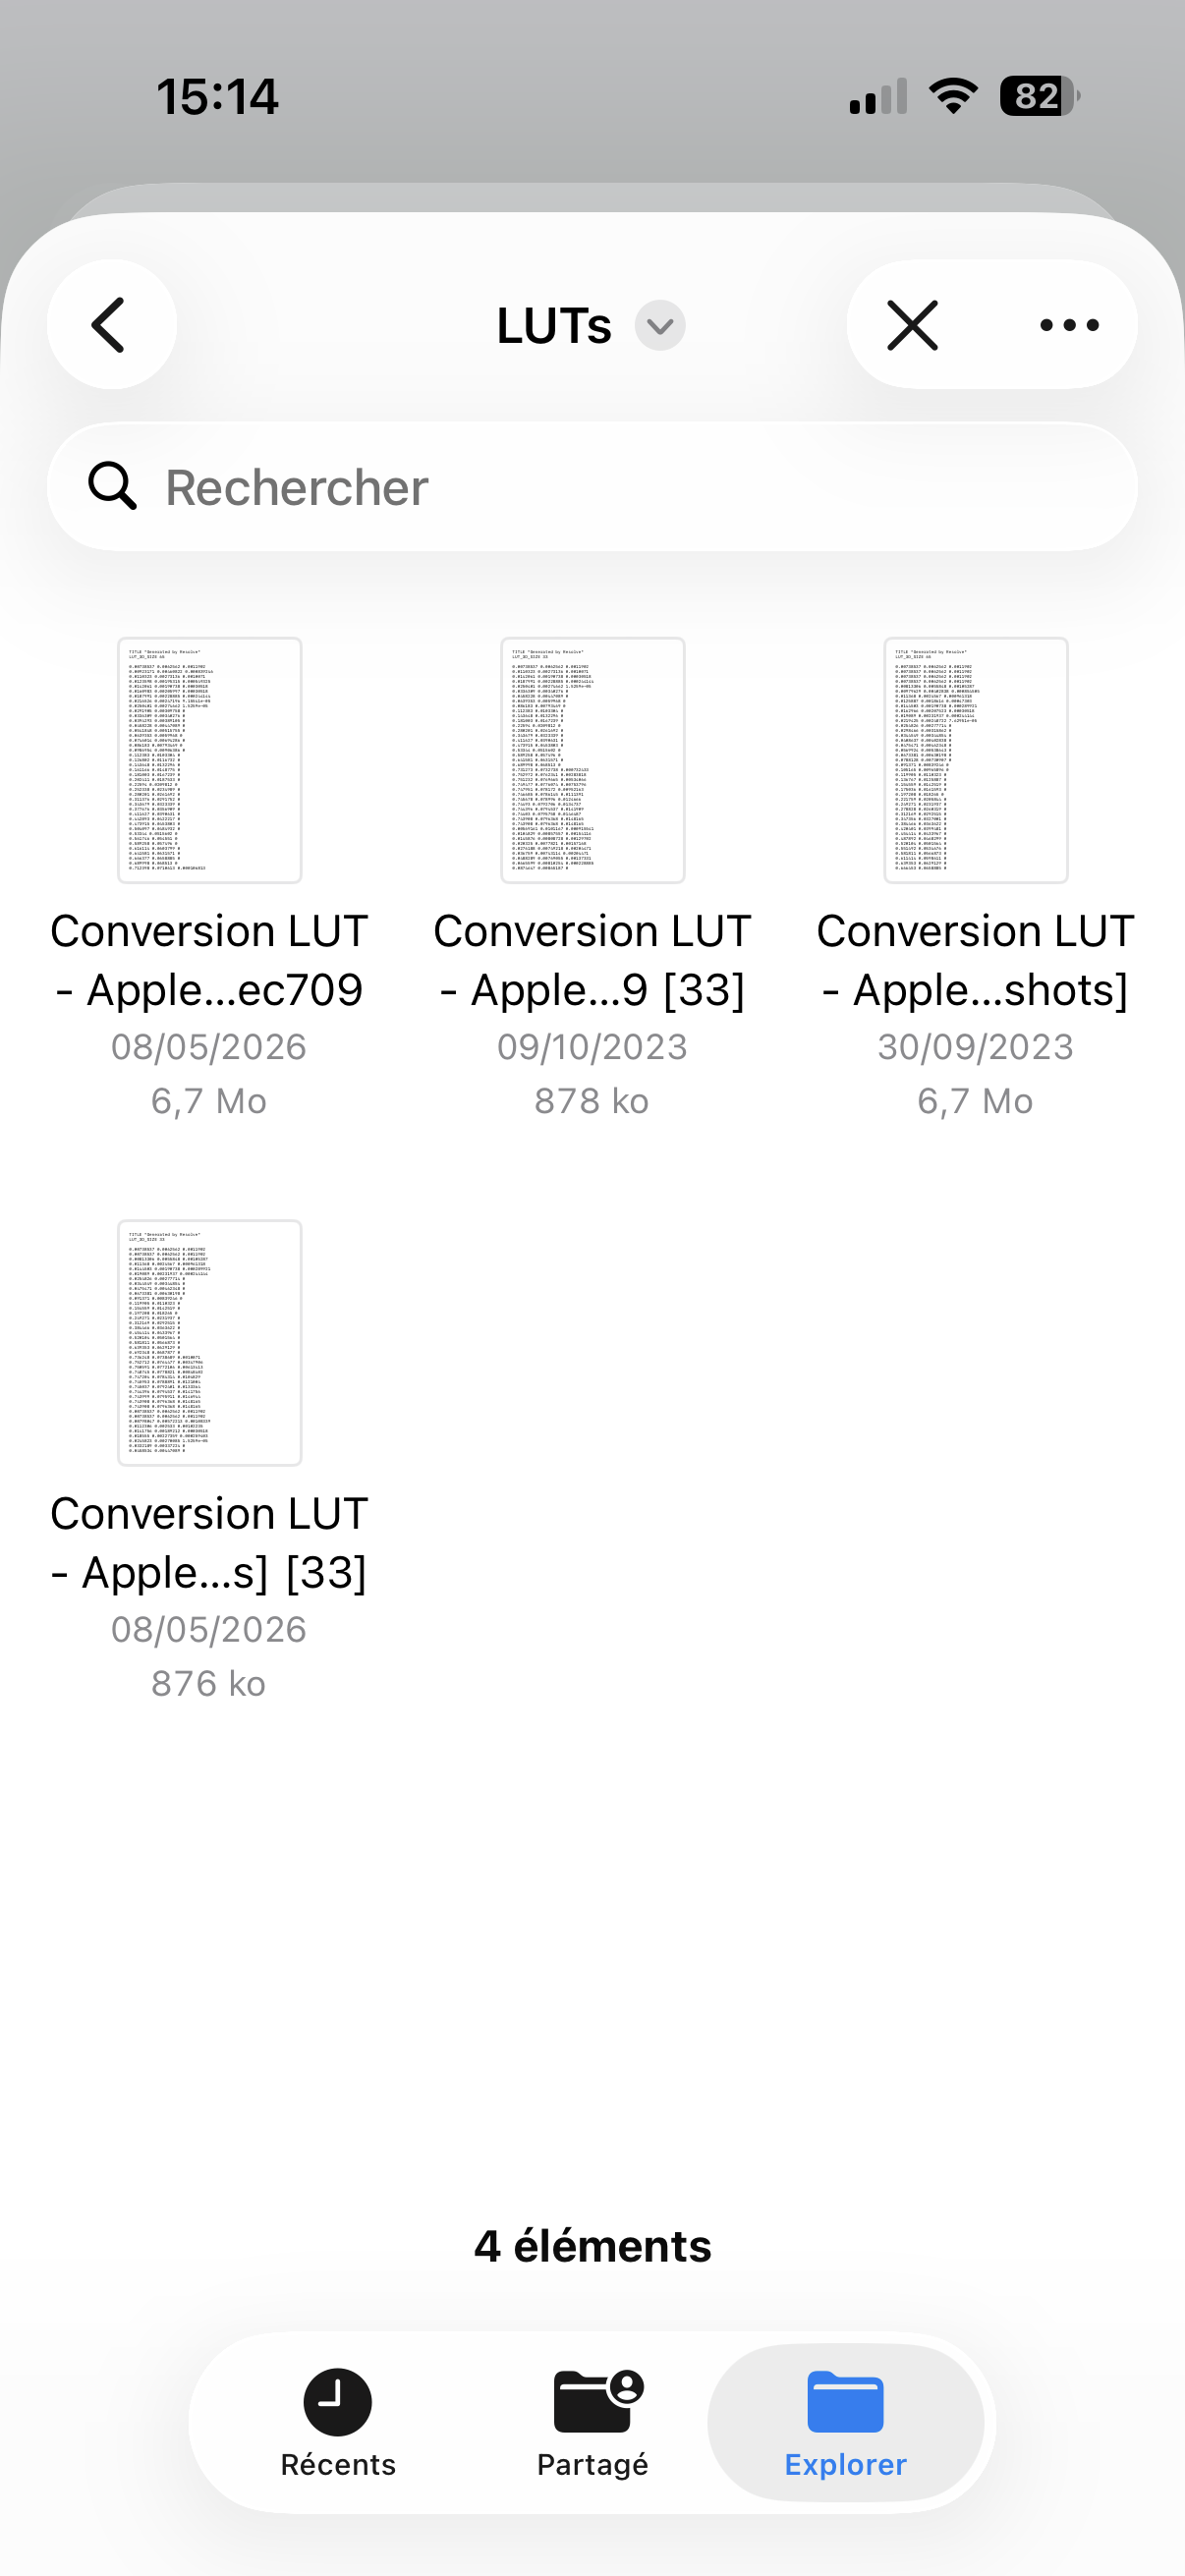
Any standard
.cubefile exported from DaVinci Resolve, Final Cut Pro, or downloaded from your camera manufacturer works.
Once a LUT is assigned, it appears in the LUT Grade section with a Remove button.
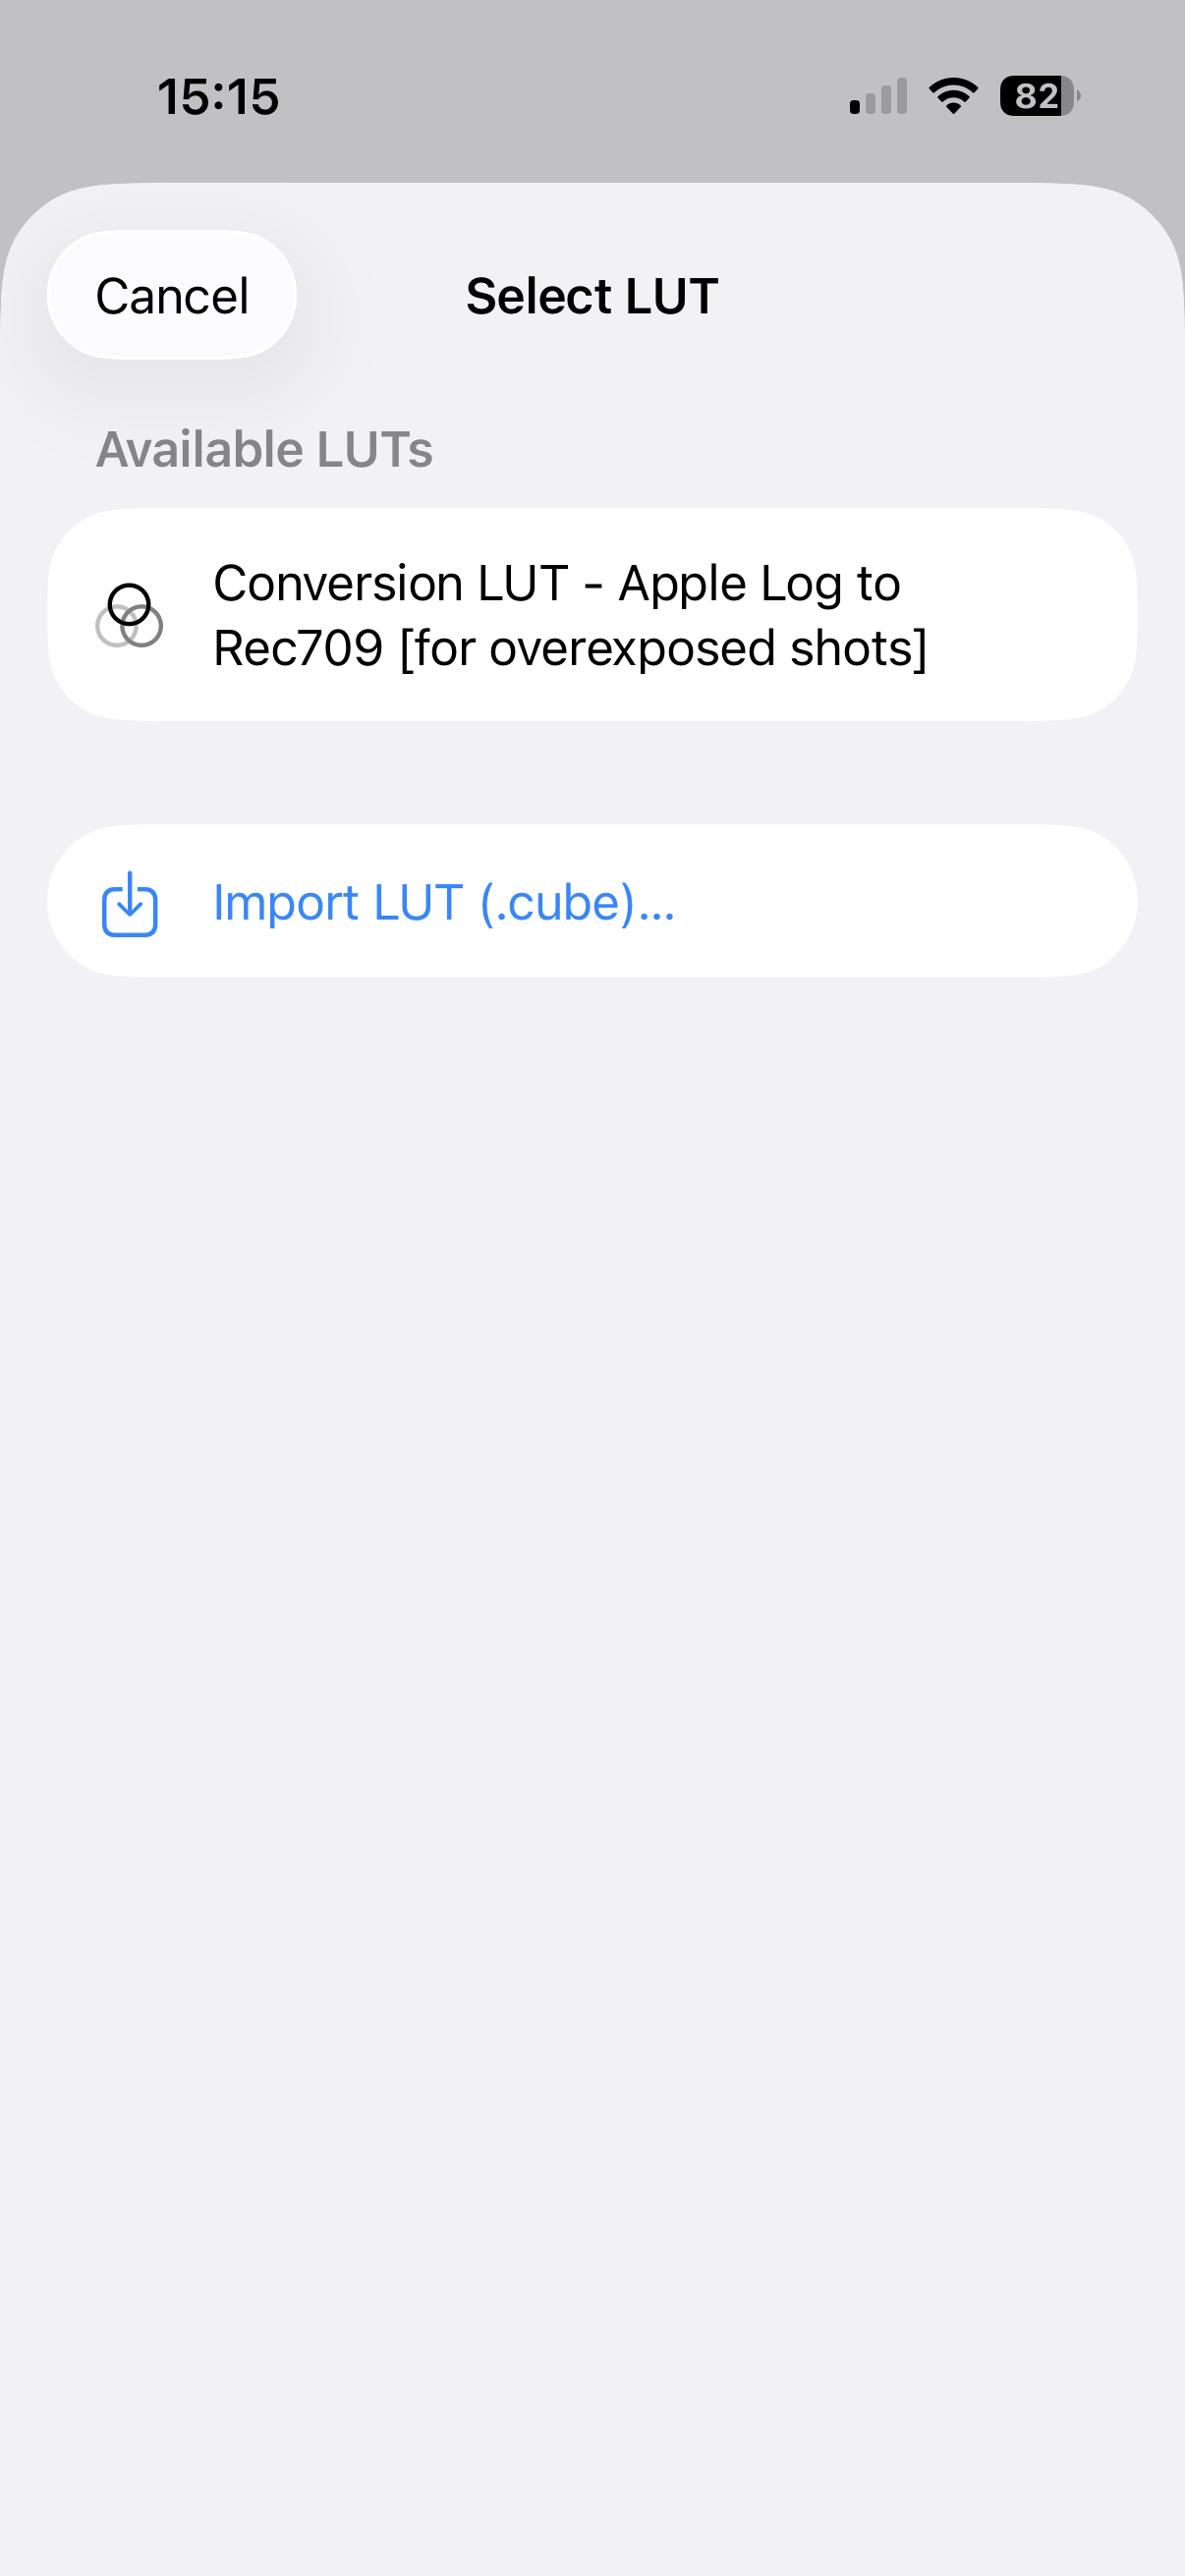
Step 2 — Preview with LUT
Tap any video in that folder. The video plays full-screen with the LUT applied in real time — colours are graded on the fly so you can judge the actual look of the footage.
Playback with LUT requires a brief load of the video tracks. Allow a second for the player to initialise on first open.
Step 3 — Grade and save (Pro)
This step requires the Pro upgrade. See Section 2.
To create permanent graded copies, select one or more videos in the grid and tap the Grade button in the toolbar. The app re-encodes each video in H.265 (HEVC) with the LUT baked in and saves the results in a sibling folder named “Device (Graded)”.
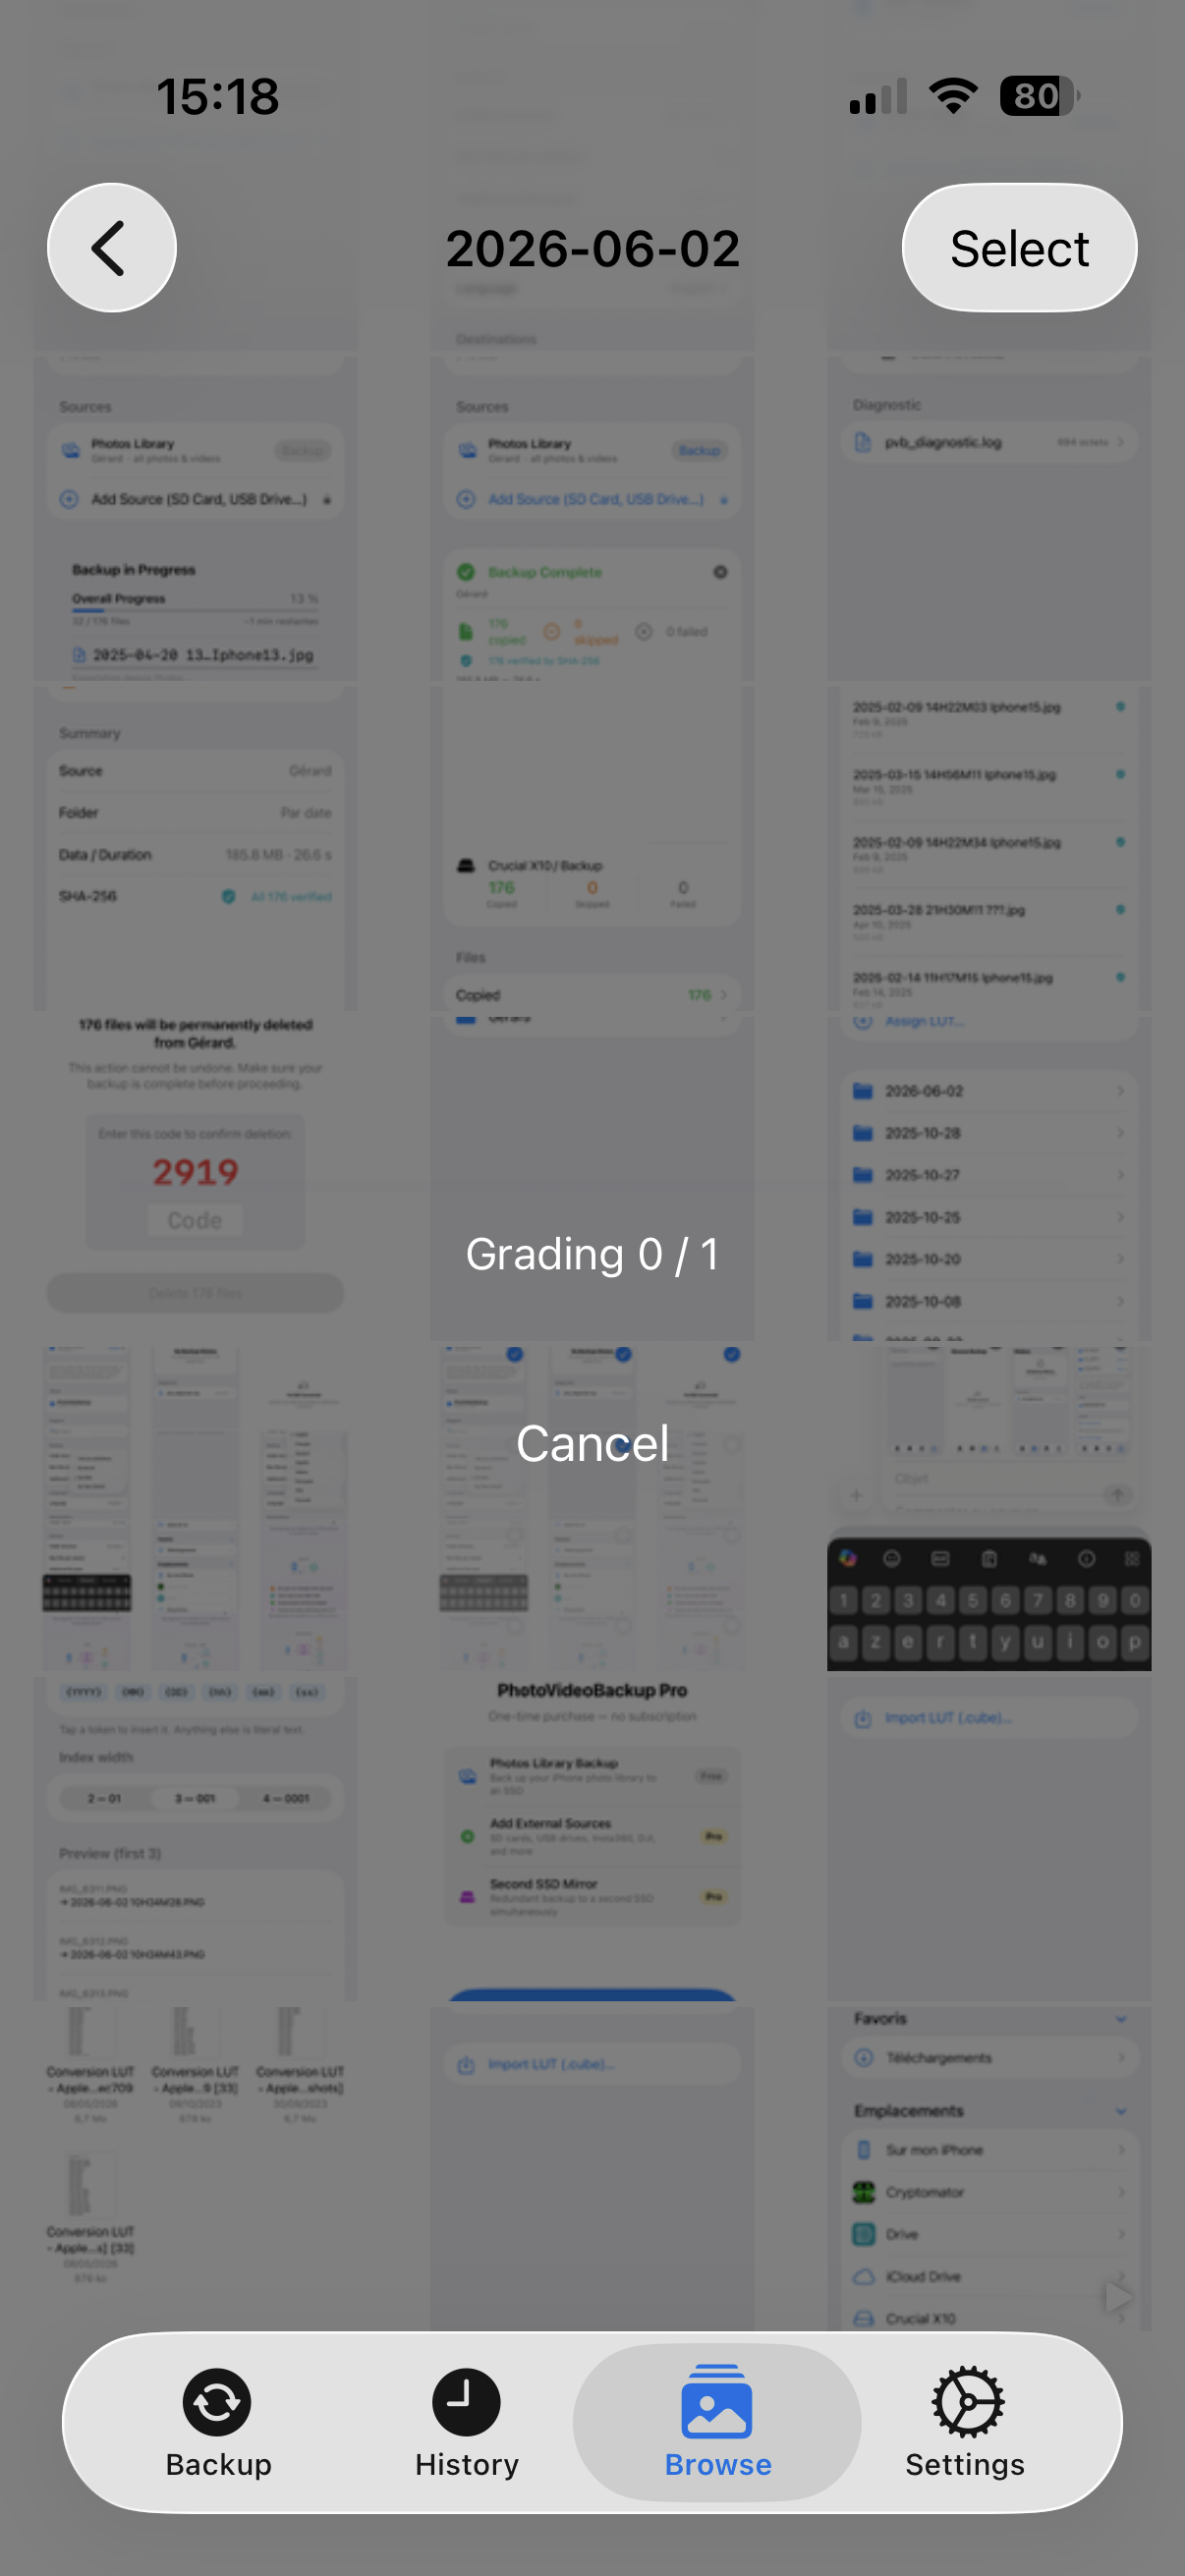
- Already-graded files are skipped (safe to re-run).
- The original folder and date structure is preserved inside the Graded folder.
- Tap Cancel to stop at any time — already-graded files are kept.
The Graded folder appears immediately in the Browse tab once grading completes.
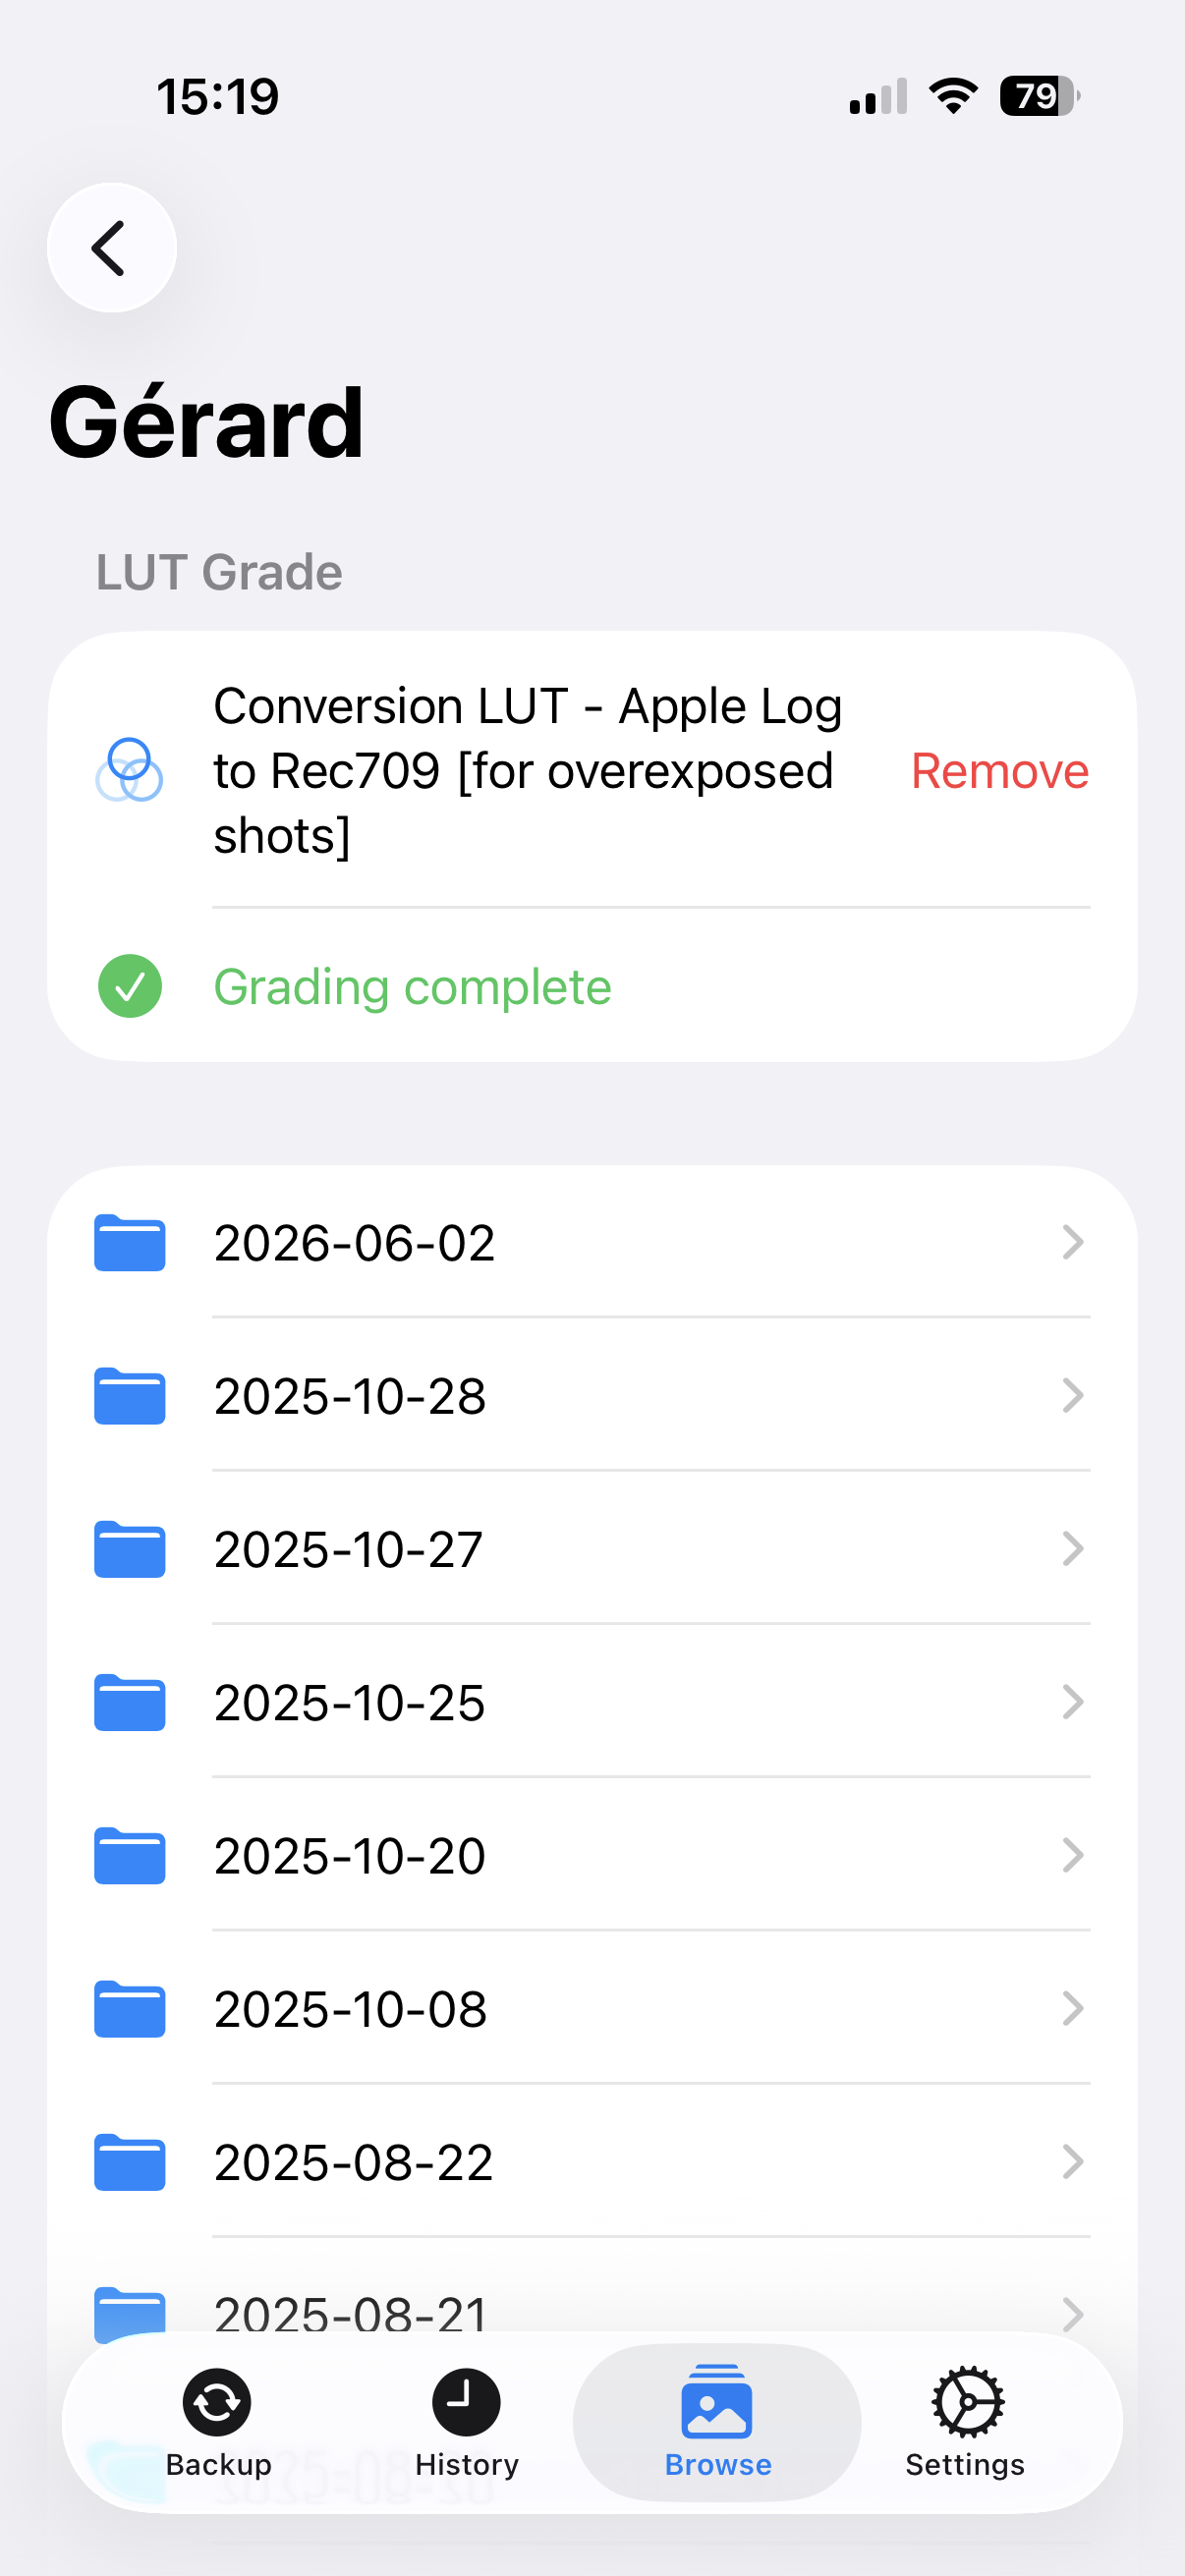
Grading is CPU-intensive. Keep the app open and the SSD connected during the process. The phone may become warm.
To remove a LUT assignment, tap Remove next to the LUT name. This only removes the assignment — it does not delete the LUT file or the already-graded videos.
LUT Grade on a NAS
LUT Grade works the same way when your backups are on a NAS (see Section 13). Open a device folder in the NAS section of the Browse tab and you’ll find the same LUT Grade section: assign a LUT, and tap any video to preview it with the LUT applied in real time. To create graded copies, tap Select, choose the videos you want to grade, then tap Grade.
Grade only your LOG clips. A camera folder often mixes LOG and non-LOG footage. Selecting videos individually (rather than “grade everything”) lets you grade only the flat LOG clips — applying a LOG LUT to already-normal footage would ruin it. This is exactly how grading works on a local SSD too.
The one difference is where the work happens: each selected video is downloaded from the NAS, graded on the phone, then uploaded back to a “Device (Graded)” folder on the NAS. Because everything travels over the network, grading on a NAS is slower than on a local SSD and uses more data — keep this in mind over a mobile/VPN connection. Already-graded files on the NAS are skipped, so it is safe to re-run.
12. Using Two SSDs — Mirror Backup (Pro)
This feature requires the Pro upgrade. See Section 2.
For extra safety, you can configure a second SSD. Every file will be copied to both SSDs at the same time. If one SSD ever fails, you have a complete copy on the other.
In Settings, tap Choose… next to “SSD 2 (mirror)” and select a folder on your second SSD.
When both SSDs are plugged in, the Backup tab shows both drives with their available space. The app copies to both simultaneously — the backup does not take twice as long.
If only one SSD is plugged in when you start a backup, the app will still run but will mark that session as an incomplete mirror in the history.
13. Backing Up to a NAS over Wi-Fi (Pro)
This feature requires the Pro upgrade. See Section 2.
Instead of (or in addition to) a USB-C SSD, you can back up directly to a NAS (Synology, QNAP, TrueNAS, or any device that speaks SMB) over Wi-Fi. Files are written straight to the NAS — no cable, no intermediate app, no cloud — and each file is verified by SHA-256.
Set up the NAS
- Make sure your NAS has SMB file sharing enabled, with a user account that has read/write access to a shared folder.
- In the app: Settings → Destinations → NAS (SMB).
- Fill in:
- Host / IP — your NAS address, e.g.
192.168.1.20 - Share — the shared folder name, e.g.
photo - Folder — an optional subfolder for your backups, e.g.
Backups - Username and Password — your NAS account (the password is stored securely in the iOS Keychain)
- Host / IP — your NAS address, e.g.
- Tap Test connection. You should see “Connected — N item(s) found.”
- Tap Save.
The NAS now appears as a destination on the Backup tab, with its free space. You can use it on its own, or together with an SSD — the app writes to all connected destinations at once.
Backing up remotely (away from home)
Because the NAS backup runs over the network, you can even back up from anywhere — for example over your mobile connection — if your NAS is reachable remotely. The simplest, secure way is a mesh VPN such as Tailscale:
- Install Tailscale on both the NAS and the iPhone, signed into the same account.
- Keep the Tailscale VPN active on the iPhone.
- In the app, use the NAS’s Tailscale address (its
100.x.x.xIP) as the Host. This works both at home and away.
Heads-up on mobile data: when a NAS backup runs over cellular, the app shows an orange “You appear to be on mobile data” banner. Large videos can use a lot of data — tap Stop backup at any time to halt it (the session is then marked Partial).
Browsing the NAS
Open the Browse tab and tap the NAS section. You can navigate the folders on your NAS; tapping a photo or video downloads it on demand and shows a preview (videos play full-screen, with a live LUT toggle when a LUT is assigned to the folder).
Device folders on the NAS also offer the full LUT Grade feature — assign a LUT and grade every video to a “Device (Graded)” folder on the NAS. See LUT Grade on a NAS in Section 11.
14. Frequently Asked Questions
Q: Does the app delete files from my iPhone or SD card?
No. PhotoVideoBackup only copies files. It never moves or deletes anything from the source.
Q: My NAS connection times out — what’s wrong?
A timeout almost always means the NAS isn’t reachable on the network, not an app problem. Check that you’re on the same Wi-Fi as the NAS (or that your VPN is active), that SMB file sharing is enabled on the NAS, and that any NAS firewall allows the connection. If you use Tailscale, make sure the VPN is switched on in the iPhone and that your iPhone is allowed to reach the NAS in your Tailscale access settings.
Q: Can I back up to the NAS and an SSD at the same time?
Yes. Every connected destination — SSD 1, SSD 2, and the NAS — receives the backup simultaneously.
Q: Will it copy the same file twice if I run it again?
No. The app checks whether each file is already on the SSD before copying. Files that are already there are skipped. Running the backup a second time is fast and safe. As of version 2.5.0, it also detects a byte-identical file already in the destination folder under a different name — and skips it — even if that file was put there by something other than the app (for example an earlier copy made in the Finder). So a folder never ends up with two copies of the same clip.
Q: My SD card appears as “Documents” — is that normal?
Yes, some cameras store footage in a generic folder. When you add the source, simply type a meaningful name (like “Blackmagic” or “GoPro”) in the naming dialog so you can recognise it easily.
Q: The app says “No SSD configured — go to Settings.” What do I do?
Your SSD is either not plugged in, or you have not set up a destination folder yet. Plug in the SSD and follow the steps in Section 5.
Q: Some photos take a long time and the app says “Exporting from Photos” — why?
Those photos are stored in iCloud and are not fully downloaded on your iPhone. The app automatically downloads them before copying. This requires a Wi-Fi or cellular connection and takes extra time depending on your internet speed.
Q: Can I use the app on two different iPhones to back up to the same SSD?
Yes. Each iPhone has its own Folder name setting (in Settings → iPhone / iPad). Give each device a different name before the first backup — for example iPhone de Gérard on one and iPhone de Camille on the other. Each device will create its own folder on the SSD and the files will never get mixed up.
Q: The progress bar says 3% and seems stuck — is it frozen?
Probably not. The first few files processed during a backup of the iPhone photo library are often large video files, which take longer individually. The percentage will start moving faster once it gets to smaller files. Wait a few minutes before worrying.
Q: What does “SHA-256 verification” mean?
It is a way of confirming that the copy on the SSD is a perfect, bit-for-bit match of the original. You do not need to understand how it works — if the backup completes without failed files, your backup is guaranteed to be identical to the source.
Q: Is my data sent anywhere? Does it go through the internet?
No. Everything happens locally between your iPhone and your SSD. The only exception is when the app downloads a photo from iCloud to copy it — but that is your own data, from your own iCloud account, going to your own SSD. The app has no server, no account, and no cloud storage of its own.
Q: Can I back up when my iPhone is almost full?
Yes. The app streams each photo or video straight to the destination instead of making a temporary copy on the iPhone first, so it only holds a few megabytes at a time no matter how large the file is. A 4 GB video can be backed up to an SSD with almost no free space on the phone. The one exception is a backup to a NAS on its own, with no SSD or iCloud Drive destination — that still needs room for one file at a time, because of how the network transfer works.
If a particular file really cannot fit, only that file is reported as failed and the backup continues with the rest. Free up some space and run the backup again — the missing file will be picked up.
Q: Does backing up to iCloud Drive free space on my iPhone?
Yes, as of version 2.3.0. Once iCloud confirms a file has been uploaded, the app releases its local copy and leaves a placeholder behind. The file stays safely in iCloud and is still visible in the Files app — tapping it downloads it again on demand, exactly like any other iCloud Drive file.
This only happens after the upload is confirmed, never before, and only for files the app itself has just copied. If your iPhone has plenty of free space the backup runs at full speed and space is reclaimed as uploads complete in the background. If it is running low, the app waits for uploads so it can keep freeing space as it goes.
Note that this frees the space taken by the copies. Your original photos are still in the Photos Library — to reclaim that space too, use Delete Source Files… in the session report once you are satisfied the backup is complete.
Q: Can I use iCloud Drive as a destination instead of an SSD?
Yes. When choosing a destination folder in Settings, you can navigate to iCloud Drive and select a folder there. The app will copy your files into iCloud Drive exactly as it would to a physical SSD.
Q: Is the incremental backup still reliable when the destination is iCloud Drive?
Yes. The app checks whether a file is already present by reading its metadata (name and size) at the destination. iOS exposes this metadata for iCloud Drive files even when their content has been offloaded to save space, so the skip logic works correctly regardless of whether the files are locally stored or cloud-only.
Q: Can I use the app to back up an SSD to iCloud Drive?
Yes. Any folder you can open with the iOS file browser can be used as a source — including a folder on an external SSD. Select the SSD folder as your source and an iCloud Drive folder as your destination, and the app will copy only the files that are not already there.
Q: What does the app offer over simply copying files manually in the Files app?
When copying to iCloud Drive, the app adds: automatic incremental transfers (only new files are copied), SHA-256 integrity verification on every file, a detailed session report listing what was copied, skipped, or failed, and support for two destinations simultaneously (for example an SSD and iCloud Drive in a single pass).
Q: Is the app available in my language?
Yes. The app supports English, French (Français), German (Deutsch), Spanish (Español), Italian (Italiano), Portuguese (Português), Chinese Simplified (中文), and Russian (Русский). By default it follows your iPhone’s system language. You can also override it manually: open the Settings tab, scroll to the Language section, and pick the language you want. The change takes effect immediately — no restart needed.
Documentation last updated: July 6, 2026