PhotoVideoBackup — User guide
Back up your photos and videos to an external SSD, an SD card or a NAS — from your iPhone or your Android phone.
Guide for PhotoVideoBackup 2.6 (iPhone, iOS 16 or later) and 1.0 (Android 9 or later)
1 What is PhotoVideoBackup?
PhotoVideoBackup copies your photos and videos from your phone — or from a camera memory card — to a portable SSD, a USB drive or a NAS. Your media never goes through an online service: the app has no server and no account.
- Your phone storage is full and you want to free space safely.
- You are back from a trip with an SD card full of footage (DJI, GoPro, Insta360, Blackmagic…) and want to secure it at once.
- You want a personal copy that does not depend on iCloud or Google Photos.
What makes it safe? Every copied file is read back and checked with a mathematical fingerprint (SHA-256). If a single byte is wrong, the app tells you — you never end up with a silently corrupted backup.
The app only copies. It never moves or deletes anything from the source, unless you explicitly ask for it after a backup (see “History and reports”).
2 Free and Pro
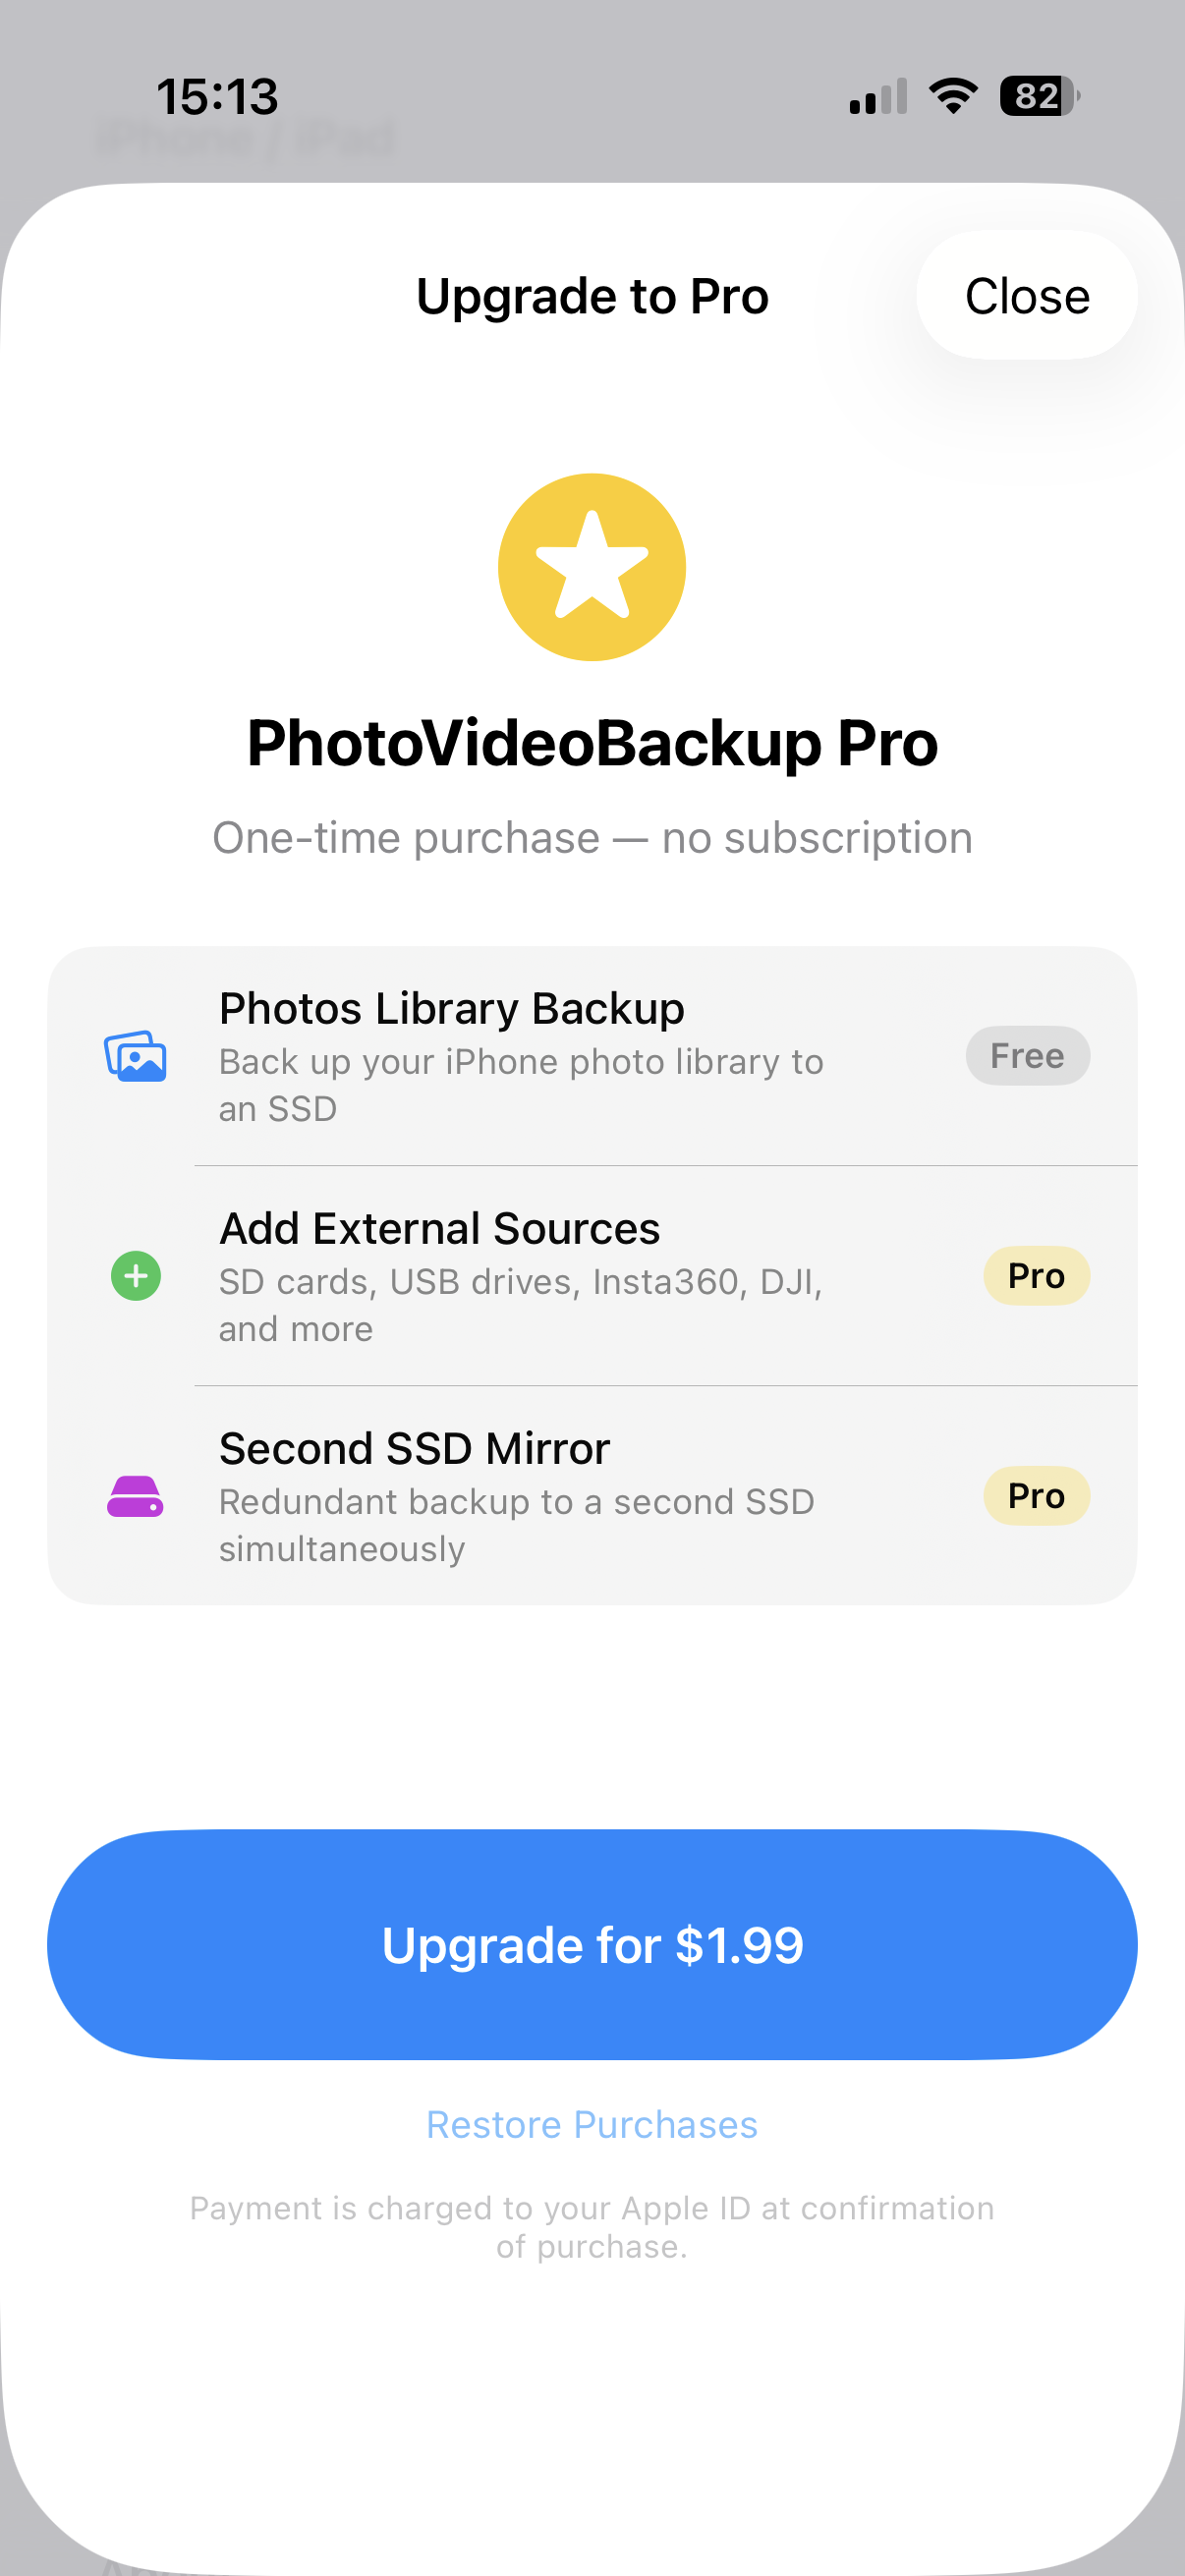
PhotoVideoBackup is free to download. One Pro purchase — paid once, no subscription — unlocks the advanced features:
| Feature | Free | Pro |
|---|---|---|
| Back up the photo library to one drive or folder | ✓ | ✓ |
| Browse and preview backups (LUT preview included) | ✓ | ✓ |
| Back up camera cards and USB drives (SD, DJI, GoPro, Insta360…) | — | ✓ |
| Mirror to a second drive | — | ✓ |
| Back up to a NAS over Wi-Fi | — | ✓ |
| Grade LOG videos with a LUT (H.265 export) | — | ✓ |
3 What you need
| iPhone / iPad | Android | |
|---|---|---|
| The device | An iPhone with a USB-C port (iPhone 15 or later), iOS 16 or later | An Android phone or tablet, Android 9 or later |
| A drive | Any USB-C SSD (Samsung T7, SanDisk Extreme, WD My Passport…) | Any USB-C SSD or USB drive, or a folder on the phone |
| A hub or reader (optional) | A small USB-C hub to plug an SSD and a card reader together | A USB-C card reader, or an OTG hub |
4 First launch and permissions
A welcome screen presents the app and five typical set-ups — from a simple phone → SSD to a NAS reached over a VPN. Tap Get Started.
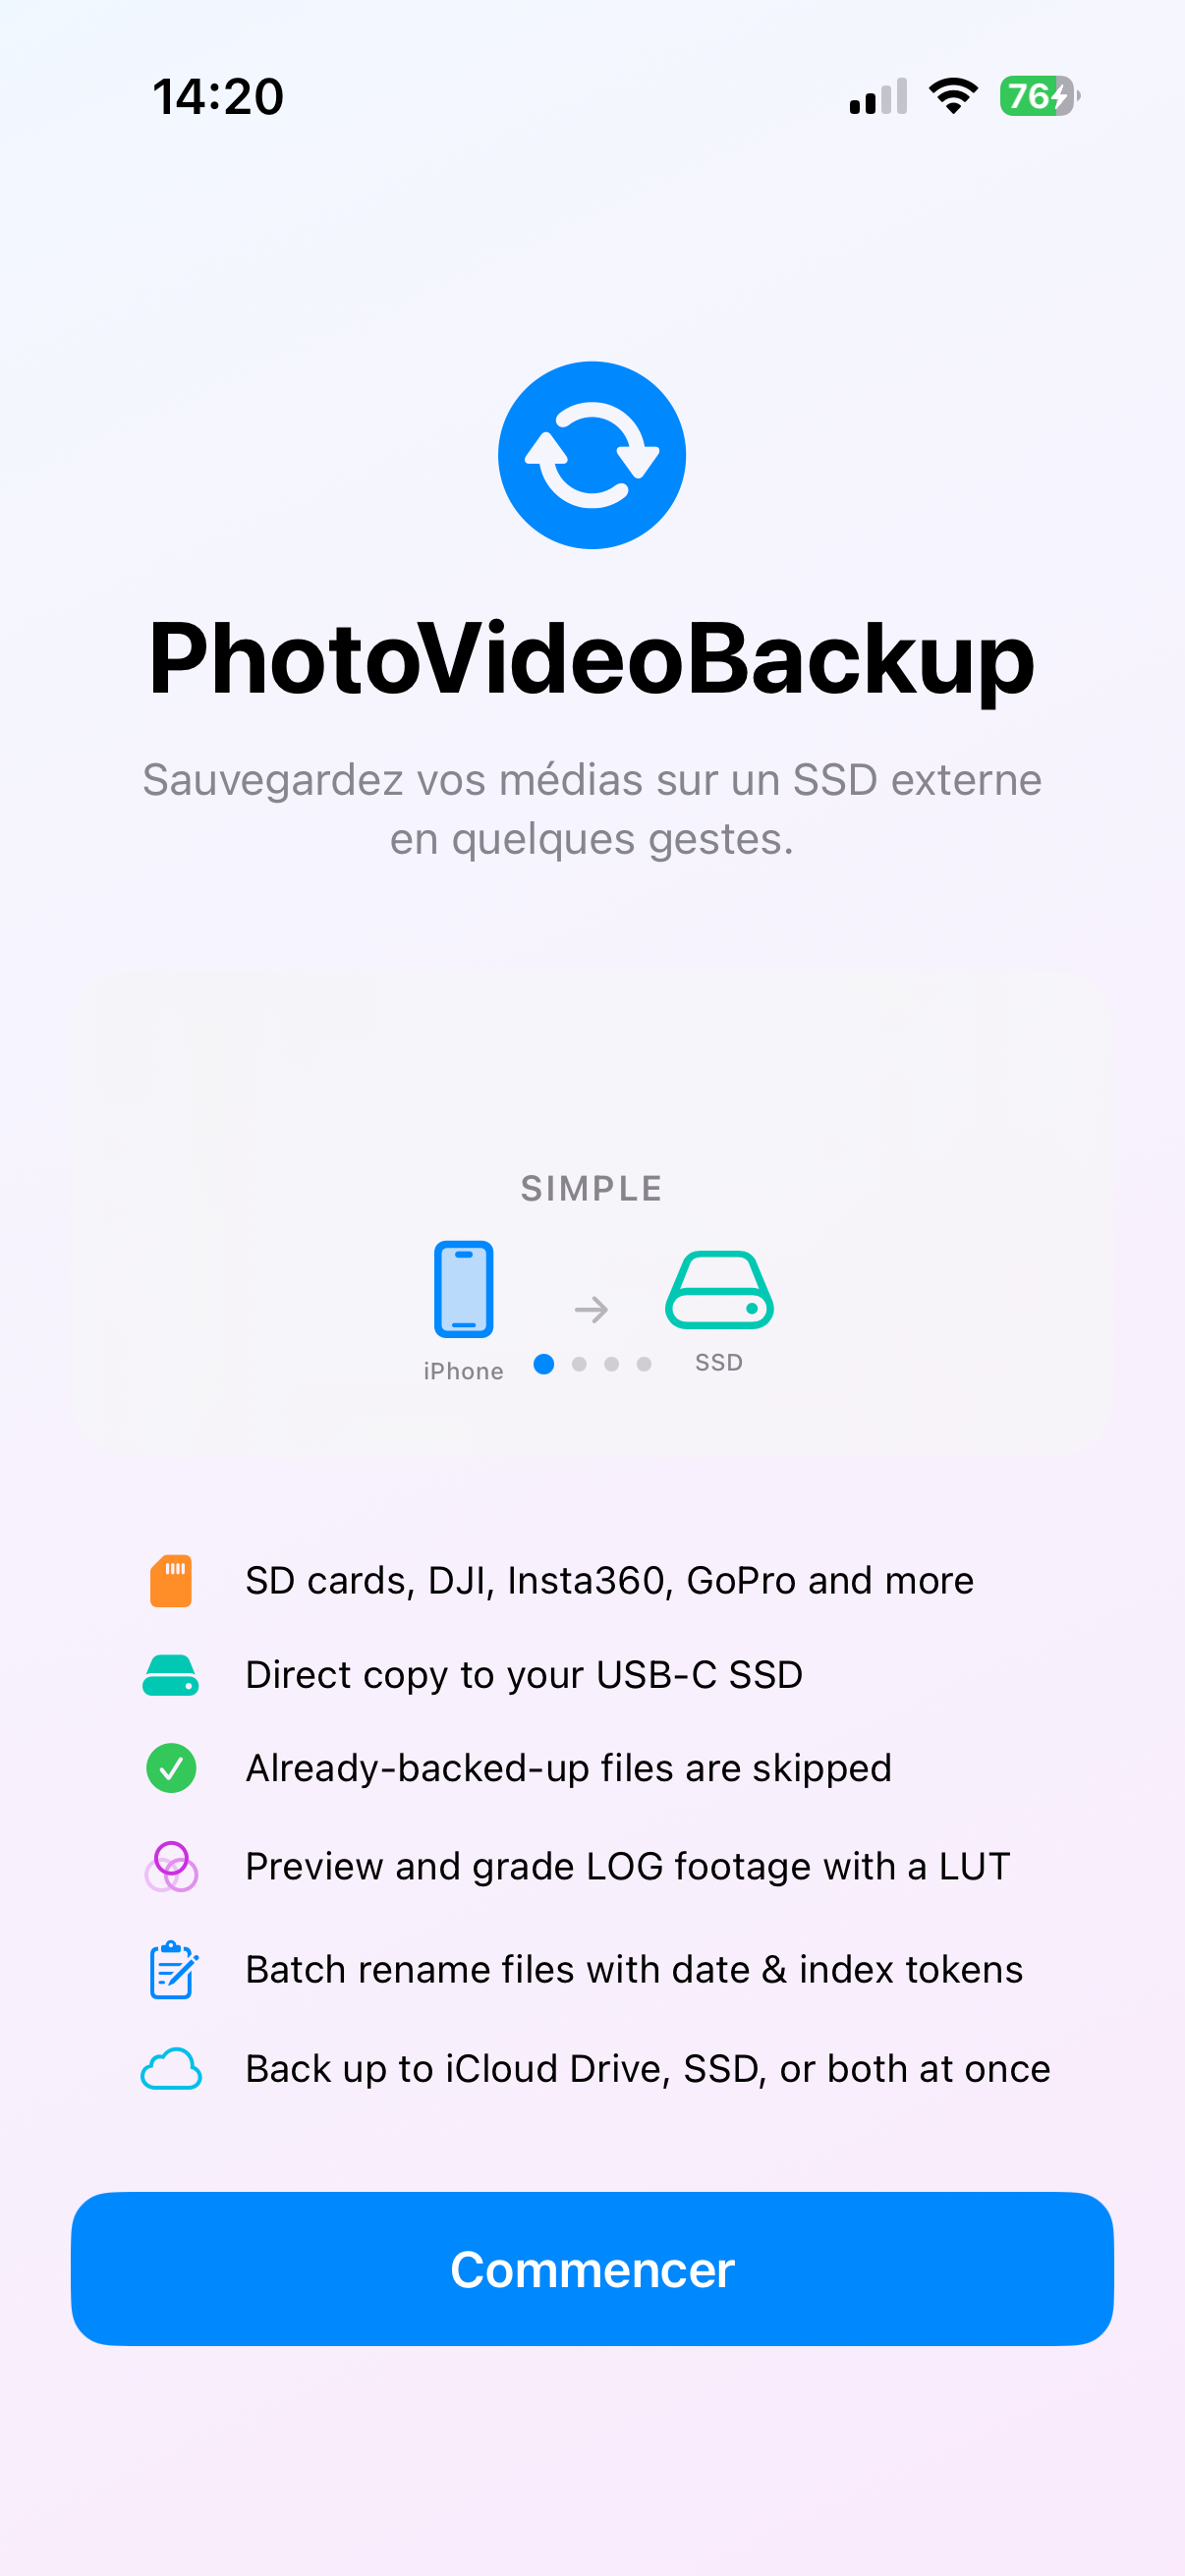
- iPhone / iPad: allow Full Access to your photo library. Without it the app cannot read your photos.
- Android: allow access to your photos and videos. Also allow access to the location of your photos — without it Android removes the GPS data from the files it hands over, and the backup would not be the original. Allow notifications so you are told when a backup ends.
5 Set up your device name and destination
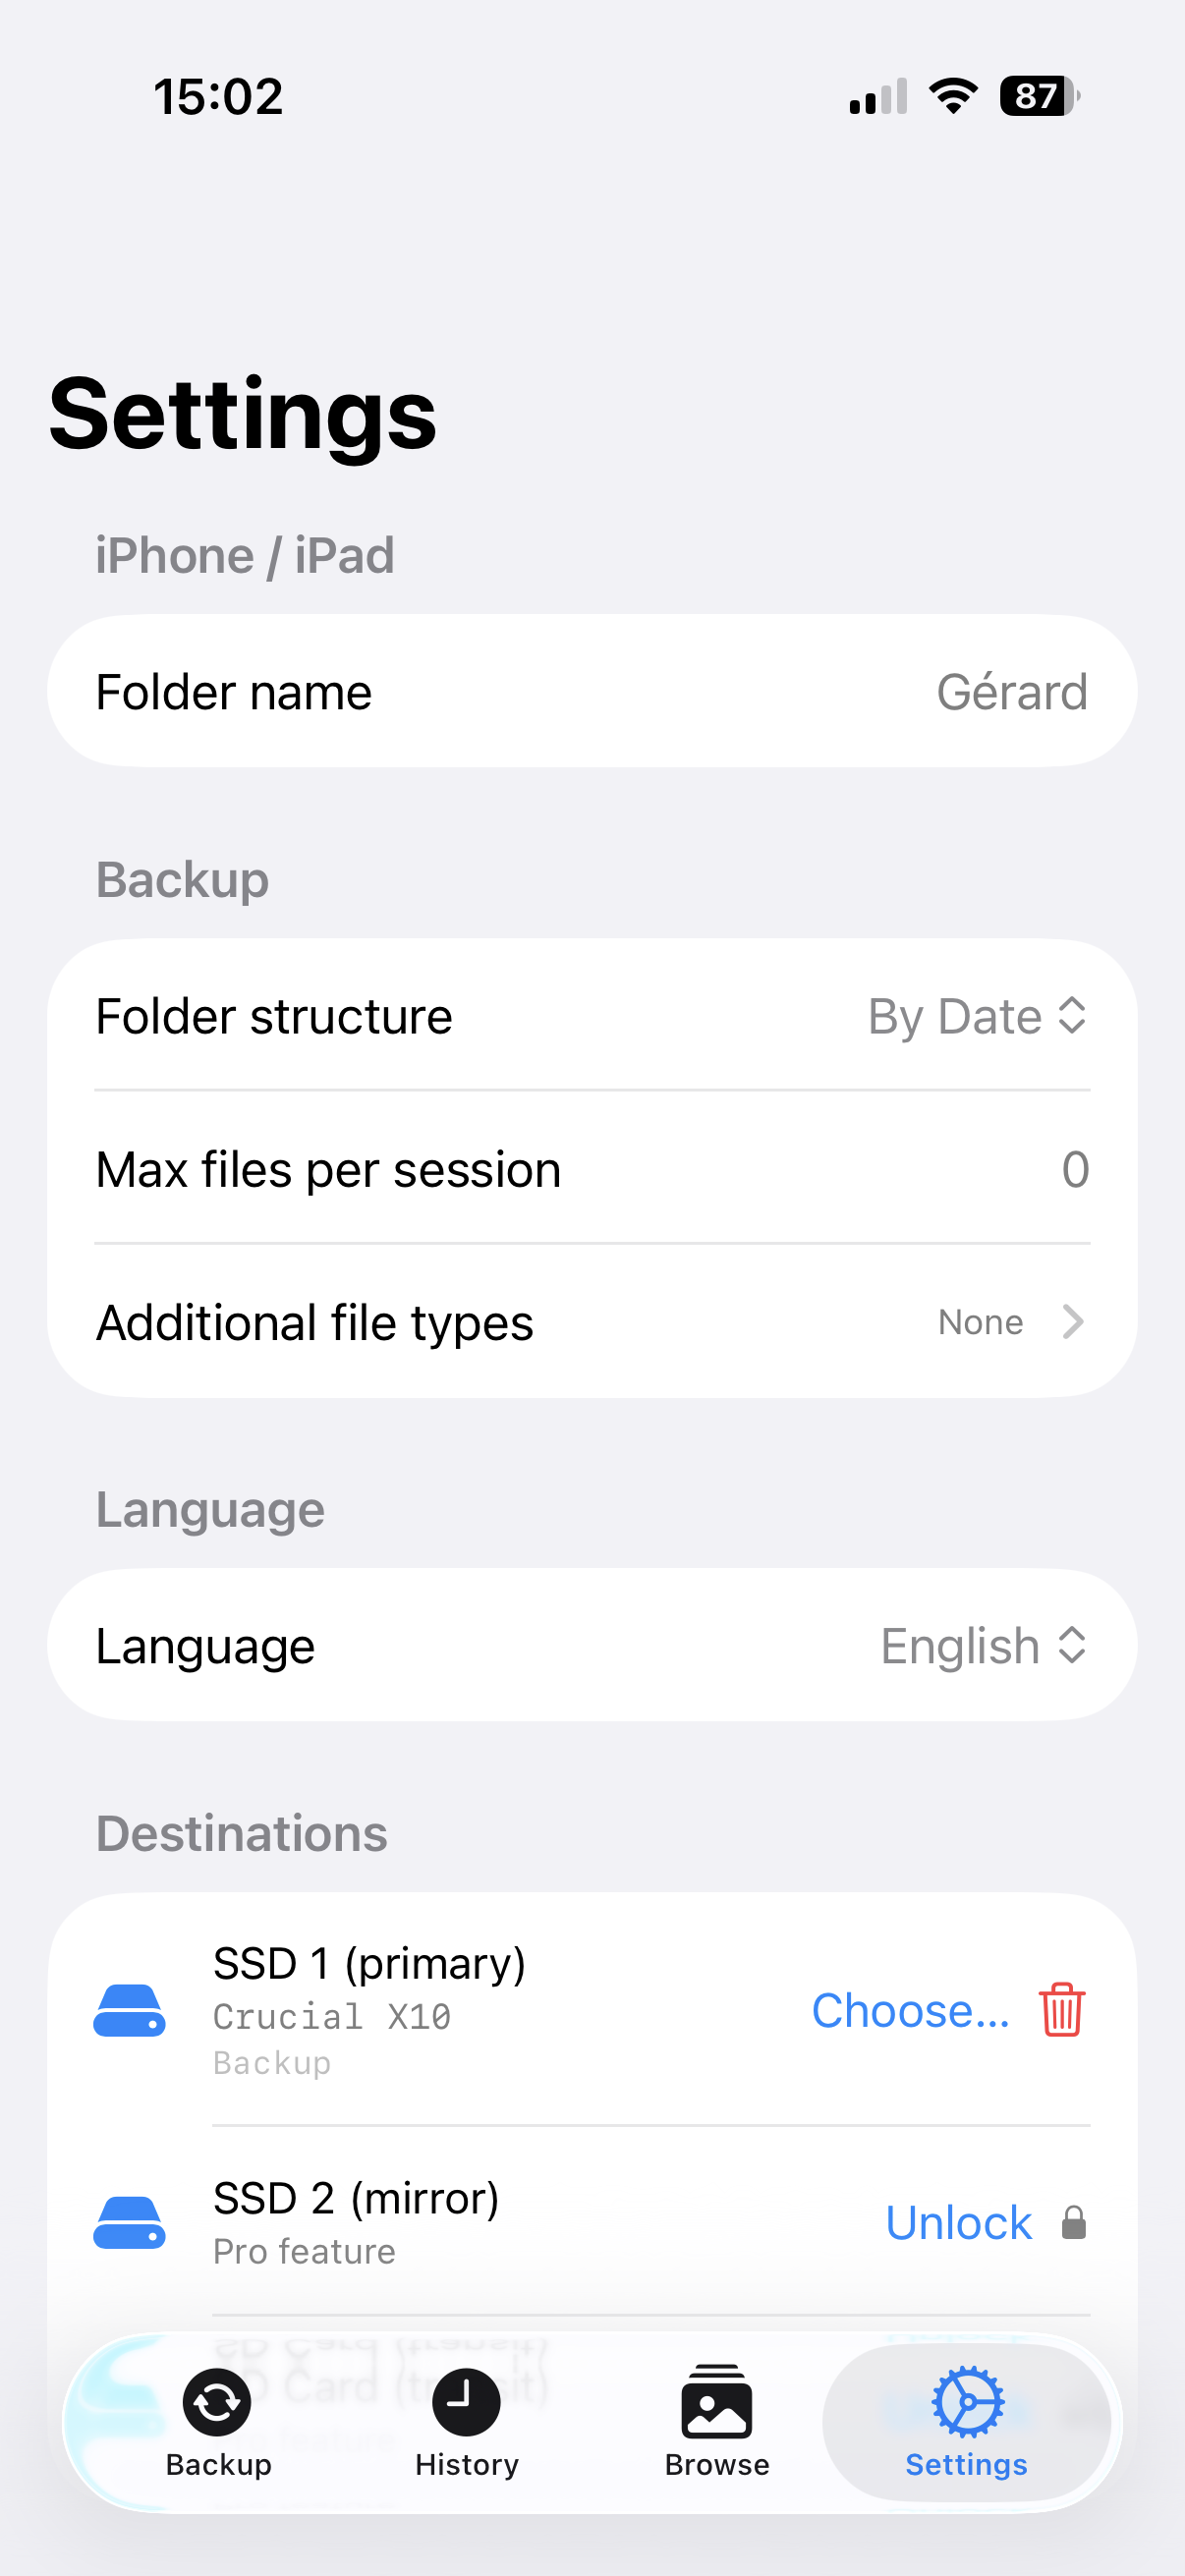
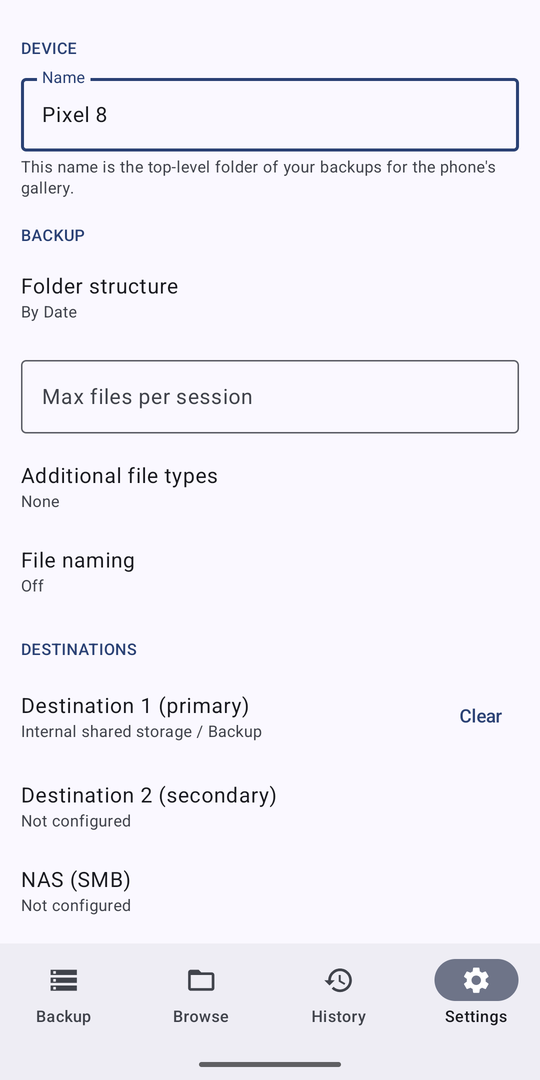
- Open the Settings tab. In the Device section, type a folder name — for example Anna’s iPhone or Pixel 8. It becomes the folder name on the drive, so two phones saving to the same drive stay separate. A backup does not start until a name is set.
- Plug in your drive.
- Under Destinations, tap Choose… and pick the drive, or a folder on it, in the system file browser. On Android you can also pick a folder in the phone’s own storage.
- The drive name appears in Settings and on the Backup tab, with its free space. You only do this once: the app recognises the drive the next time.
6 Back up your photos and videos
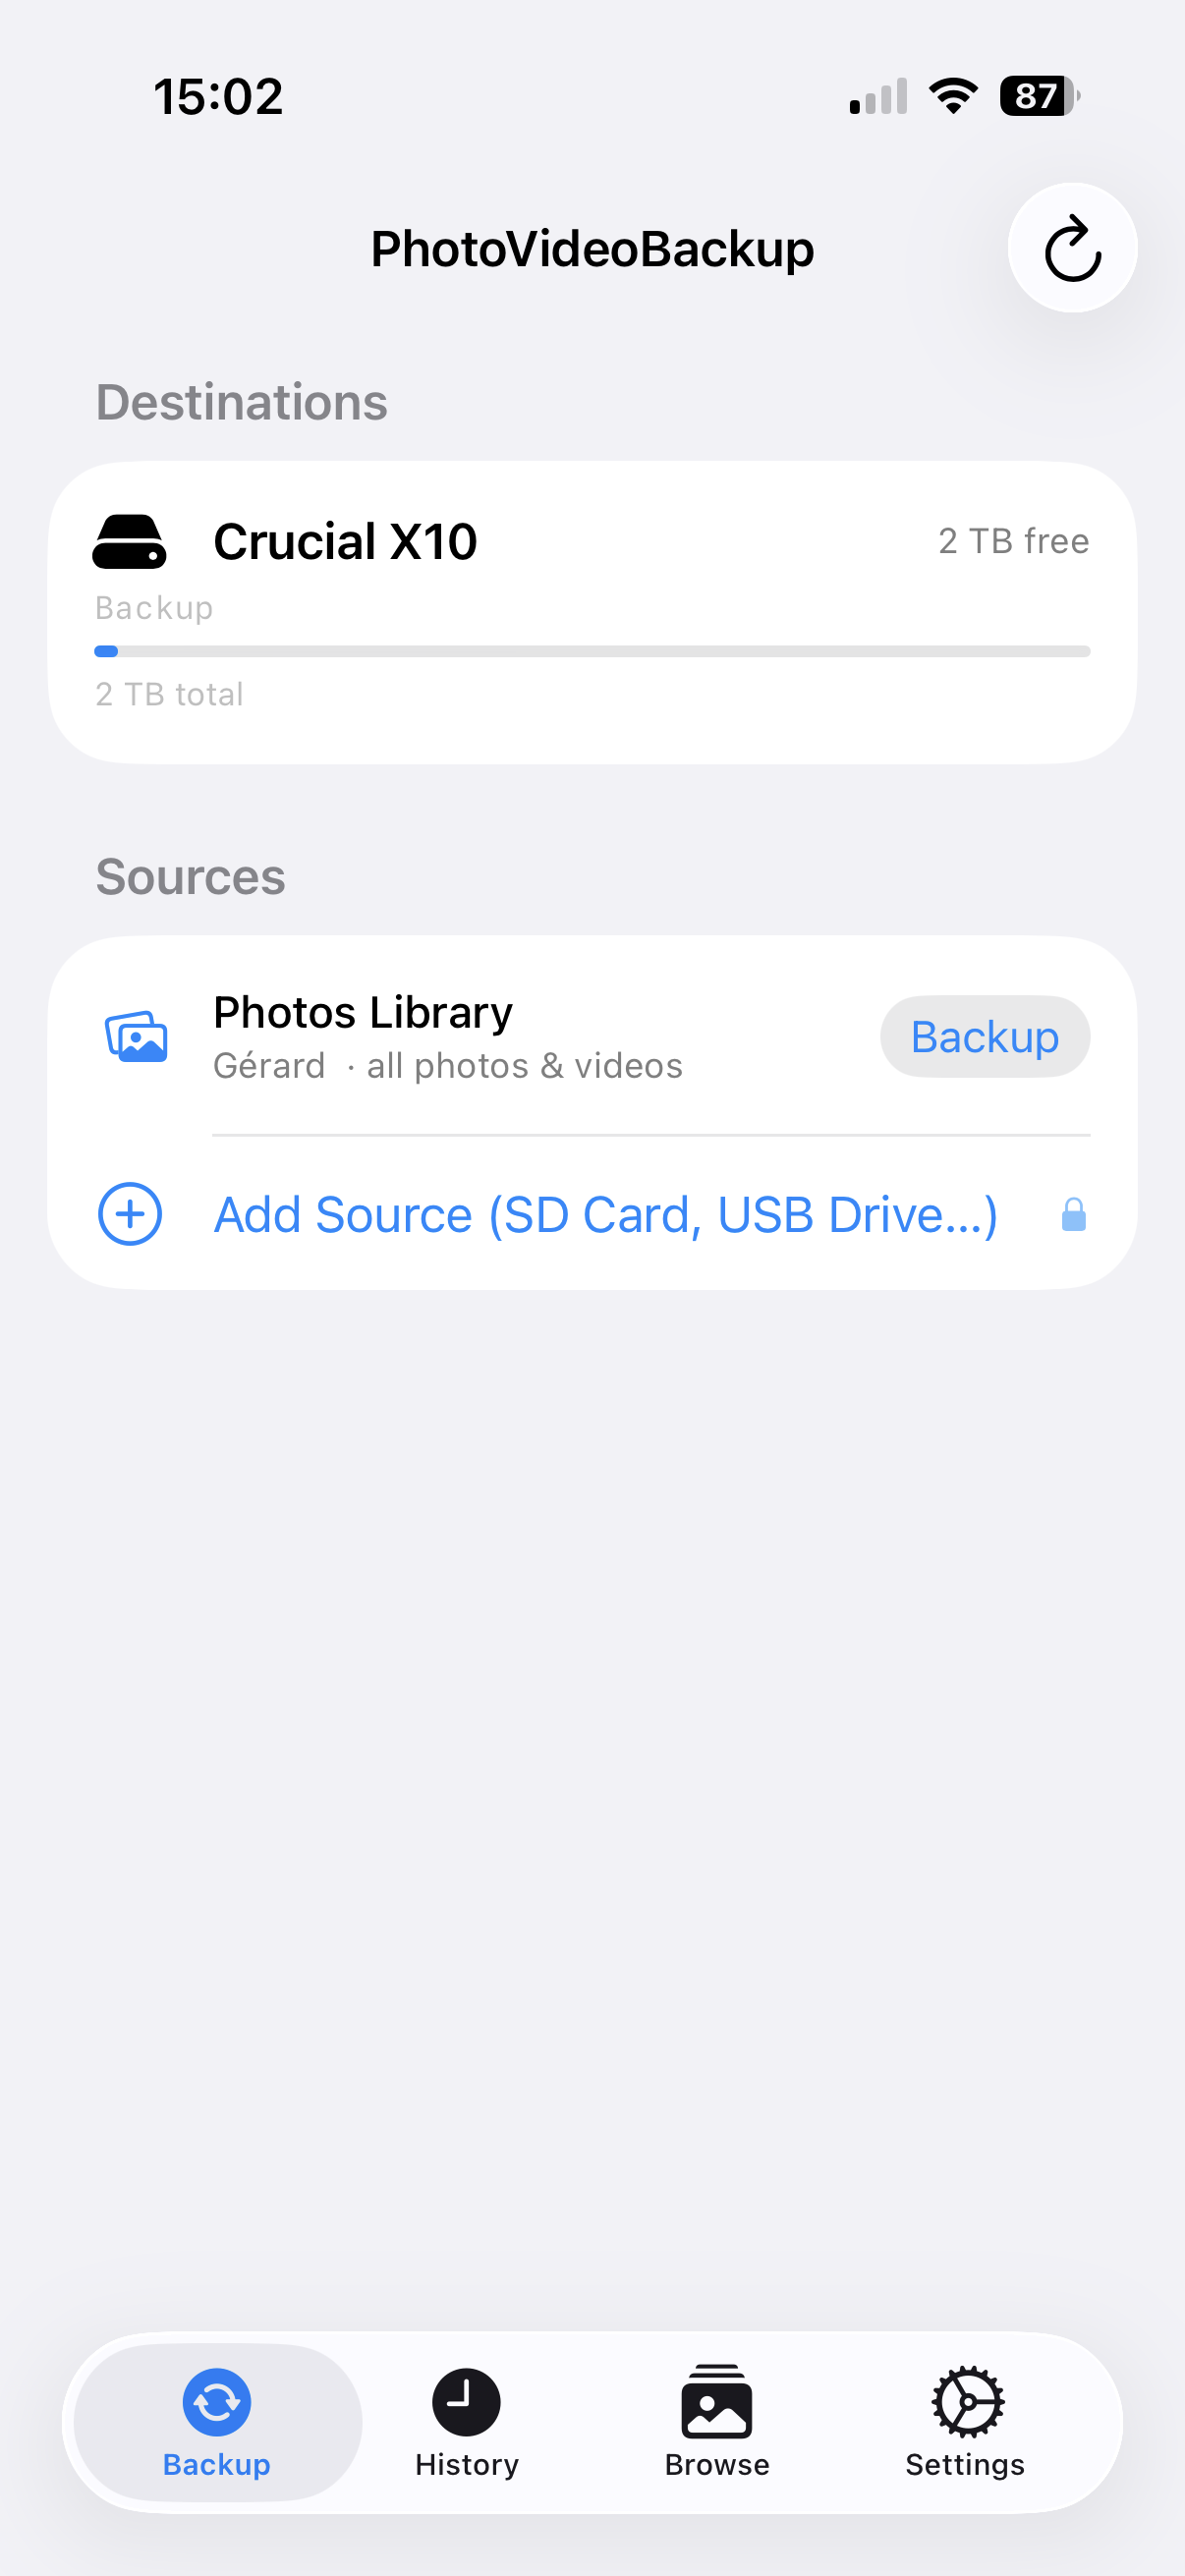
Open the Backup tab. At the top you see your destinations, with their free space. In Sources, the Photos Library row shows your device name. Tap its Backup button.
The app scans the library, then copies. The first backup is the longest; the next ones only copy what is new, and are much faster.
- Photos stored only in iCloud / Google Photos are downloaded first — that takes a connection and some time.
- The app copies each file straight to the destination, so it works even when the phone is almost full.
- You can leave the app: a notification tells you when the backup ends.
7 Back up a camera card (Pro)
- Plug the card reader into the phone and insert the card (use a hub if the SSD must stay plugged in too).
- On the Backup tab, tap Add Source (SD Card, USB Drive…), find the card in the file browser and confirm.
- Give the source a name — Blackmagic, Trip to Japan… The device type is recognised by itself.
- Tap Backup on the source row.
| Recognised device | What is backed up |
|---|---|
| DJI Mini 3 Pro | Photos, videos, DNG and the telemetry (.srt) |
| DJI 360 / Action (Neo 2…) | Videos, photos, DNG, audio and the telemetry (.srt) |
| Insta360 (X5…) | .insv, .insp and .lrv files |
| GoPro HERO | Videos and photos; the proxy (.lrv) and thumbnail (.thm) files are skipped |
| Anything else | Common photo, video and RAW formats |
To remove a source from the list, use the red – (iPhone) or the remove button of the row (Android). This deletes no file.
8 While the backup runs
A Backup in Progress panel appears the moment you tap Backup. First Preparing… (connecting to your destinations), then Analyzing source… with a live count of files found — on a large library this can take a moment, it is not stuck.
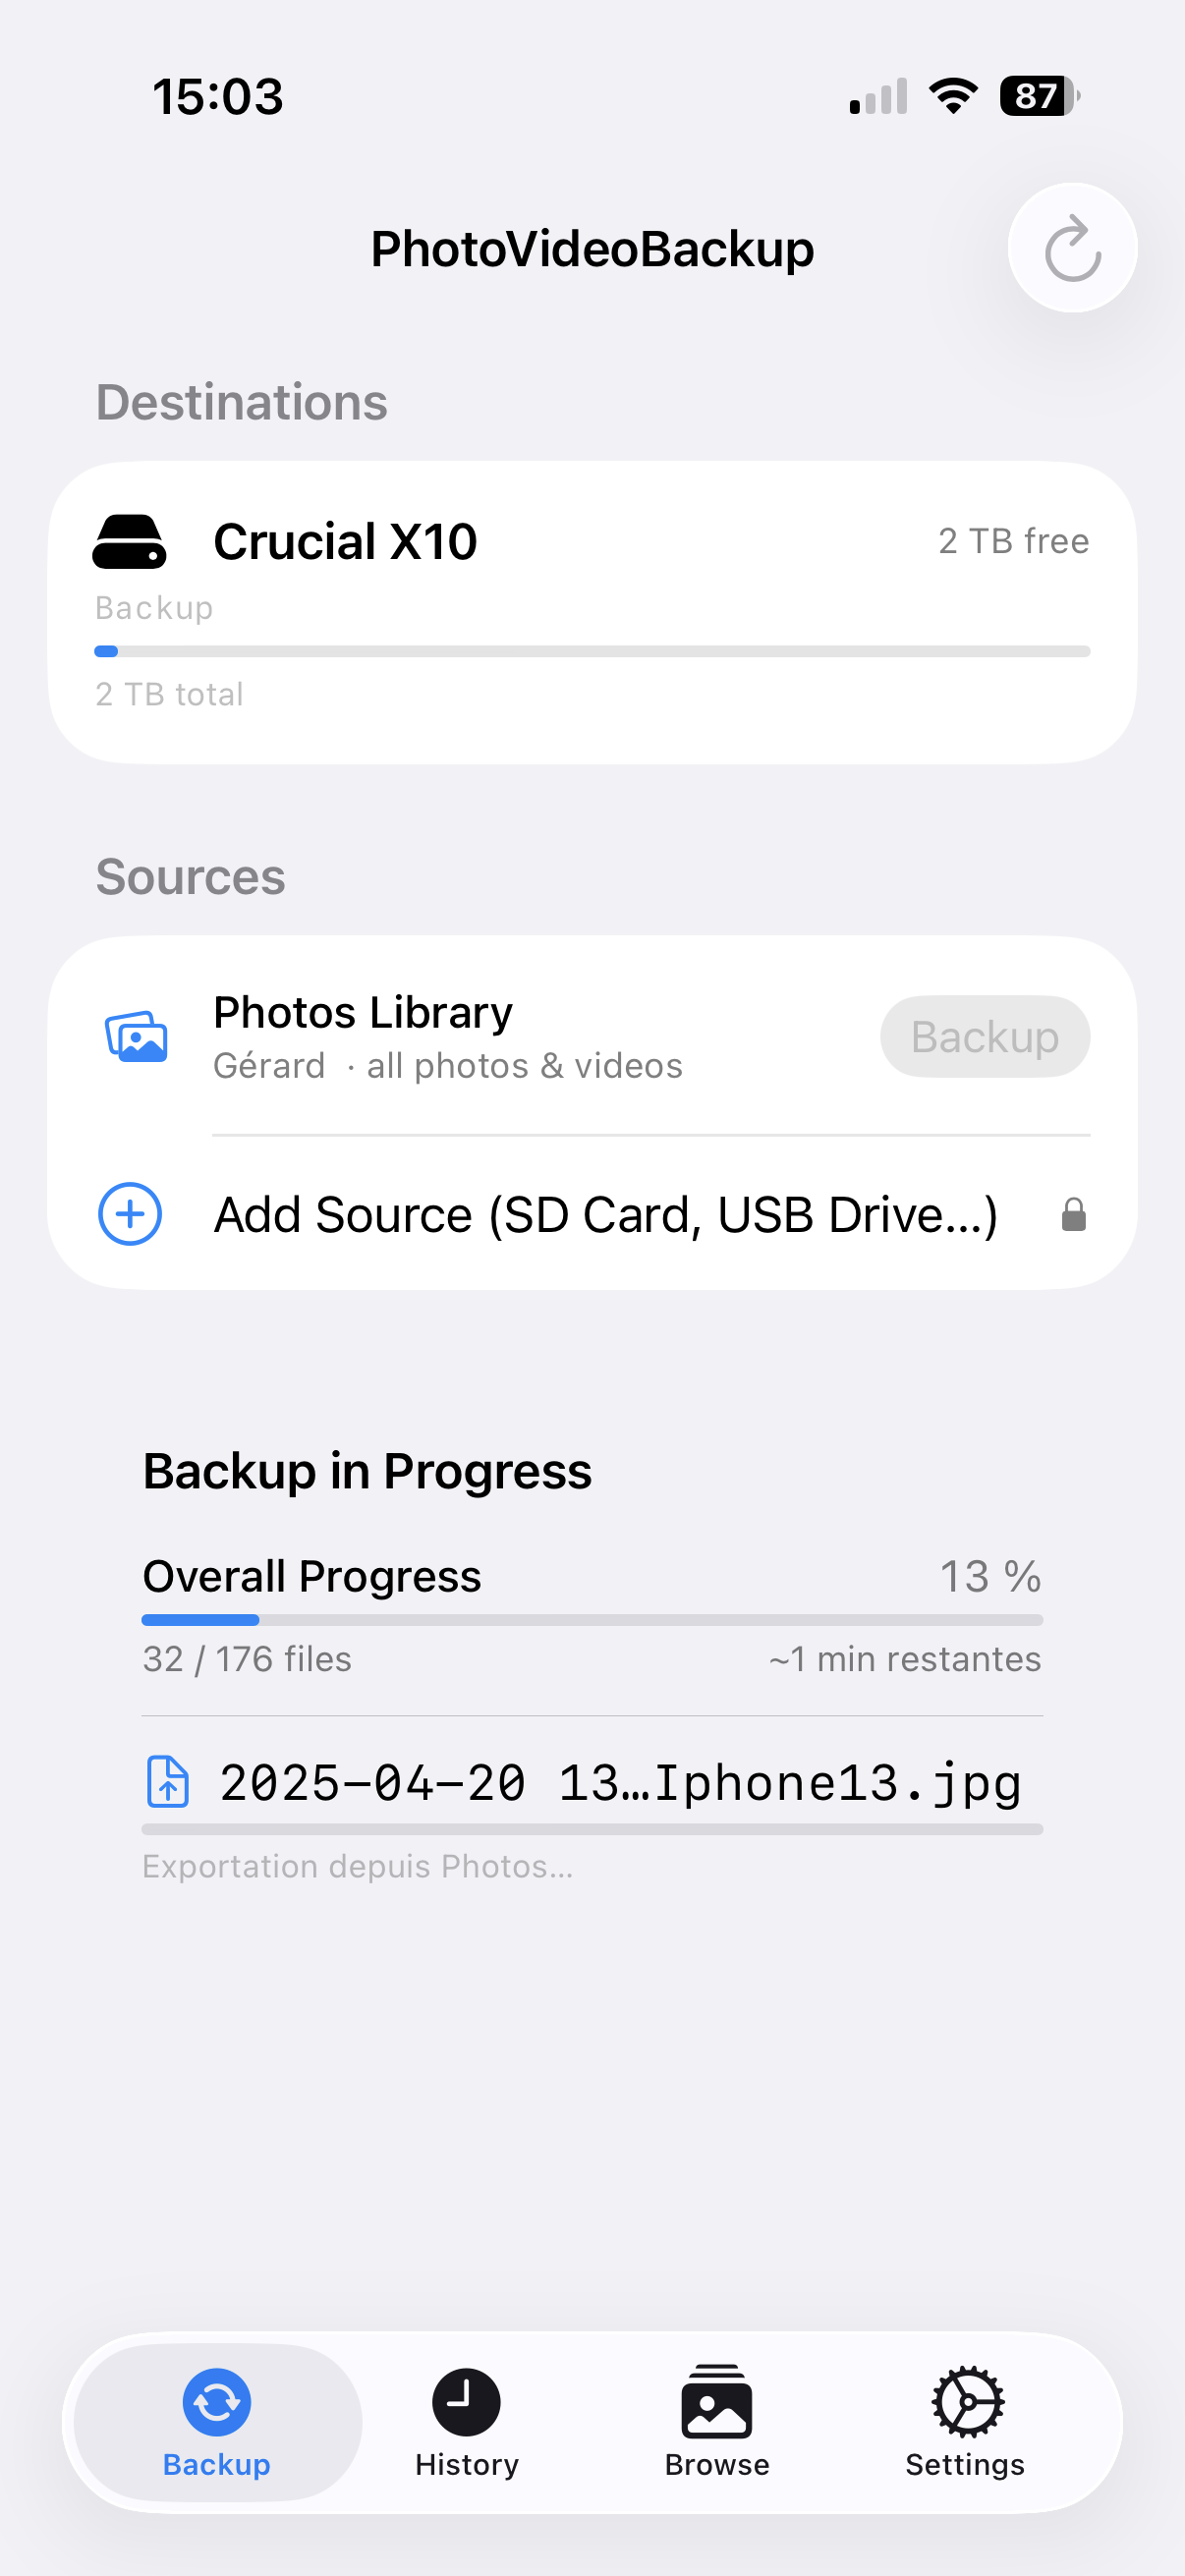
| Phase | What the app is doing |
|---|---|
| Scanning | Counting the files and checking which ones need to be copied. |
| Copying | Writing the file to the destination. |
| Verifying | Reading the copy back and comparing it with the original. |
| Skipped | The file is already backed up — nothing to do. |
A Stop button ends the backup cleanly at any time. Settings → Backup also has a Max files per session limit: leave it empty for unlimited.
9 When the backup is done
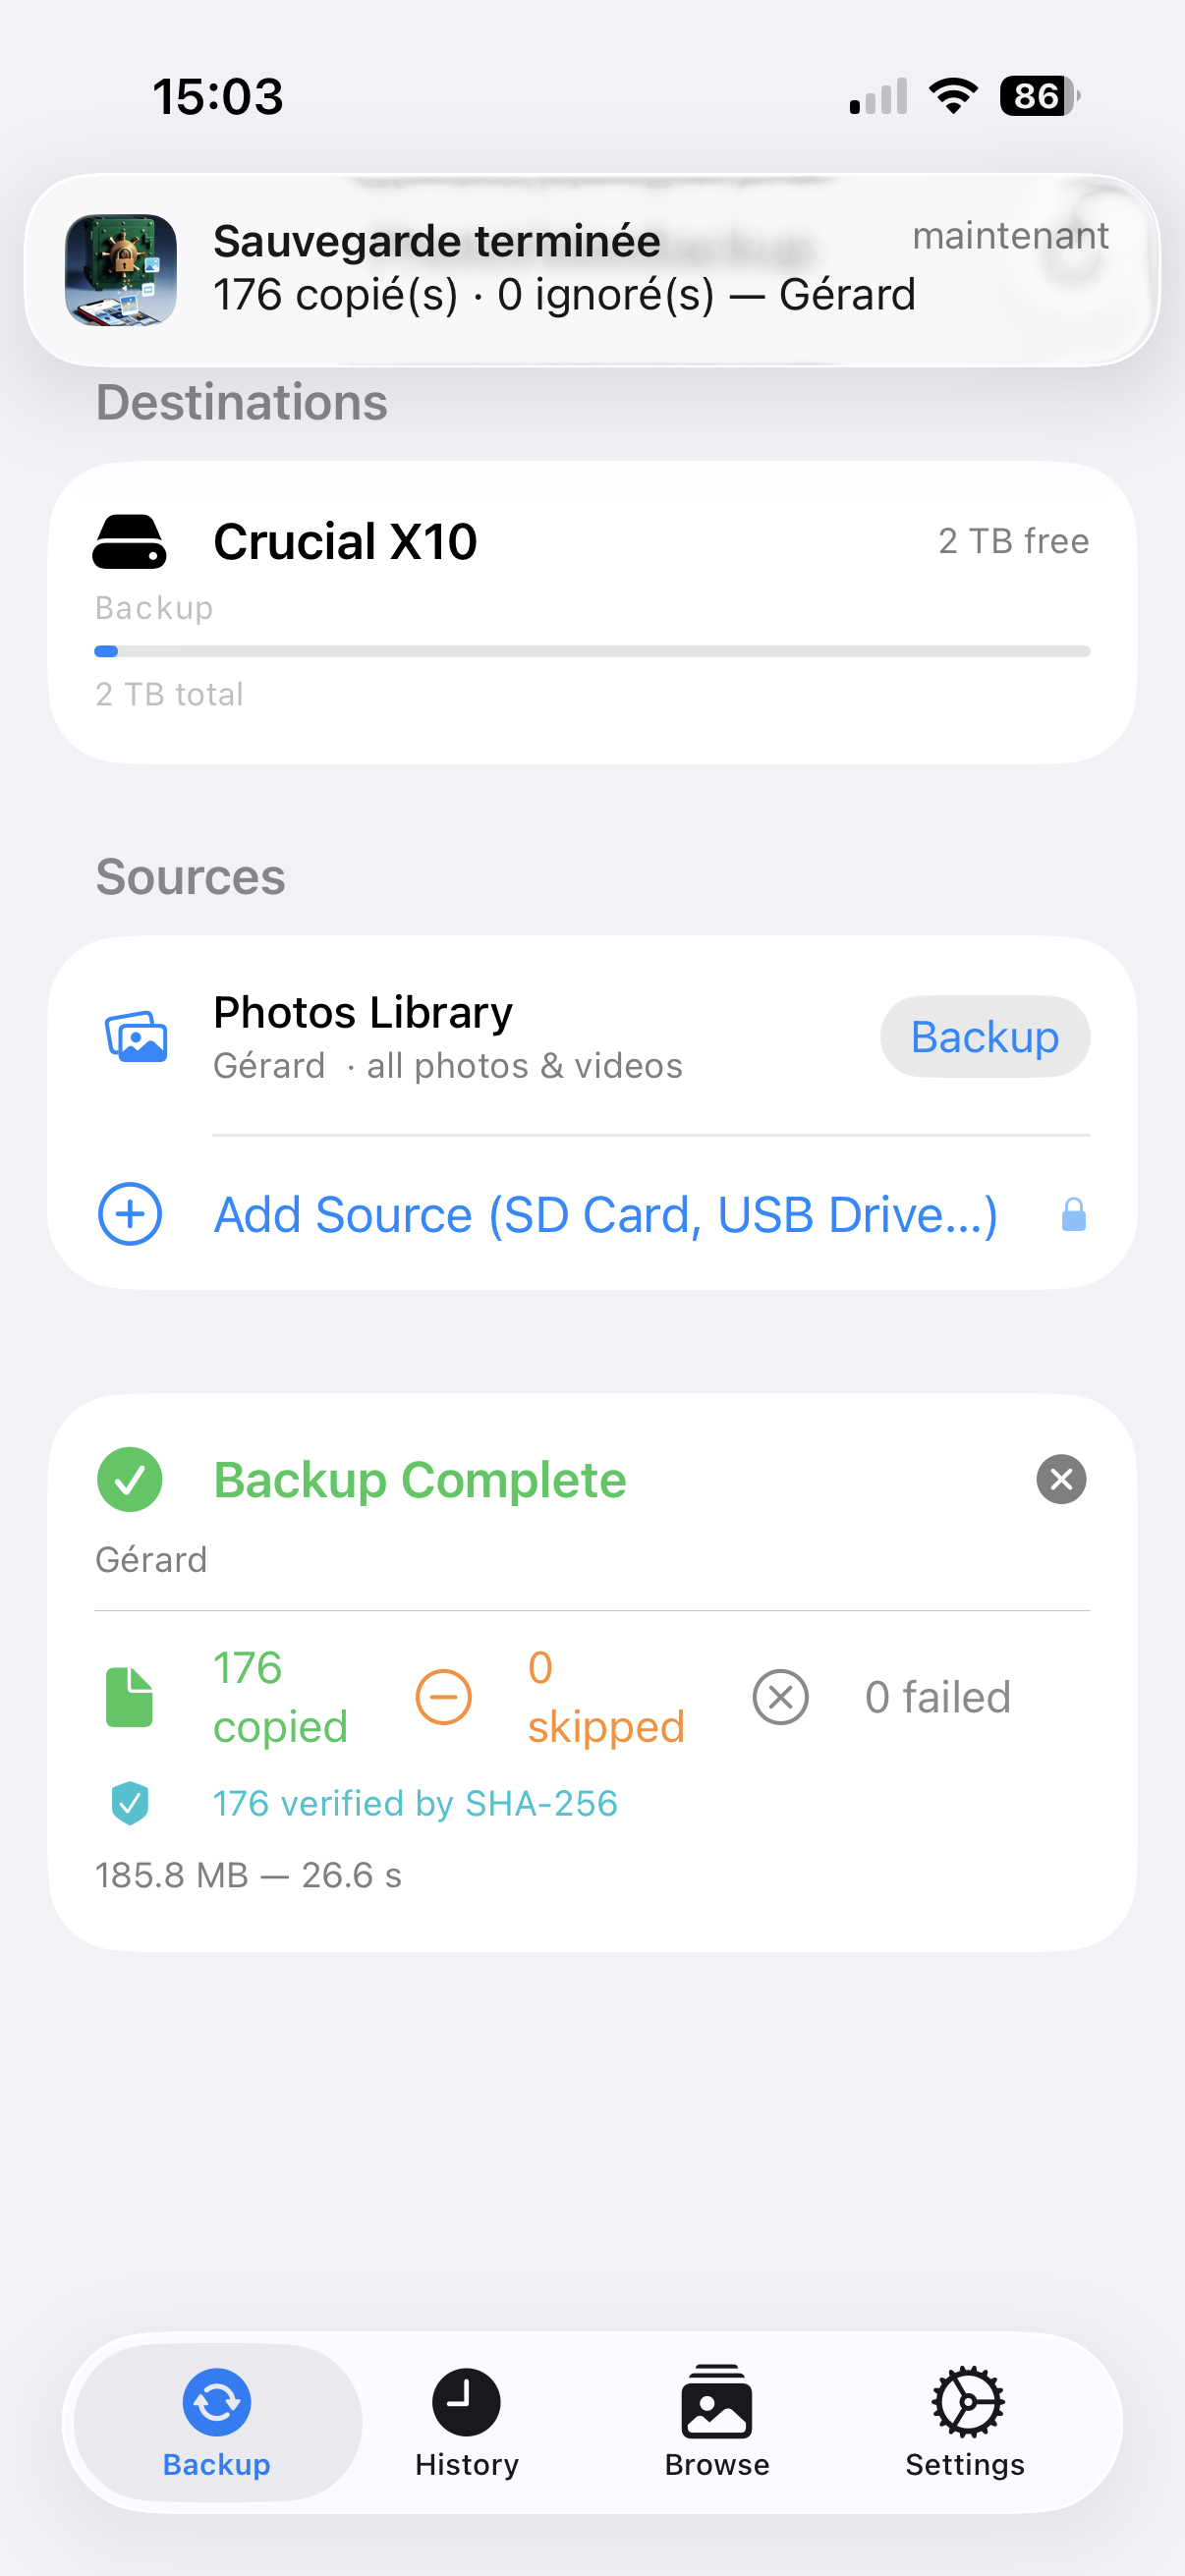
| Number | Meaning |
|---|---|
| Copied | Files saved to the destination for the first time. |
| Skipped | Files that were already there — normal and safe. |
| Failed | Files that could not be copied (rare). |
A failure comes from a damaged card, a full drive, a connection that dropped, or one single file too large for the free space — only that file is reported and the rest continues. Free some space or reconnect, and run the backup again: the missing files are picked up.
10 History and reports
The History tab lists every backup: source, destinations, folder structure, number of files, and a colour — green for success, orange for Partial, red for failures.
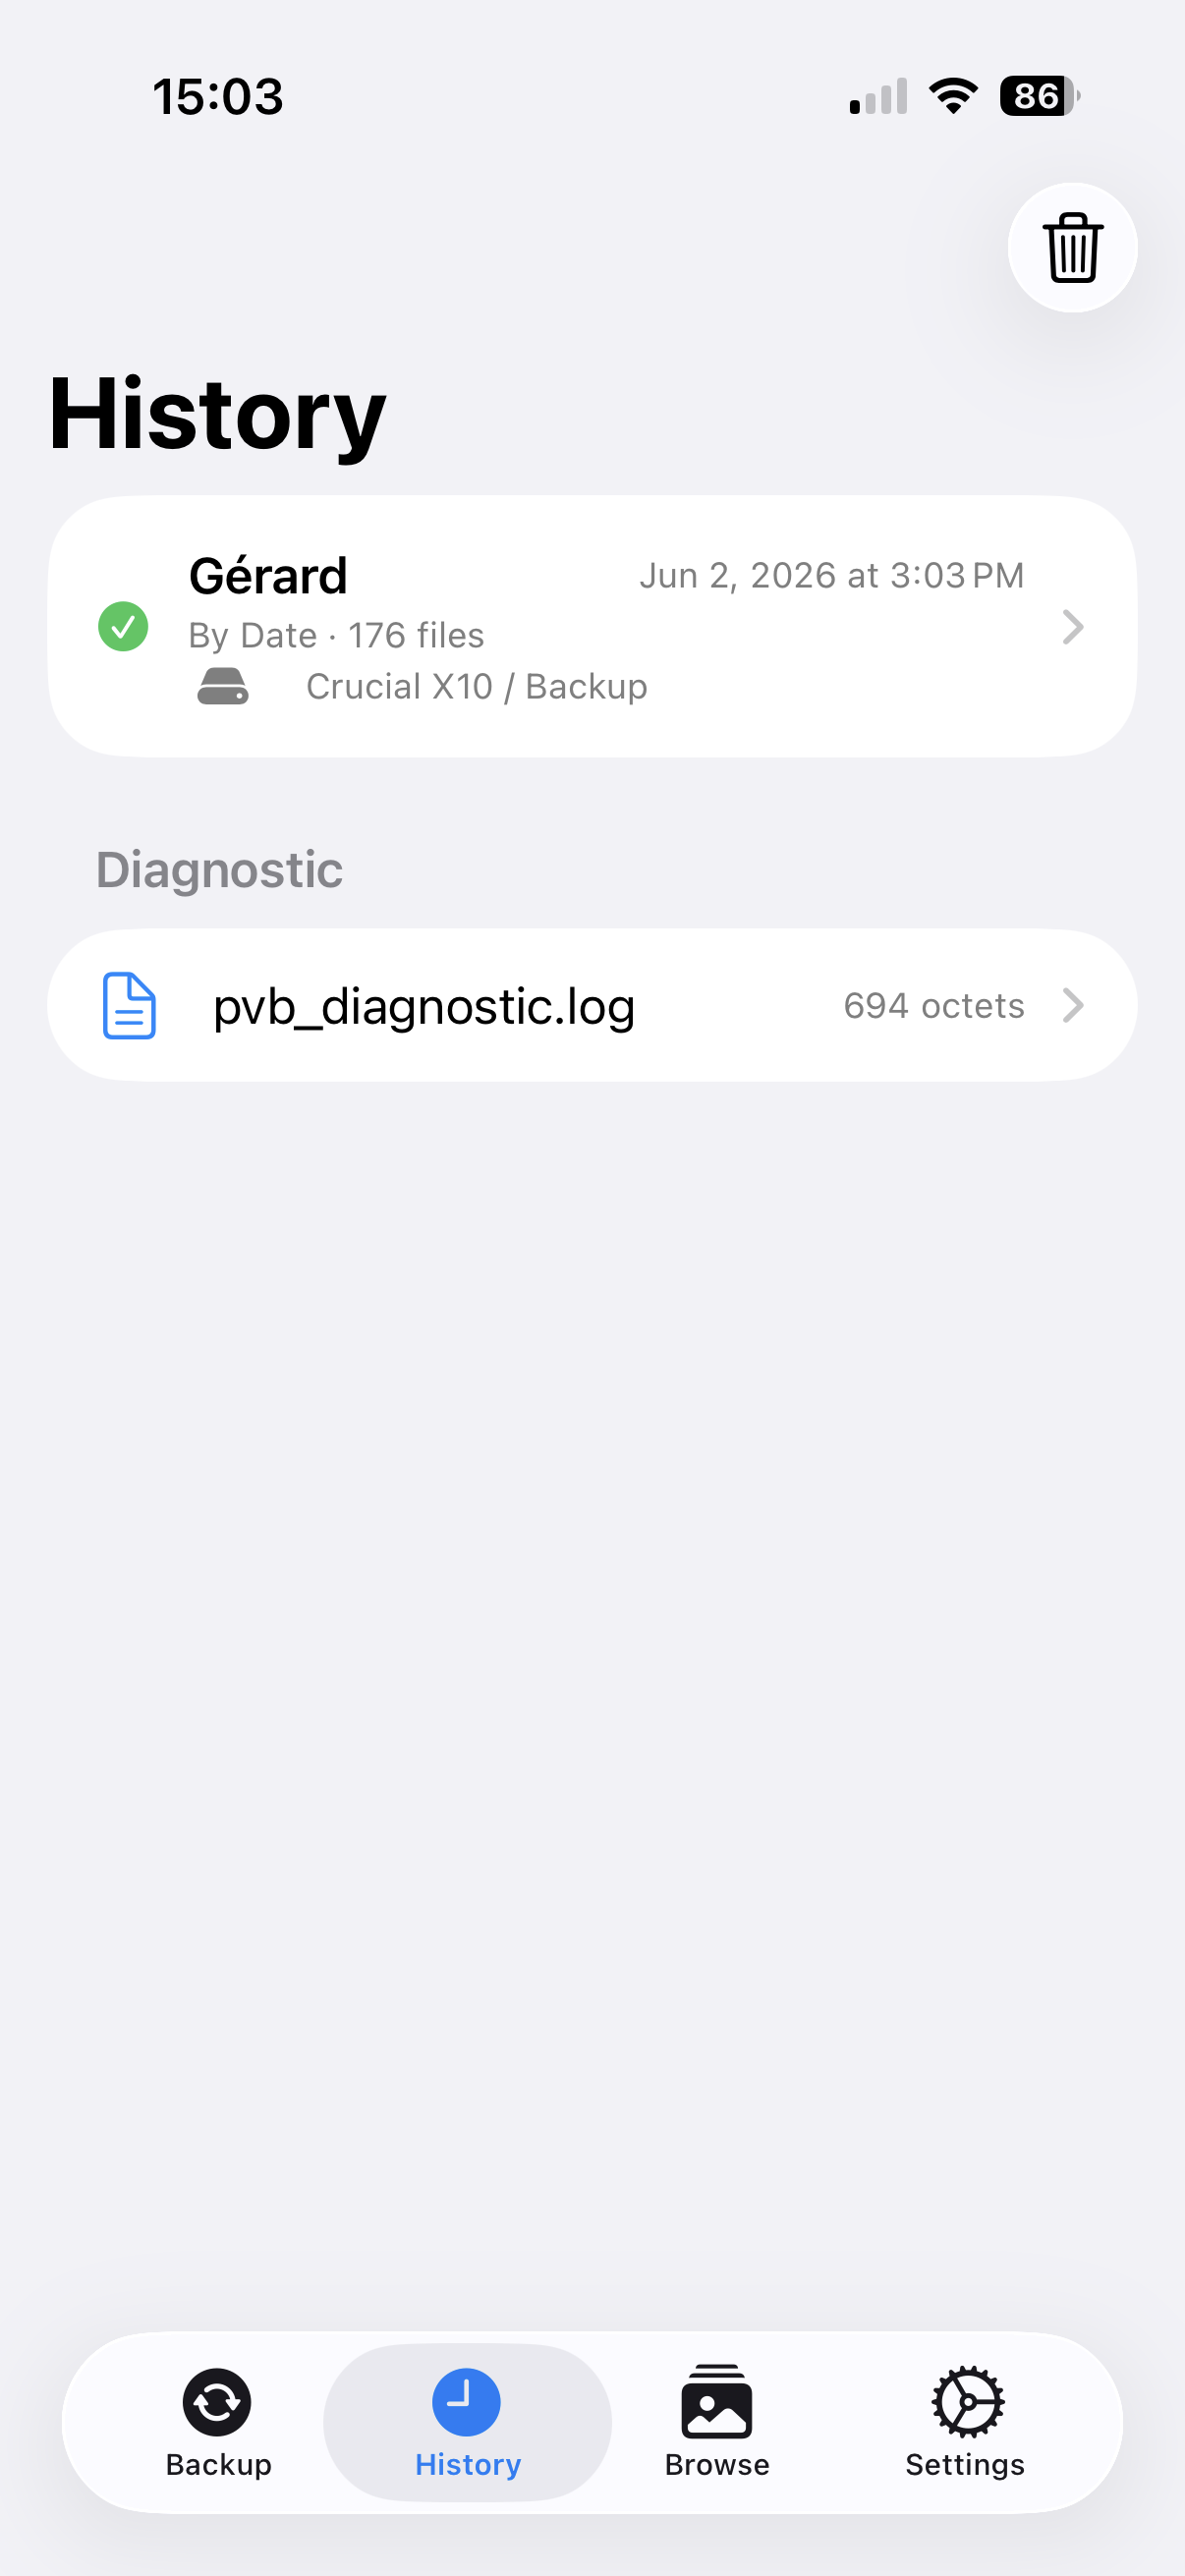
Partial means the backup stopped early, for one of three reasons that the report states: you tapped Stop, the file limit was reached, or a destination disconnected. Reconnect the drive and run again — it resumes where it stopped.
Tap a session for its report: summary, SHA-256 status, and the lists of copied, skipped and failed files — with the reason of each failure. With two destinations the report shows each drive separately.
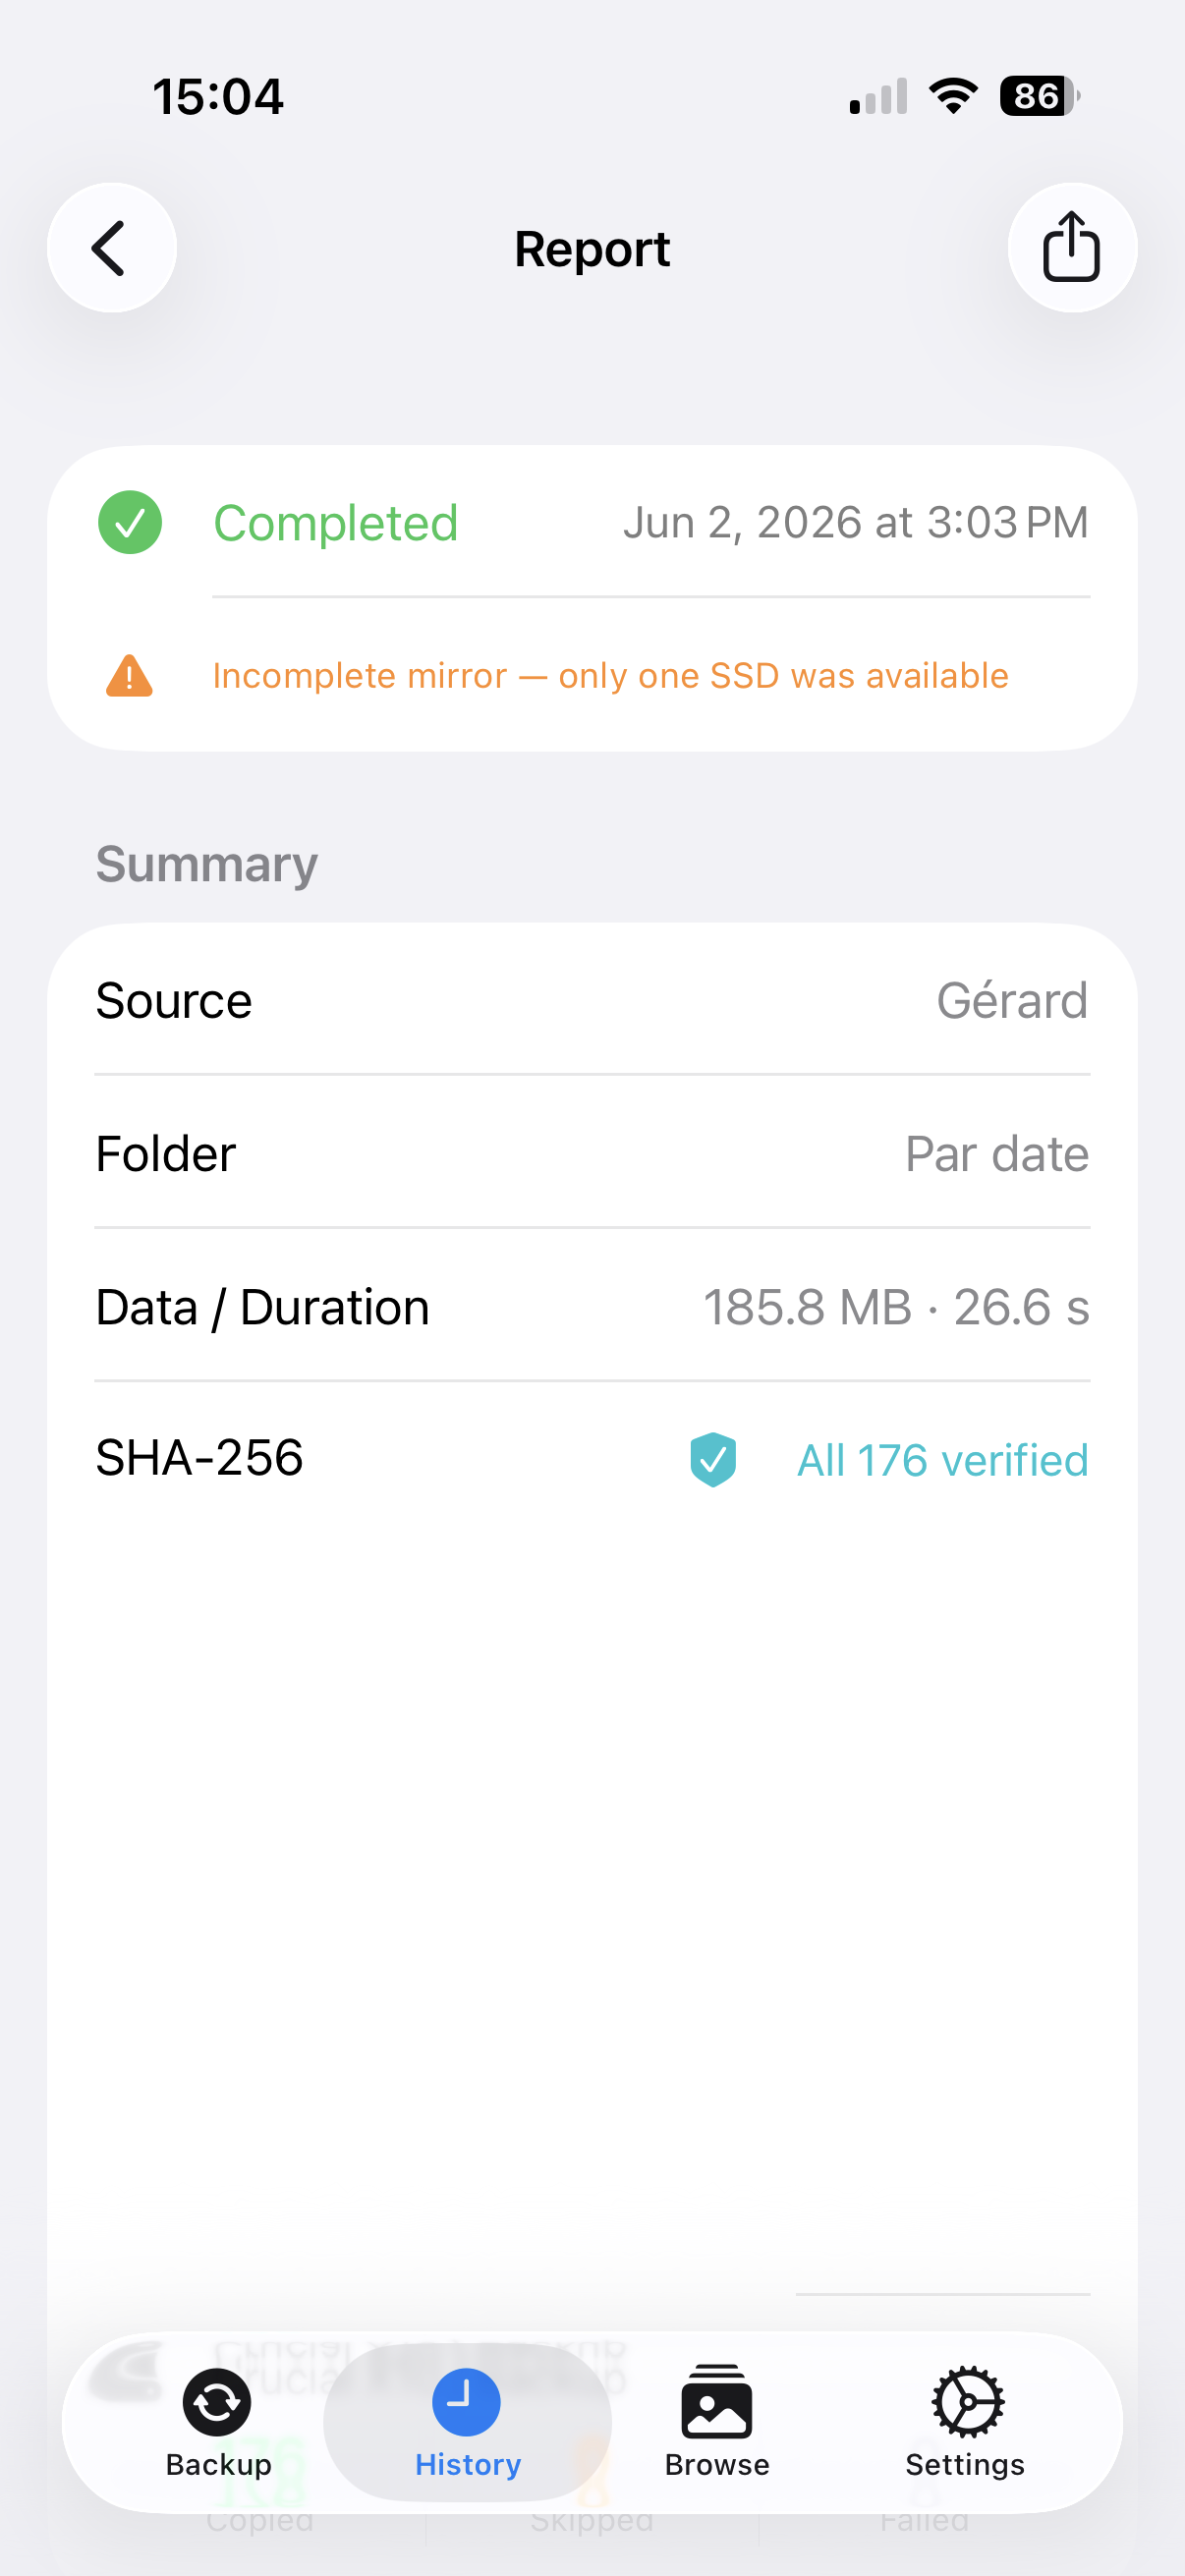
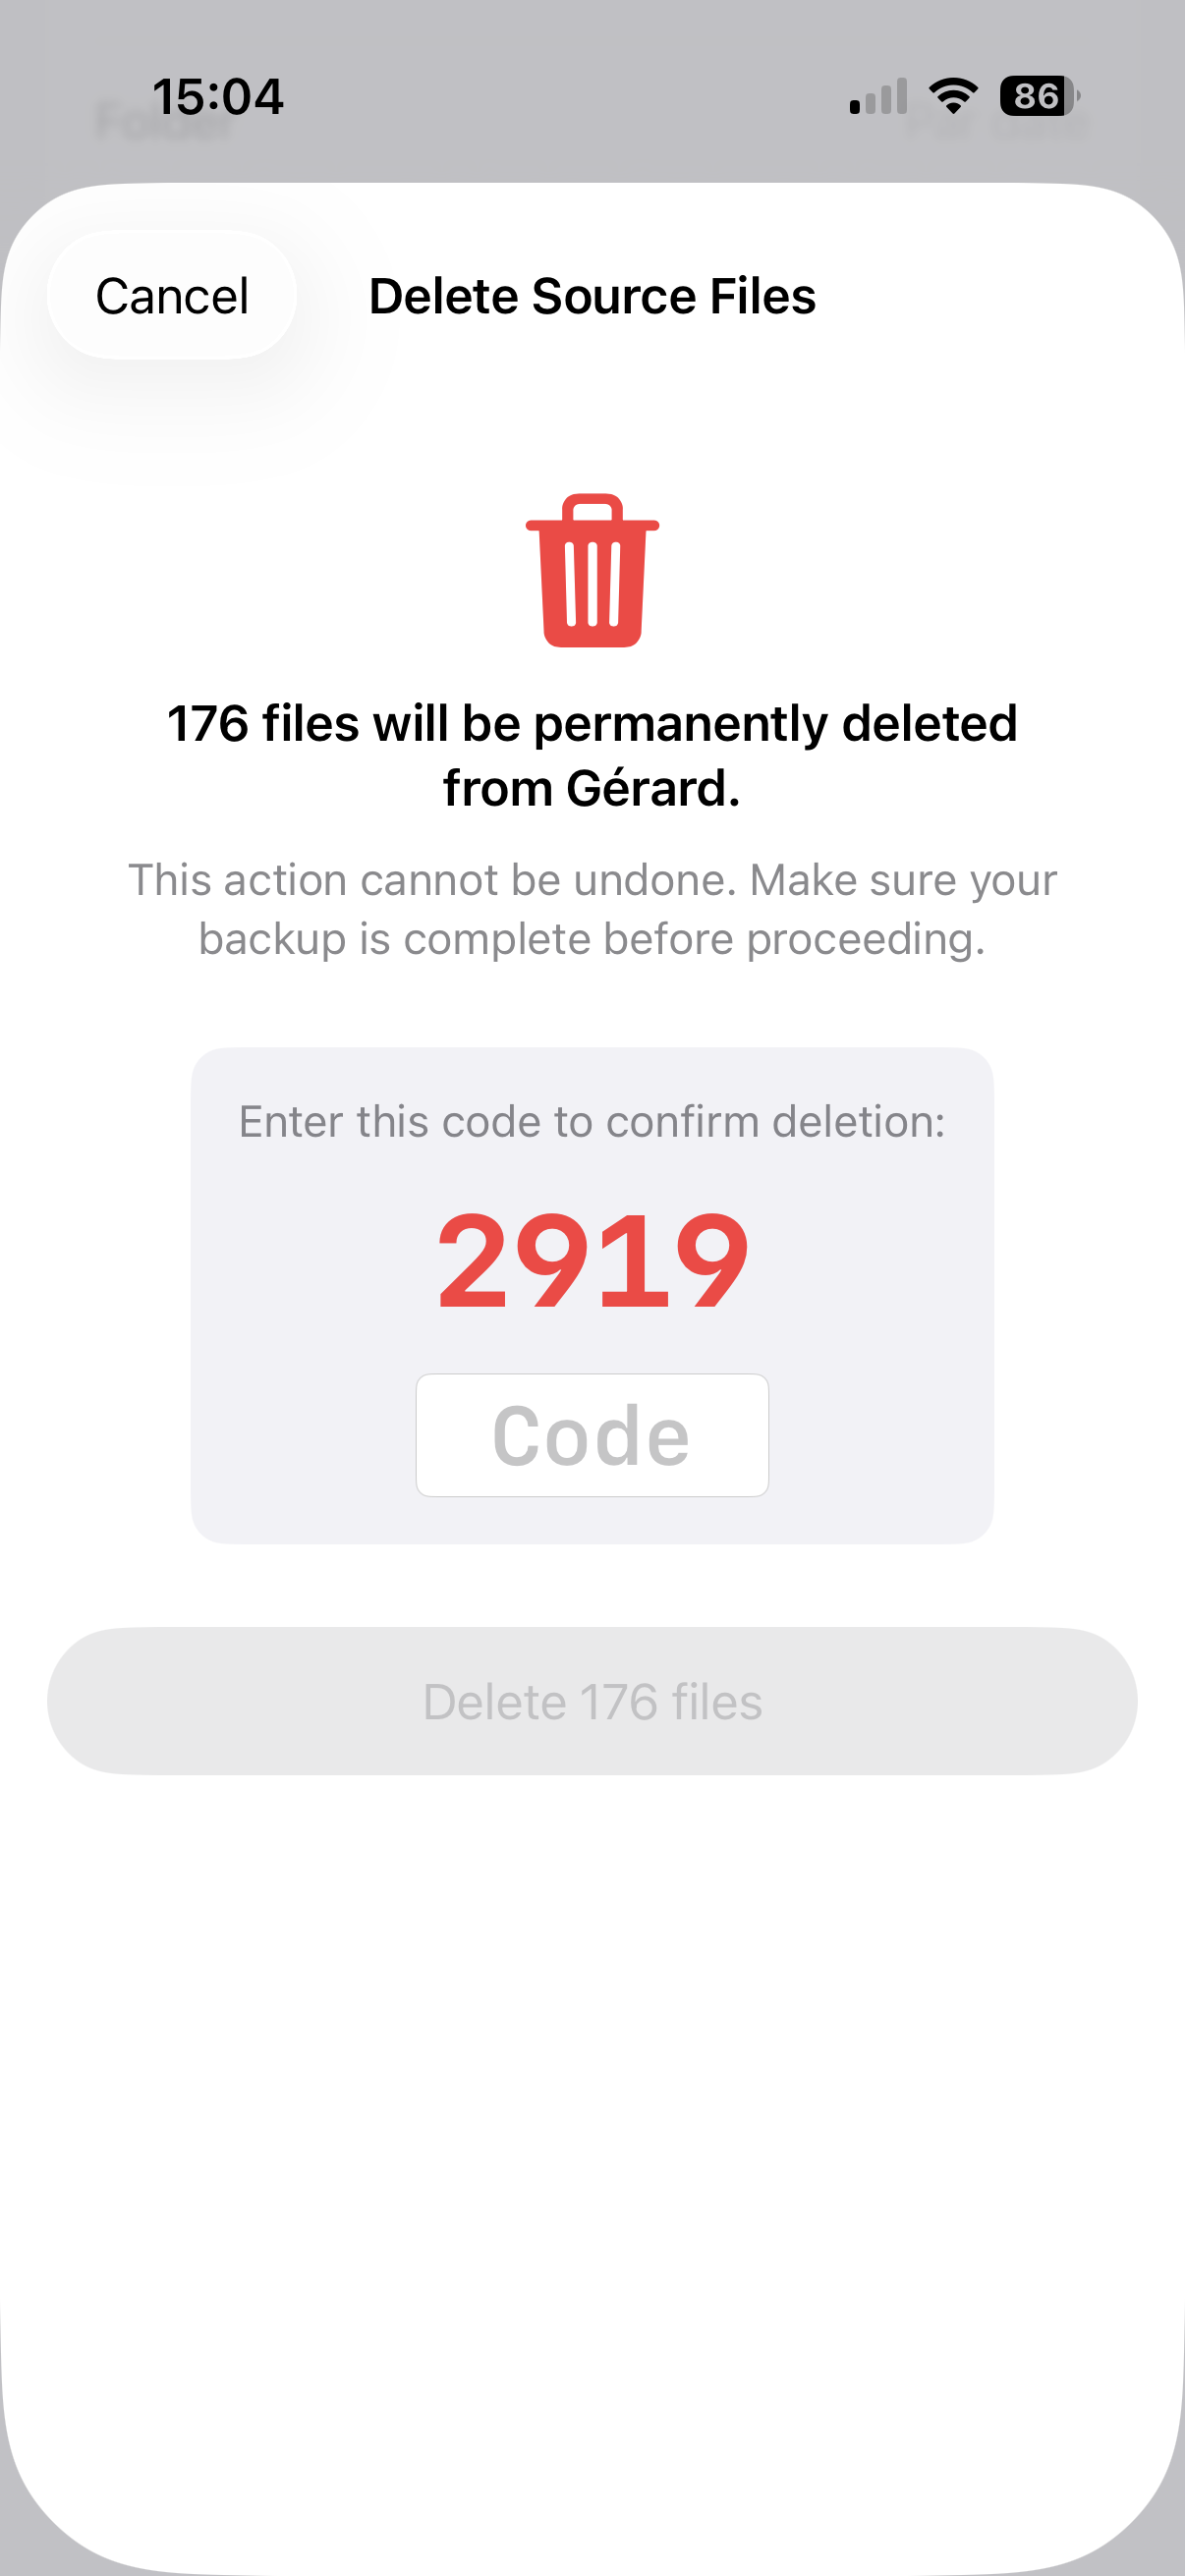
Delete Source Files… frees space on the card or in the library once you are satisfied with the backup. It only offers files that were copied and verified, and you must type a four-digit code to confirm. Your backup is not touched. On iPhone and Android the system asks for one more confirmation for photos.
11 Browse, view and share your backups
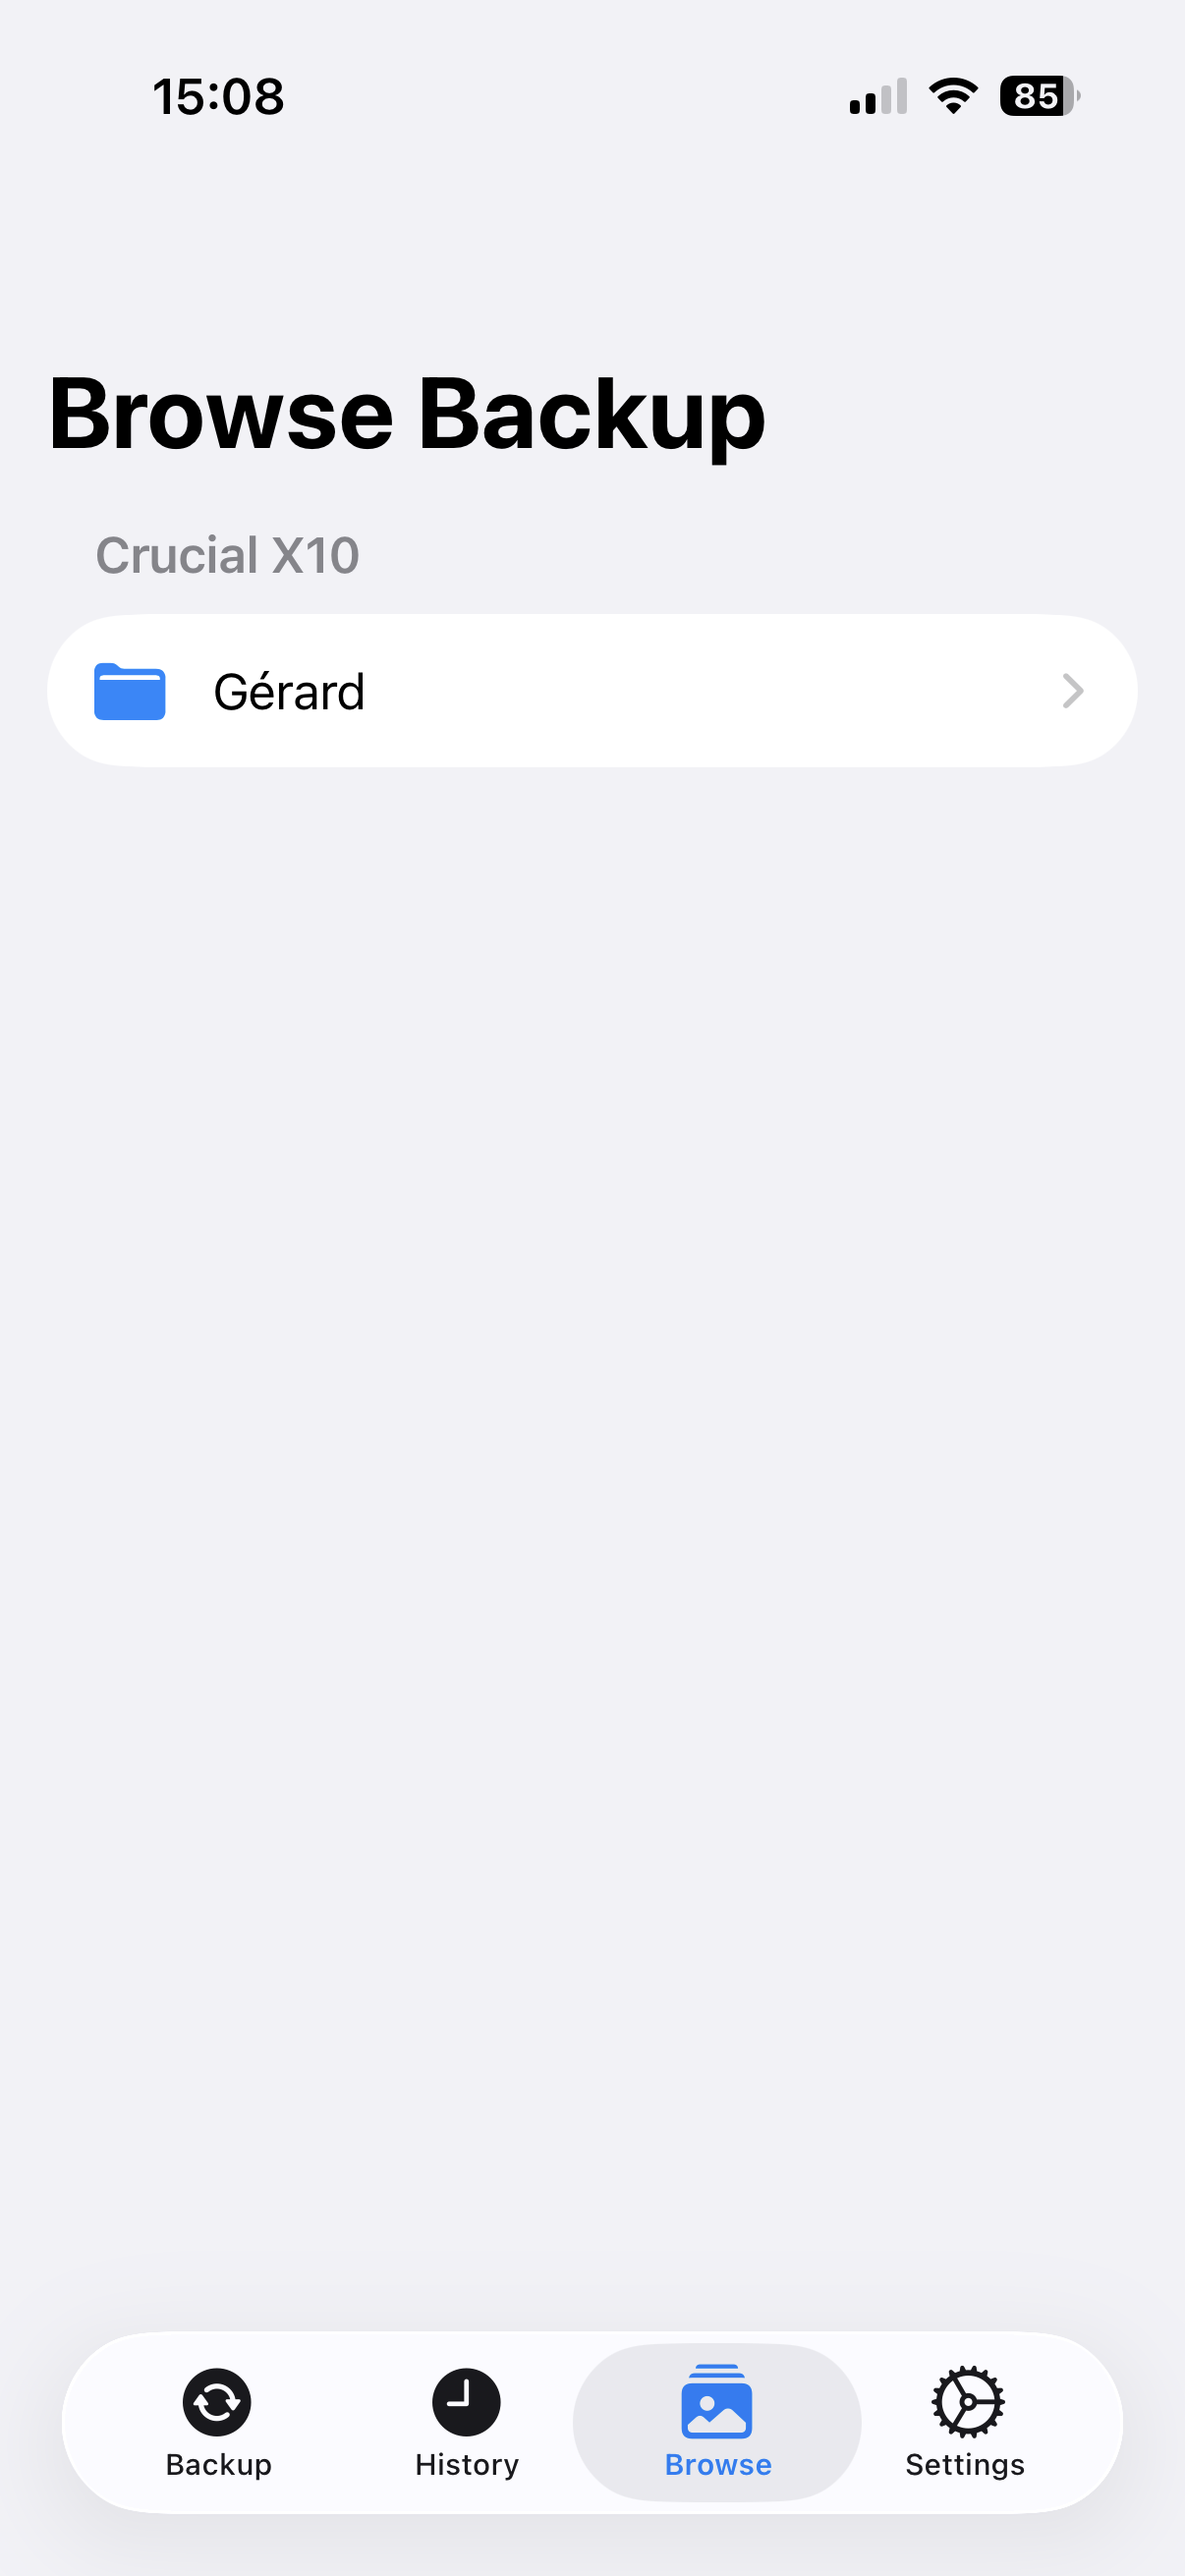
The Browse tab shows what is on your drives, inside the app: one folder per device, then your date folders, then a grid of thumbnails. Tap a photo to open it full screen — swipe to move between files, pinch to zoom — or tap a video to play it. The drive must be plugged in.
To send files elsewhere: tap Select, tick the files, then Share — AirDrop, messages, e-mail, another app.
On a NAS, Browse lists the files and downloads each one only when you open it.
12 Folders and file names
In Settings → Backup, Folder structure sets how a device folder is organised: Flat, By month, By date (default) or By year / month. The Browse tab adapts to whatever is on the drive.
File naming gives every file its final name as it is first copied — it is never stored under its camera name and renamed afterwards. Turn on Rename files during backup and edit the pattern: tap a token to insert it, anything else is literal text. An Example line shows the result.
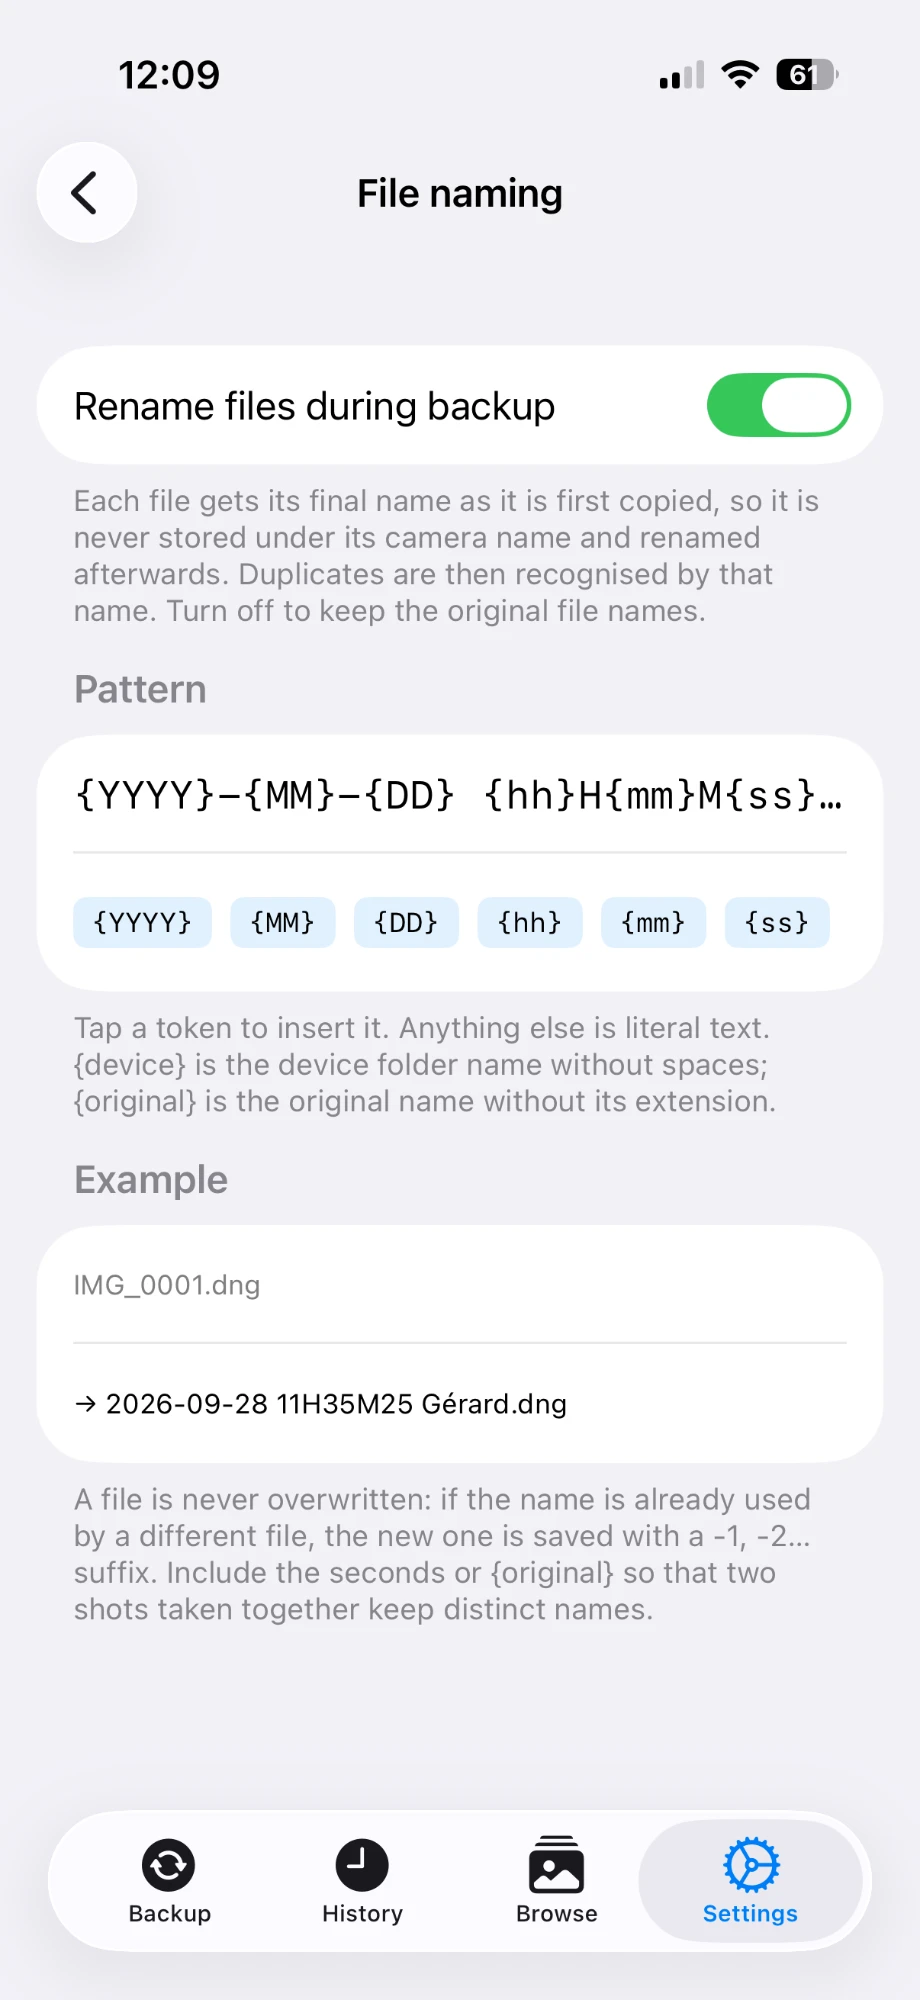
| Token | Replaced by |
|---|---|
| {YYYY} {MM} {DD} | Year, month, day of the capture |
| {hh} {mm} {ss} | Hour, minute, second of the capture (local time) |
| {device} | The device folder name, without spaces |
| {original} | The original file name, without its extension |
- Nothing is ever overwritten. If the name is taken by a different file, the new one gets a
-1,-2… suffix. Include the seconds in your pattern so two shots taken together keep different names. - Duplicates are recognised by that name. A file already backed up is skipped — even if you have edited it since — and a different file with the same name is kept apart.
- Existing files are not renamed. The profile applies to files copied from now on. With the profile off (default) files keep their camera names.
You can also add extra file extensions to copy next to the media — for example gpx GPS logs.
13 LUT Grade: give LOG footage its look (Pro)
Footage shot in LOG (DJI D-Log M, GoPro Protune…) looks flat and grey until a LUT is applied. In Browse, assign a LUT to a device folder to preview and grade without leaving the app.
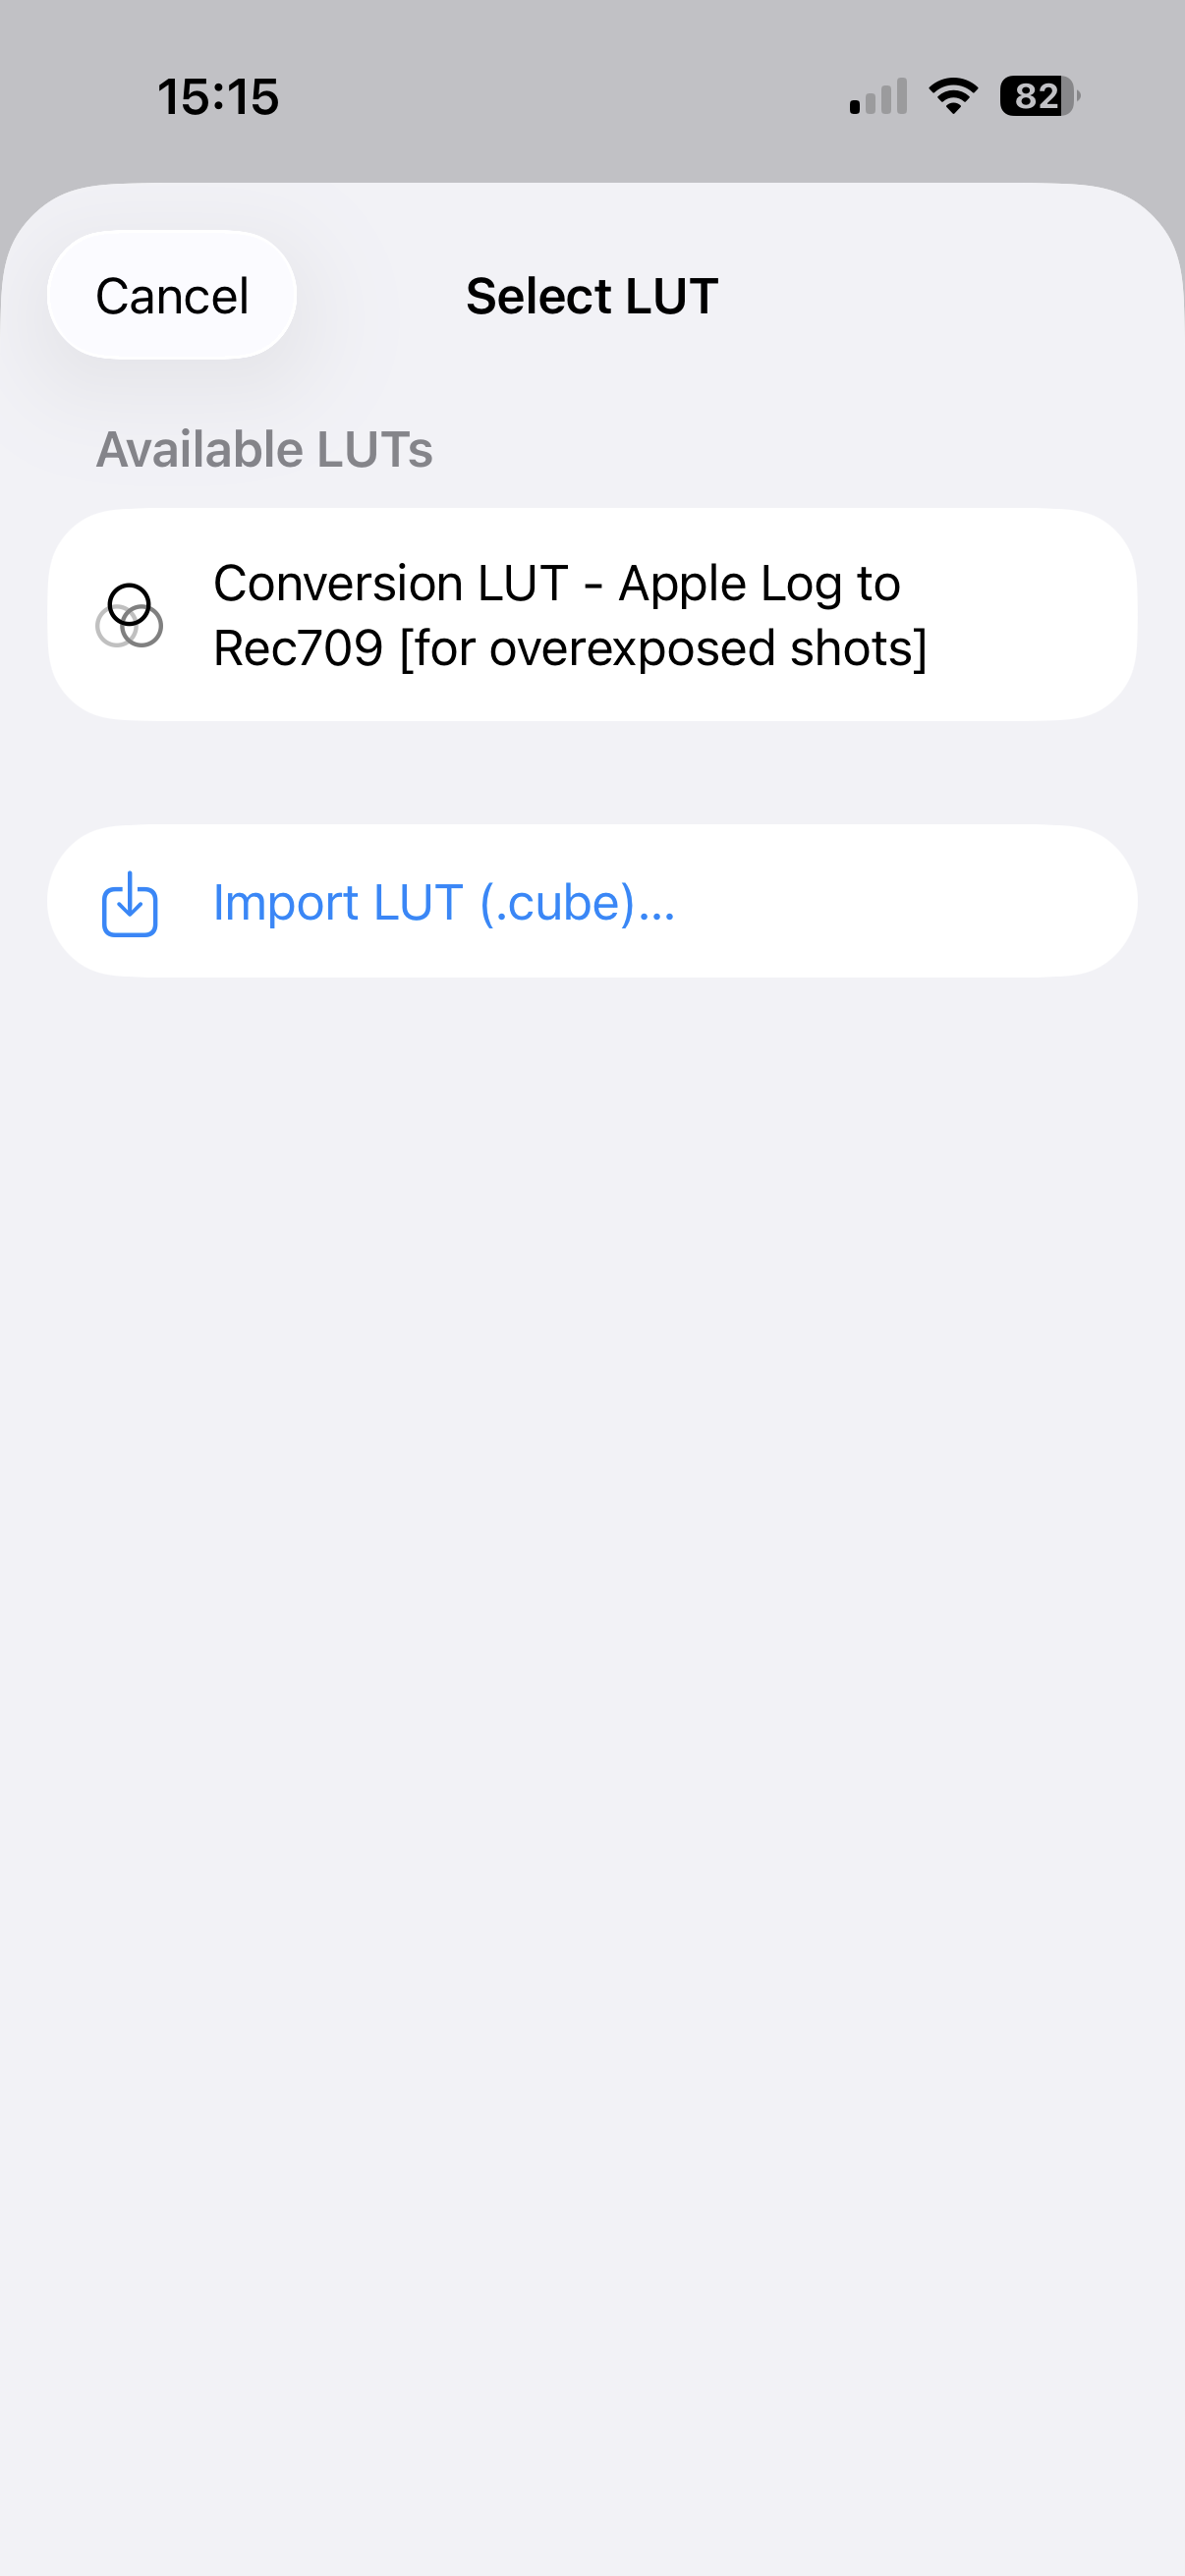
- Open a device folder and, in LUT Grade, tap Assign LUT… then Import LUT (.cube). Any standard
.cubefile works (DaVinci Resolve, Final Cut Pro, your camera maker). - Tap any video of that folder: it plays with the LUT applied in real time. This preview is free.
- To create permanent copies (Pro), tap Select, choose the videos, then Grade. Each one is re-encoded in H.265 with the LUT baked in, into a sibling folder named Device (Graded).
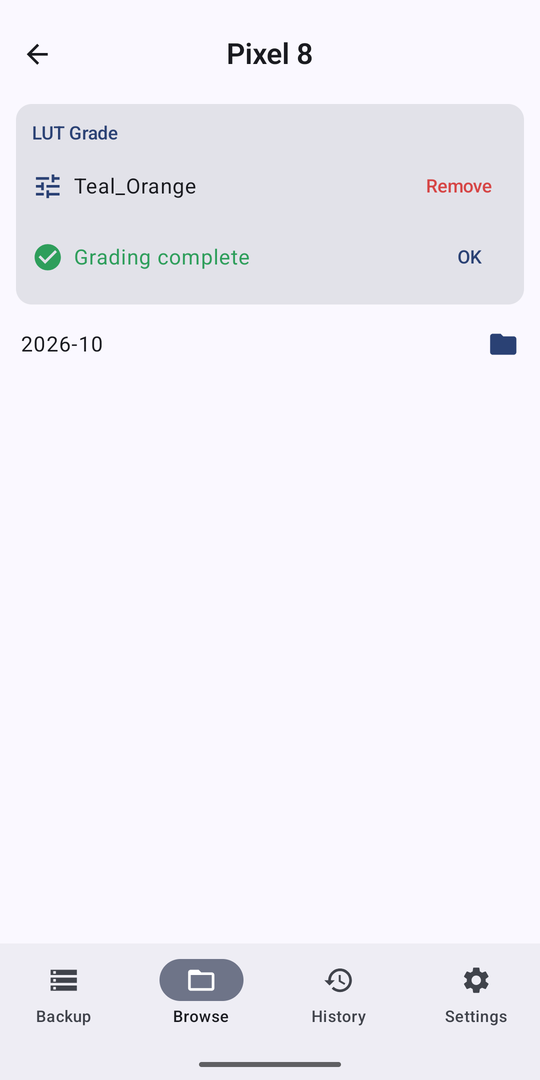
- Grading is per video, never “everything” — a folder often mixes LOG and ordinary clips, and a LOG LUT would ruin the ordinary ones.
- Already-graded files are skipped, so it is safe to run again. Cancel at any time: finished files are kept.
- Grading is demanding: keep the app open and the drive connected. The phone may get warm.
- On a NAS the clips are downloaded, graded on the phone and uploaded to a Device (Graded) folder on the NAS — slower, and it uses data.
14 Two destinations at once (Pro)
In Settings, add a second destination: every file is copied to both at the same time — two drives, or a drive and a NAS. The backup is not twice as long. If one destination fails or disappears, the other carries on, and the report says which one is missing what.
15 Back up to a NAS over Wi-Fi (Pro)
Instead of — or in addition to — a drive, you can back up straight to a NAS (Synology, QNAP, TrueNAS, any device that speaks SMB) over the network. No cable, no cloud, and each file is verified by SHA-256.
- On the NAS, enable SMB file sharing and give a user read and write access to a shared folder.
- In the app: Settings → Destinations → NAS (SMB).
- Fill in the host (e.g.
192.168.1.20), the share (e.g.photo), an optional folder, and your user name and password. The password is stored in the iOS Keychain or the Android Keystore. - Tap Test connection: “Connected — N item(s) found.” Then Save.
The NAS now appears on the Backup tab with its free space. You can back up away from home if the NAS is reachable — the simplest secure way is a VPN such as Tailscale: install it on the NAS and on the phone, then use the NAS’s 100.x.x.x address as host.
16 Android and iPhone: what differs
The two apps share the same engine: same duplicate detection, same naming, same SHA-256 verification, same index — a backup started on one is recognised by the other.
| iPhone / iPad | Android | |
|---|---|---|
| Library source | Photos Library | Gallery (photos and videos) |
| Destination | Folder chosen in Files (SSD, iCloud Drive, SMB) | Folder chosen with the system picker (SSD, USB, phone storage), NAS |
| Background | About 30 seconds, then the screen stays on during the backup | A foreground notification keeps it running, with a Stop button |
| Pro | In-app purchase (App Store) | One-time purchase (Google Play) |
| Mac | Runs on Apple-silicon Macs (“Designed for iPad”) | — |
.nomedia file) so the backup is not backed up again.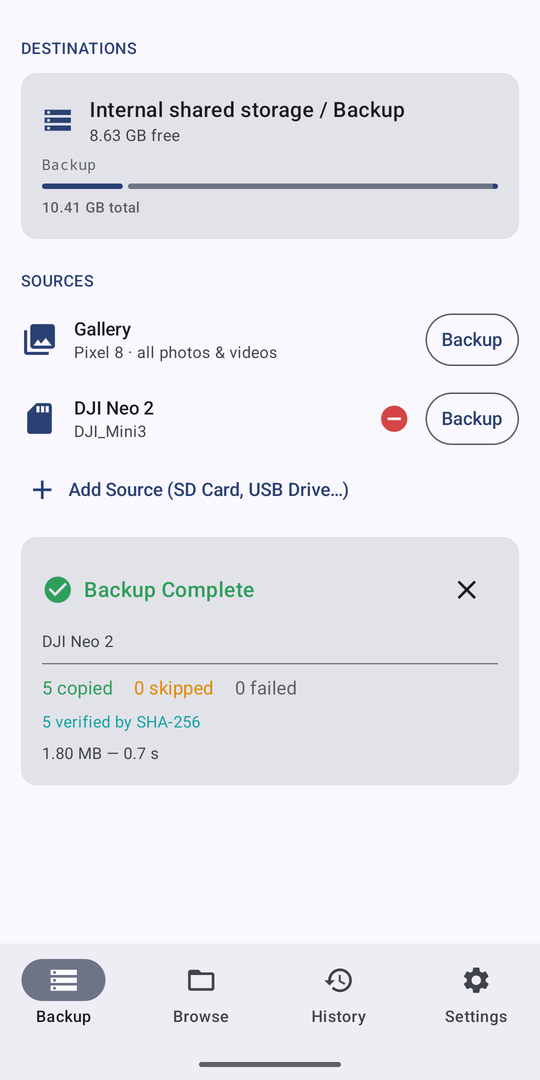
17 Frequently asked questions
Will it copy the same file twice if I run it again? No. Each file is given a name at the destination and the next backup looks for it under that name. If the app’s records show it came from the same original, it is skipped — even if you edited it since. Only genuinely different files that share a name get a -1, -2… suffix, and nothing is ever overwritten.
Where does the app remember what it has backed up? In its own database, and in a small hidden file, .pvb-index.json, at the root of each destination. That copy travels with the backup: after a reinstall, or from another phone, the app reads it and does not copy again. You can leave it alone; if you delete it the app rebuilds it.
Can I back up to a NAS and a drive together? Yes — every connected destination receives the backup at the same time.
My NAS connection times out. The NAS is usually not reachable: check that you are on the same Wi-Fi (or that the VPN is on), that SMB sharing is enabled, and that the NAS firewall allows the connection.
Can I use two phones with the same drive? Yes. Give each a different folder name in Settings; each creates its own folder on the drive.
The bar says 3% and seems stuck. The first files are often large videos. Wait a few minutes.
My card appears as “Documents”. Some cameras use a generic folder. Type a meaningful name when you add the source.
Can I back up when my phone is almost full? Yes. Files are streamed to the destination, so only a few megabytes are held at a time. Only a backup to a NAS alone needs room for one file at a time. A file that really cannot fit is reported as failed and the rest continues.
Is my data sent anywhere? No. Everything happens between your phone and your drive or NAS. The app has no server and no account. The only network traffic is to the NAS you set up yourself, and the download of your own iCloud / Google photos by the system.
Which languages? English, French, German, Spanish, Italian, Portuguese, Simplified Chinese and Russian. The app follows the phone language; you can force one in Settings → Language, with no restart.